Download
1 / 23
230 likes | 331 Views
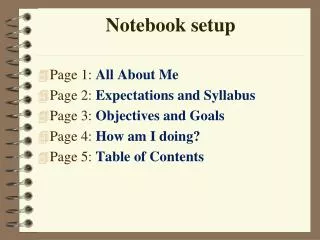
BOT 59.1 Presents :. Notebook Manual. Preparing your Notebook PC. Installing the Battery Pack. Connecting the Power Adapter. Using the Touchpad. Slide your finger across the touchpad to move the pointer. You can also hold the left button and slide your finger to drag the selected item .

E N D
BOT 59.1 Presents: Notebook Manual Preparing your Notebook PC
Using the Touchpad Slide your finger across the touchpad to move the pointer. You can also hold the left button and slide your finger to drag the selected item. Use the left and right buttons like a standard mouse. Slide your finger up or down on the right side to scroll up or down a window.
Knowing the Parts Right Side Display (Monitor) Output Power (DC) Input HDMI Port (on selected models) Flash Memory Slot USB Port (2.0) The adapter may become warm to hot when in use. Ensure not to cover the adapter and keep it away from your body.
Knowing the Parts USB Port (2.0) Left Side Headphone Output Jack LAN Port Microphone Input Jack USB Port (2.0) Optical Drive Optical Drive Emergency Eject(location varies by model) Optical Drive Electronic Eject
Knowing the Parts 1. LAN Port The RJ-45 LAN port with eight pins is larger than the RJ-11 modem port and supports a standard Ethernet cable for connection to a local network. The built-in connector allows convenient use without additional adapters. 2. USB Port (2.0) The USB (Universal Serial Bus) port is compatible with USB 2.0 or USB 1.1 devices such as keyboards, pointing devices, cameras, hard disk drives, printers, and scanners connected in a series up to 12Mbits/sec (USB 1.1) and 480Mbits/sec (USB 2.0). USB allows many devices to run simultaneously on a single computer, with some peripherals acting as additional plug-in sites or hubs. USB supports hot-swapping of devices so that most peripherals can be connected or disconnected without restarting the computer. 3. Optical Drive The Notebook PC comes in various models with different optical drives. The Notebook PC’s optical drive may support compact discs (CD) and/or digital video discs (DVD) and may have recordable (R) or re-writable (RW) capabilities. See the marketing specifications for details on each model.
Knowing the Parts 4. Optical Drive Electronic Eject The optical drive eject has an electronic eject button for opening the tray. You can also eject the optical drive tray through any software player or by right clicking the optical drive in Windows Computer and selecting Eject. 5. Optical Drive Emergency Eject(location varies by model) The emergency eject is used to eject the optical drive tray in case the electronic eject does not work. Do not use the emergency eject in place of the electronic eject. 6. Microphone Input Jack The mono microphone jack (1/8 inch) can be used to connect an external microphone or output signals from audio devices. Using this jack automatically disables the built-in microphone. Use this feature for video conferencing, voice narrations, or simple audio recordings. 7. Headphone Output Jack The stereo headphone jack (1/8 inch) is used to connect the Notebook PC’s audio out signal to amplified speakers or headphones. Using this jack automatically disables the built-in speakers.
Knowing the Parts Rear Side 1. Battery Pack The battery pack is automatically charged when the Notebook PC is connected to an AC power source and maintains power to the Notebook PC when AC power is not connected. This allows use when moving temporarily between locations. Battery time varies by usage and by the specifications for this Notebook PC. The battery pack cannot be disassembled and must be purchased as a single unit. 2. Kensington® Lock Port The Kensington® lock port allows the Notebook PC to be secured using Kensington® compatible Notebook PC security products. These security products usually include a metal cable and lock that prevent the Notebook PC to be removed from a fixed object. Some may also include a motion detector to sound an alarm when moved
Knowing the Parts Front Side Status Indicators (front) Status indicators represent various hardware/software conditions.
Knowing the Parts Bottom Side
Knowing the Parts 1. Battery Lock - Manual The manual battery lock is used to keep the battery pack secured. Move the manual lock to the unlocked position to insert or remove the battery pack. Move the manual lock to the locked position after inserting the battery pack. 2. Battery Pack The battery pack is automatically charged when the Notebook PC is connected to an AC power source and maintains power to the Notebook PC when AC power is not connected. This allows use when moving temporarily between locations. Battery time varies by usage and by the specifications for this Notebook PC. The battery pack cannot be disassembled and must be purchased as a single unit. 3. Battery Lock - Spring The spring battery lock is used to keep the battery pack secured. When the battery pack is inserted, it will automatically lock. To remove the battery pack, this spring lock must be held in the unlocked position. 4. Audio Sub-Woofer The built-in sub-woofer speaker allows you to enjoy amazing bass (low frequency) sounds in your multimedia applications.
Knowing the Parts 5. Memory (RAM) Compartment The memory compartment provides expansion capabilities for additional memory. Additional memory will increase application performance by decreasing hard disk access. The BIOS automatically detects the amount of memory in the system and configures CMOS accordingly during the POST (Power-On-Self-Test) process. There is no hardware or software (including BIOS) setup required after the memory is installed. Visit an authorized service center or retailer for information on memory upgrades for your Notebook PC. Only purchase expansion modules from authorized retailers of this Notebook PC to ensure maximum compatibility and reliability. 6. Hard Disk Drive Compartment The hard disk drive is secured in a compartment. Visit an authorized service center or retailer for information on hard disk drive upgrades for your Notebook PC. Only purchase hard disk drives from authorized retailers of this Notebook PC to ensure maximum compatibility and reliability. 7. Shutdown Button (Emergency) In case your operating system cannot properly turn OFF or restart, the shutdown button can be pressed with a straightened paper clip to shutdown the Notebook PC
How to Add a Printer to a Laptop 1. If you have you have the installation CD that came with your printer, insert it into the CD-drive of your laptop and complete the installation process. 2. If you do not have the installation CD, go to the printer manufacturer's website and find the support section for your printer model number. Download the driver for your printer and install it onto your laptop. 3. Once you have installed the driver and software for your printer, plug the printer cable into your laptop's USB port, and the laptop should immediately recognize the printer. 4. If the printer you want to add is attached to another computer on the same network as the laptop, you can share the printer without actually adding it. Go to the computer that the printer is attached to. Click the "Start" button, select "Control Panel," then select "Network and Internet" and click "Network and Sharing Center." Click the arrow next to "Printer Sharing." Select "Turn On Printer Sharing" and then click the "Apply" button. Make sure the shared printer is turned on.
How to Add a Printer to a Laptop 5. Go to your laptop and click the "Start" button. In the search box, type "\\" and the name of the computer with the attached shared printer (for example, enter "\\mydesktop"). Click "Enter." 6. In the folder that opens on your screen, double-click "Printers." You should see the shared printer on your network. Double-click the shared printer. Windows automatically adds it to your laptop and installs the driver software. Click the "Next" button. The printer is successfully added to your laptop and should be visible in your "Printers" folder.
Safety Precautions The following safety precautions will increase the life of the Notebook PC. Disconnect the AC power and remove the battery pack(s) before cleaning. Wipe the Notebook PC using a clean cellulose sponge or chamois cloth dampened with a solution of nonabrasive detergent and a few drops of warm water and remove any extra moisture with a dry cloth. DO NOT place on uneven or unstable work surfaces. Seek servicing if the casing has been damaged. DO NOT place or drop objects on top and do not shove any foreign objects into the Notebook PC. DO NOT expose to dirty or dusty environments. DO NOT operate during a gas leak. DO NOT expose to strong magnetic or electrical fields. DO NOT press or touch the display panel. Do not place together with small items that may scratch or enter the Notebook PC. DO NOT expose to or use near liquids, rain, or moisture. DO NOT use the modem during electrical storms. DO NOT leave the Notebook PC on your lap or any part of the body to prevent discomfort or injury from heat exposure. Battery safety warning: DO NOT throw the battery in fire. DO NOT short circuit the contacts. DO NOT disassemble the battery.
Safety Precautions SAFE TEMP: This Notebook PC should only be used in environments with ambient temperatures between 10°C (50°F) and 35°C (95°F). INPUT RATING: Refer to the rating label on the bottom of the Notebook PC and be sure that your power adapter complies with the rating. DO NOT carry or cover a Notebook PC that is powered ON with any materials that will reduce air circulation such as a carrying bag. DO NOT use strong solvents such as thinners, benzene, or other chemicals on or near the surf DO NOT use damaged power cords, accessories, or other peripherals. Incorrect installation of battery may cause explosion and damage the Notebook PC. DO NOT throw the Notebook PC in municipal waste. This product has been designed to enable proper reuse of parts and recycling. The symbol of the crossed out wheeled bin indicates that the product (electrical, electronic equipment and mercury-containing button cell battery) should not be placed in municipal waste. Check local regulations for disposal of electronic products. DO NOT throw the battery in municipal waste. The symbol of the crossed out wheeled bin indicates that the battery should not be placed in municipal waste.
Opening the LCD display panel Carefully lift up the display panel with your thumb. Slowly tilt the display panel forward or backward to a comfortable viewing angle.
Turning on the Power Push and release the power button located beneath the LCD display panel. Use [Fn]+[F5] or [Fn]+[F6] to adjust the LCD brightness.
Open My Computer You can open the system folder My Computer from the Start menu. The Windows Explorer program shows the contents of the folder. Try that, and then look at the contents of the window while you read my explanation
Reference Google search: http://www.google.com/search?source=ig&hl=en&rlz=1R2SKPB_enUS388&=&q=pc+operating+manual&aq=f&aqi=&aql=&oq=&gs_rfai=CqoLhw0x9TMbsHqmsoAS4jpXKBAAAAKoEBU_QFpzx Linked picked: http://dlcdnet.asus.com/pub/ASUS/nb/G73Jh/G73Jh_1229-b.pdf Original PDF available