Download

1 / 37
370 likes | 376 Views
Learn about five classroom tools that help teachers set clear learning objectives, develop student-friendly targets, and strategically share objectives with students. These tools include the Learning Window, Student-Friendly Learning Targets, Post, Discuss, Reference, A Study In..., and Review/Preview.

E N D
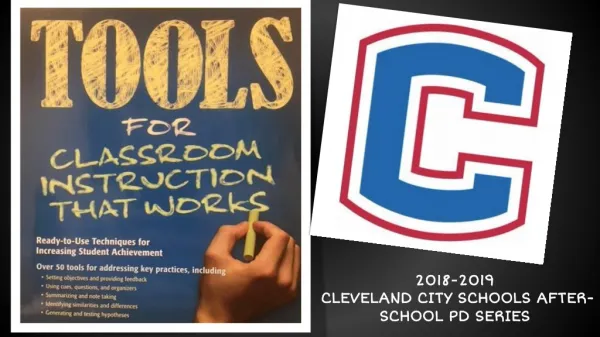
Chalkduster 2018-2019 CLEVELAND CITY SCHOOLS AFTER-SCHOOL PD SERIES
SESSION 1 SETTING OBJECTIVES AND PROVIDING FEEDBACK
Learning Window What is it? • A framework for transforming complex standards into classroom-level learning goals. What are the benefits of using this tool? • When learning objectives are clear, students are better able to see where their learning is headed, and what’s giving them trouble. • Learning Window facilitates this unpacking process with a window-shaped organizer that helps us determine the “core three” elements of good learning objectives. • Asks us to identify the important habits of mind or dispositions we expect students to develop and the critical academic terms students will need to master.
Learning Window What are the basic steps? • Identify the standards that you intend to address during an upcoming lesson or unit. • Begin to unpack the standards by scanning for useful information. Underline words or phrases that point to knowledge, understandings, skills, and habits of mind that students need to acquire. • Use the the questions on the reproducible Learning Window to help you complete the unpacking process. • Refer to your Learning Window as you map out lessons or unit. Use it to guide the development of assessments, assignments, and activities. • Use your completed Learning Window to generate a list of student-friendly learning targets.
Learning Window How is the tool used in the classroom? • To unpack standards, identify learning goals, and focus instruction/assessment. • Habits of Minds (see resources pg. 30) • Examples next slide
Student-Friendly Learning Targets What is it? • A tool for developing learning targets that are clear, specific, and easy for students to understand. What are the benefits of using this tool? • Setting clear learning objectives “reassures students that there is a reason for learning and provides teachers with a focal point for planning instruction. • Encourages students to think of objectives as targets. • Reminds us that objectives can’t be posted and then forgotten; rather they need to be revisited, reinforced, and assessed throughout instruction.
Student-Friendly Learning Targets What are the basic steps? • Generate a list of learning objectives for an upcoming lesson or unit. • Turn your list of objectives into student-friendly targets. “I can… I will...” • Post the list of targets in a prominent location and leave it there throughout the lesson or unit. . • Refer to the list regularly to show students how the things they’re doing in class and relate it to the things they’re supposed to be learning. • Remind students to revisit the list of targets throughout the lesson or unit to gauge their progress.
Post, Discuss, Reference What is it? • a tool for using classroom objectives once we’ve developed them What are the benefits of using this tool? • share objectives strategically • provide catalysts for student learning • connect what they’re doing with what they’re learning learning
Post, Discuss, Reference What are the basic steps? • POST • DISCUSS • REFERENCE • optional - students develop personal learning goals How is this tool used in the classroom? • move from posting objectives to helping students understand and achieve those objectives
A Study In... What is it? • a technique for framing instructional units around core concepts that focus student learning and provoke thinking What are the benefits of using this tool? • builds the “thinking-centric” quality of our units • encourages us to identify the biggest of the big ideas - the conceptual powerhouse that puts all of the other concepts into line • develops an organizing principle for student learning
A Study In... What are the basic steps? • Identify key understandings *using the Learning Window tool can be helpful http://toolsforclassroominstructionthatworks.com/wp-content/uploads/2018/01/Learning_Window.pdf 2. “What core concept or universal theme unites these key understandings and can serve as a lens for investigating this unit?”
A Study In... 3. Turn your concept into a title “(Unit Topic): A Study in (Core Concept)” 4. Use the core concept to guide student learning • use the concept as a hook for the unit • design essential questions around the core concept • develop a culminating assessment around the core concept • encourage regular reflection • build interdisciplinary thinking
A Study In... How is this tool used in the classroom? • to use rich, universal concepts as lenses that focus student learning • to develop students’ ability to think conceptually • to increase students’ interest in academic topics
Review/Preview What is it? • A tool that helps students understand where they are within an instructional sequence. What are the benefits of using this tool? • Helps students see the big-picture vision • Keeps students oriented by giving them a “road map” for instruction • Allows students to track their progress
Review/Preview What are the basic steps? • Create a “road map” for an upcoming unit of study.
Review/Preview • Share your map with students before instruction begins. Keep map displayed for reference. • Stop throughout instruction to point where you are on the map. • Help students improve their big-picture understanding by pointing out how topics, targets, and lessons connect to one another.
Goal Cards A tool to help students focus their learning. Help develop “self-directed and successful learners.” Guides them to make learning goals, plans and action steps, and reflection of progress. Benefits Gives guidance and direction for all learners to become “successful and self-regulating” by developing goals, plans, and reflections “so they can become lifelong learners.”
Goal Cards Basic Steps • Invite students to establishlearning goals. • Have students record goals and a plan for achieving them on one of the Goal Cards. • Meet with students to review and discuss their plan. • Remind students to follow through with their plan, monitor/gather feedback about progress, and adjust as needed. • Acknowledge students who work hard to achieve their goals. Point out what worked from their actions to achieve their goal. • Use questions to help reflection
Goal Cards How is this tool Used in the classroom To have students set goals, establish plans for achieving them, and monitor their progress. To help students see that planning, effort, and strategy use can facilitate achievement.
Fine-Tune Your Feedback What is it? Why? Not all feedback is equal Basic Steps: STAIRS Discuss importance (relevance) Review an assignment Decide on your technique Give students opportunity to use feedback
Fine-Tune Your Feedback Specific Task-focused, not student-focused Age appropriate Improvement oriented Regular Selective Techniques: Glow and Grow- *make sure “grow” part includes “how” language What and Why P’s to Better Work Praise Probing Questions Prompts Propose
PEERS What is it? A tool that teaches students how to give each other focused-feedback and has students revise and improve their work with guidance of peers. Benefits: This tool makes peer-review sessions more focused and productive by reinforcing that the purpose of feedback is to help students improve and by teaching students (and teachers) 5 simple steps for giving and responding to feedback.
PEERS Basic Steps: • Pair up students • Explain & model -Preview the assessment criteria/rubric BEFORE reviewing each other’s work. -Examine each other’s work, keeping the assessment criteria in mind. -Explain what was done well and what could be improved. Be specific. -Review the feedback you received. Think: How can you use it to improve your work? -Share your thoughts with your partner and discuss plans for revision. 3. Give students a list of assessment criteria/rubric and discuss. 4. Have students review each other’s work. 5. Observe and listen to students work to confirm that they’re on task and using the PEERS process properly. 6. Give students an opportunity to use feedback to revise work.
PEERS Elementary
PEERS Middle/High School
Guiding and Grading Rubrics What is it? A tool that describes what work looks like at different levels of quality. Rubrics assess student performance and guide student thinking. Benefits: • shift the focus from evaluation to learning • help students understand what high-quality work looks like • gives an objective scale for assessing their work and discussing ways to make it better
Guiding and Grading Rubrics Basic Steps 1.Create a rubric that can be used to guide and grade students’ work on an upcoming task • What criteria will you use to assess student work? • Describe 3 or 4 levels of performance for each criterion • Will some criteria be weighted more than others? 2. Review the rubric with students before they begin working 3. Guide students in referencing the rubric throughout their work 4. Use the rubric to grade students’ assignments
Guiding and Grading Rubrics How is this used in the classroom? To teach students what high quality work looks like. TO help students assess and improve their performance on assigned tasks. To evaluate and give students specific feedback about their work.
Guiding and Grading Rubrics Multi-Dimension Rubric
Guiding and Grading Rubrics Single Dimension Rubric
Guiding and Grading Rubrics Remember your audience. Underscore what is important Borrow ideas from others Reuse if possible Inspire Growth Clarify expectations Stop and review
ESL Connection *Set both content and language objectives. • The language objective is determined by deciding on the function that language will have in the lesson and the structures they will need to participate in the lesson. • Identify the vocabulary and key concepts *Set specific but flexible goals. *Use comprehensible, useful, and relevant feedback.
Resource http://toolsfortodayseducators.com/resource-center/
After-School PD Dates October 18, 2018 November 15, 2018 December 6, 2018 January 17, 2019 February 7, 2019