Download

1 / 11
110 likes | 284 Views
FACEBOOK. By Jordan, Riley . Personal information. If you want to see your personal information go to privacy settings then go to security and then switch it off to share on a Facebook timeline you go to the top of your profile and click the what's on your mind tab. How to deactivate .

E N D
FACEBOOK By Jordan, Riley
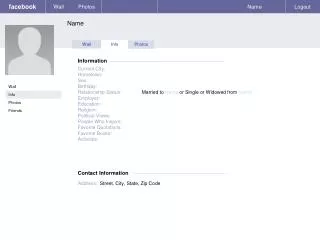
Personal information If you want to see your personal information go to privacy settings then go to security and then switch it off to share on a Facebook timeline you go to the top of your profile and click the what's on your mind tab.
How to deactivate To deactivate your account on Facebook go to the to the top right corner of the page. click on the arrow and drop down to click account settings On the sidebar of the account settings page. Click the security tab. Click deactivate your account.
Pros and cons pros cons The games on Facebook and the site itself can be very addictive. There are several instances of online stalkers . There is always the possibility of identity theft on the site • Registering on the site is a extremely smooth process • You would feel right at home with the uncluttered UI of the site • It transcends all physical boundaries and lets you connect with long/lost friends and family.
Photos 1.From the Facebook Home page, locate and select Photos. 2. The Photos page will appear. Locate and select the Add Photos button. 3. A dialog box will appear. Locate and select the photos you want on your computer, then click Open. 4. As your photos are uploaded, you'll be able to enter information about your album, including thealbum title anddescription, along with photo description. You'll also be able to set your privacy levelfor the album with the audience selector.
Photo 2 5.You'll also be able toadd tags to photos of yourself and your Friends. 6. Before posting your photos, double-check the audience selector to make sure you're sharing your photos only with the people you want to see them we recommend selecting Friends or Custom for a higher level of privacy. 7. Click Post Photos 8.The album will be created and posted to your Timeline
Deleting photos • 1. From the FacebookHome page, locate and select Photos in the Navigation pane. • 2. The Photos page will appear. Locate and select the desiredalbum. • 3. Click theAdvanced Settings Gear and then choose Delete Album from the drop-down menu. The album will be deleted.
Chat and video call • 1. From the Facebook Homepage, locate and select the Chatbox at the bottom-right corner of the screen. • 2. The Online Friends window will appear with a list of Friends who arecurrently online and available for Facebook Chat. • 3. Check your Friend's Chat status. • 4. Select an available Friend.
Chat and video call 2 • 5.Chat window will appear. Type a message and then pressEnter. Your conversation will be recorded and appear in the Chat window. • 6. When you are finished with the Chat, click on the x to close the Chat window.
Sites I used Gcflearnfree.org Google Youtube