Download
1 / 42
430 likes | 446 Views
Best Practices for Collecting Mid-section Discharge Measurements with ADCPs. Nick Stasulis Maine Water Science Center Webinar Presented: September 19 and 22, 2011. Overview. What is the mid-section method? When is the mid-section method preferable? Overview of TRDI’s SxS Pro

E N D
Best Practices for Collecting Mid-section Discharge Measurements with ADCPs Nick Stasulis Maine Water Science Center Webinar Presented: September 19 and 22, 2011
Overview • What is the mid-section method? • When is the mid-section method preferable? • Overview of TRDI’s SxS Pro • Overview of Sontek’s RS Stationary Live • Some best practices for mid-section Qms
Mid-Section (SxS or Stationary)Discharge Measurement Velocity Width Depth
Standard USGS Mid-Section Methods Still Apply • Good cross section • 25 - 30 sections attempting to avoid measuring > 5% of discharge in any one section • > 40 second sample time per section
Why use the mid-section method? • Ice Measurements • Unable to bottom track • Moving bed conditions • Difficulty completing moving boat transects • Check measurements • Confirming edge discharges/bank overflow
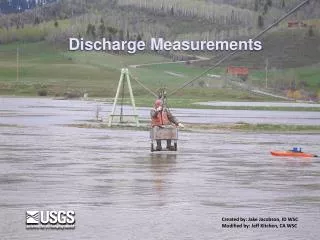
Why use the mid-section method? • Ice Measurements • Using ADCPs with the current software allows for correction of angles • Ideally, only at each station collecting data for ~40 seconds • Potential for smaller diameter auger • No need to sound river depth Yukon River @ Stevens Village, Alaska
Angles under ice… • With SP: • Q unadjusted = 850 Q adjusted = 760 • These angles and the adjusted Q were confirmed by an M9
Why use the mid-section method? • Unable to bottom track • High sediment • Near bed vegetation • Uneven channel • Fast/turbulent water
Why use the mid-section method? • Moving Bed Conditions • No need to rely on bottom track, GPS and compass data
Why use the mid-section method? • Difficulty completing moving boat transects • Flowing Debris • River Traffic
Why use the mid-section method? • Check measurements • Uses an entirely different method than a moving boat ADCP measurement • A great option if an ADCP is the only measurement option and/or only one unit is available • Confirming estimated edge discharges/bank overflow
TRDI’s SxS Pro Software • Released June 2010 • Software can be downloaded for free and used to playback data collected in the WinRiver II SxS software or the PDA SxS software • A license is required to collect data with SxS Pro • For units with SxS for the PDA or WinRiver II the upgrade cost is $500 • For a unit without SxS the cost is $1,450 • A key specific to the activated ADCP is entered into the SxS Pro software
Activation • PDA software and SxS for WinRiver II moved key into unit • SxS Pro requires key entered into software
SxS Pro Highlights Open existing measurement (if not ended) and continue data collection Edit configuration and change instruments mid-measurement using wizard
Ability to correct for angles if beam 3 is oriented DS and transducer can be held stationary (likely not for float deployment)
Sontek’s RS Stationary Live (RSSL) • Released October 2010 • Software can be downloaded for free and used to playback data already collected • A license is required to collect data with RSSL • A license for one ADCP is $1,950 and is entered into the firmware of that unit using the Utility software.
Features in both software packages SxS Pro RSSL
Manual Vertical or Island Edge • Slush-to-bottom, too shallow to profile or to account for island/pier
Best Practices • Like with any new equipment or method, comparisons measurements are essential to ensure this new software measures a discharge similar to accepted equipment and software combinations • Conduct comparisons over the range of conditions you intend to use the stationary software • Comparisons are not required for every measurement • Submit comparisons to the OSW Sharepoint Site!
Best Practices • With mid-section measurements we still make many of the same key assumptions as moving boat ADCP measurements: • All beams are “seeing” the same flow • Use in turbulence, eddies or highly variable depths may result in erroneous velocities • We should still keep the ADCP a river depth away from vertical walls • Discharges on the top/bottom are estimated through extrapolation
Best Practices RSSL SxS Pro
Best Practices • Angles in open-water • Though both software packages provide automated methods for angle correction it is important to observe the angle measured by the unit and confirm through surface observations at each station • With RSSL a poor calibration of the compass or interference could cause the azimuth for the tagline or individual station angles to be incorrect
Best Practices • Angles in open-water • SxS Pro does not have an automated procedure for open water angle correction, unless the boat can be oriented perpendicular to the tagline (usually on possible during ice measurements) • You MUST manually enter an angle from perpendicular for each station to account for flow angles
Best Practices • Angles under ice • With RSSL, consider using a hand-compass to measure the azimuth of the tagline to check against the ADCP value • With SxS Pro holding beam 3 downstream throughout the entire data collection period is essential. This can be difficult.
Best Practices • Check the velocity directions in open water and under ice to ensure the directions are similar • This is important with manual angle corrections and with automated angle corrections • This can be done in the “contour” views and the tabular summaries • An 8 degree angle = a 0.99 coefficient • An 11.5 degree angle = 0.98 coefficient • A 14 degree angle = 0.97 coefficient
Velocity Direction Incorrect azimuth, compass experiencing interference during collection of azimuth With correct azimuth, measured with hand compass before measurement
Effect of Boat Movement on Water Velocity Measurements No Compass Rotation results in averaging velocity components which appear to the instrument to be in different directions will bias the velocities low Rotation + lateral movement in direction of rotation creates positive velocity that results in movement of the boat being added to the water velocity May also result in varying depths
Standard Deviation of Flow Direction • If > 20 degrees, a good indication of uncompensated rotation that may result in a low bias • Efforts should be made to stabilize the ADCP
Changes to Reference ADCP (or System) Assumes the ADCP is stationary This is the standard setting and will typically not be changed Bottom Track Accounts for movement of the ADCP and removes the bottom track velocity from the water velocity DO NOT use if there is potential for moving bed!
Effect of Boat Movement on Water Velocity Measurements With Compass Rotation Compass allows velocities to be averaged in same coordinate system Lateral movement should average out Relies on accurate heading applied to each ensemble May also result in varying depths
COV for Velocity Q = 14.7 cfs Q = 12.0 cfs +10% = 1.89 ft/s -10% = 1.55 ft/s Out of 360 cfs total
Slush in ice conditions • When slush is present near-surface the ADCP will likely not collect valid data • To determine the slush/water interface: • While pinging, slowly drop the transducer deeper into the hole until valid is obtained and adjust the transducer depth accordingly • Observe SNR/intensity profile plots and look for inconsistencies to be sure the transducer is clear of the slush • Using an ice fishing basket for clearing holes on a graduated rod can also be used to determine if/where slush is located
Duration of data collection • Ensure the sample time and number of samples is reasonable • Increase observation time if data is intermittent • Ensure the actual number of ensembles is reasonable (you may collect for 40 seconds but only get one ensemble)
Equipment Summary • RiverSurveyor Stationary Live (RSSL) • Uses ADCP’s compass to determine the tagline azimuth and corrects velocity angle to perpendicular automatically in both ice and open water conditions • Compass also used to account for ADCP rotation • SxS Pro • Open water - Uses observed, manual angle corrections • Compass used to account for boat rotations • Ice - Uses Y-velocity method • Requires beam 3 is held downstream, perpendicular to tagline, for entire 40 second period • Rotations of the transducer will cause flow angle
Summary • There are many situations where mid-section ADCP measurements are preferable • Be sure the licenses/software are setup appropriately BEFORE field use • Make comparison measurements • Don’t assume the data from the ADCP is always correct – confirm with river conditions! • Use software data quality indicators