Download
1 / 6
60 likes | 163 Views
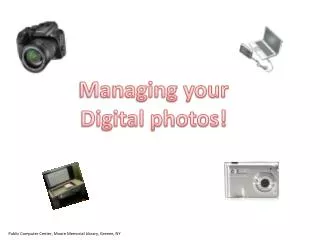
Making a Playable DVD movie using your digital photos. And adding music to the movie. Picasa and IrfanView. Run face recognition in Picasa to isolate the pictures containing the person of interest

E N D
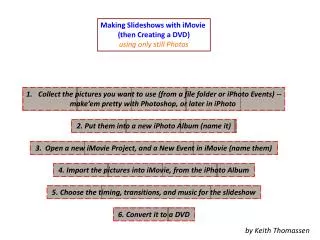
Making a Playable DVD movie using your digital photos And adding music to the movie
Picasa and IrfanView • Run face recognition in Picasa to isolate the pictures containing the person of interest • Be sure to remove folders from the face recognition process where you have done photo editing AND renamed the file. Otherwise you will have a lot of duplicates. • Create a new folder containing the results of the face recognition process. • Open this new folder with IrfanView and do any necessary editing of photos. Be sure to retain the resolution of the original photo as big as possible.
Download Windows LIVE Movie Maker (FREE) from the Microsoft web-site. • Open Windows LIVE Movie Maker and import the folder of photos • Use all the photo and audio tools available in LIVE Movie Maker, clicking on the icons at the top of the screen.
Obtaining Your Music of Choice and Inserting it into LIVE Movie Maker • Go to YouTube.com and search for the kind of music you desire, such as “Graduation Music”, etc. • Download the FREE YouTube Downloader software which allows you to download only the MP3 audio portion of the selected YouTube video. • Using the “add music” tool in Movie Maker, import the music. (Always select music in proper order, starting at the beginning of the movie.) • Adjust volume, beginning and ending points, and phasing in and out of each piece of music. • You can also increase the photo time to coordinate with the music, if necessary. • When completed to your satisfaction, click on “Save Movie” on the right side of the menu list. • This converts the .wlmp format to .wmv format.
Making a Movie DVD that will play in most DVD players and on your computer. • Download FREE “DVD Styler” from www.dvdstyler.org. • Go to YouTube.com and search for a tutorial on DVD Styler • For a single movie, do the following: • Open DVD Styler and “create a new project”. • Select the following: • Video Format: NTSC 720 X 480 (for the U.S.) • Aspect Ratio: standard screen or wide screen • You can leave the other choices on the default values entered. • Click “OK” • Click on “No Template” when not using a menu screen • Click on “Import videos” and select your SAVED Windows LIVE Movie Maker file (.wmv). (You can click and drag the video into the strip at the bottom of the screen next to “Menu 1” • Check space used in the gauge at the bottom • Go to “Menu 1” and RIGHT click on Properties; Select “Pre command” and enter “jump title 1”. This puts the first video (labeled “Title 1”) into the entry point on the DVD at play time. • Click “OK”
Continued……….. • If more than one video is going to be on the DVD, click on “Title 1” video and “Properties”. • In “Post Command”: select “jump title 2”. This will automatically load the next video, “title 2” after the first video; “title 1” has played. • Repeat for each video to be played on the DVD. No need to put anything in post commands in the last video because it will automatically loop back to the beginning. • Click “Burn” button on Main Menu at top. Click on “Preview” to play the DVD BEFORE burning. Then click on “Burn” to make the DVD. • In “Burn” menu; if using a DVD-RW, click on “format DVD-RW”. Otherwise leave format box empty. • Hit the “Start” button. Depending on the original format of the videos, this may take some time. • Check the details to see the progress. “Burning completed” appears. Click “Close” • This DVD can be played on your computer OR in a DVD player.