Download

1 / 60
630 likes | 902 Views
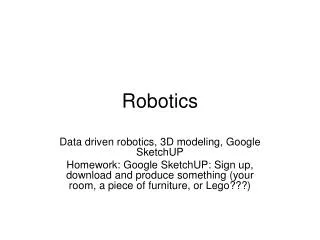
INTRODUCTORY LECTURE ON ARDUINO. ELECTRONICS & ROBOTICS CLUB. SWAPNIL UPADHYAY. WHAT IS ARDUINO ?. Open-source electronics prototyping platform Y ou can make your own board, or buy one . Easy-to-use hardware and software

E N D
INTRODUCTORY LECTURE ON ARDUINO ELECTRONICS &ROBOTICS CLUB SWAPNIL UPADHYAY
WHAT IS ARDUINO? • Open-source electronics prototyping platform • You can make your own board, or buy one. • Easy-to-use hardware and software • Cheap, easily available. • Open Source Software. • Very widespread, many projects openly available. • Extra HW (shields) available. • Usb programmable
OPEN SOURCE • OPEN SOURCE HARDWARE • OPEN SOURCE BOOTLOADER • OPEN SOURCE DEVELOPMENT KIT • COMMUNITY DRIVEN SUPPORT
MORE BOARDS • 15 CURRENT BOARDS
COMPATIBLE BOARDS • DIAVOLINO • Ruggeduino
SHIELDS Datalogging Shield Touchscreen Shield Wave Shield
Modules Bluetooth Module GPS Module Temperature & Humidity Sensor RFID Module
Sensors and Modules Gas Sensor Fingerprint Scanner Temp & Humidity Flex Sensor Geiger Counter
How to get started • You’ll need a board of course. • You will need arduino software. • Mac, Windows and Linux friendly versions available • Then you are ready to plug it in!
Not so fast! • It’s important to note at this stage that Arduino’s are electronic devices. • Different arduinos operate at different voltages. • You need to make sure that that you are providing the right voltage to the input pins and arduino.
Led Blinking Code • // Pin 13 has an LED connected on most Arduino boards. • int led = 13; • // the setup routine runs once when you press reset: • void setup() { • // initialize the digital pin as an output. • pinMode(led, OUTPUT); • } • // the loop routine runs over and over again forever: • void loop() { • digitalWrite(led, HIGH); // turn the LED on (HIGH is the voltage level) • delay(1000); // wait for a second • digitalWrite(led, LOW); // turn the LED off by making the voltage LOW • delay(1000); // wait for a second • }
Internal Pullup And Pulldown • Assuming the sensor is connected to pin 12 • For pulling Down a pin, Syntax is: pinmode(12,INPUT_PULLDOWN); • For Pulling up a pin ,Syntax is: pinmode(12,INPUT_PULLUP);
Analog input and outputs • Only pins beginning with alphabet ‘A’ can be used to take analog input. Syntax: analogRead(pin); • Analog Output can be given only on pwm pins and in case of Arduno Due, it can also be given on DAC0 and DAC1 pins. • DAC stands for digital to analog and converts the digital signal to analog. • Arduino Due contains inbuilt 12 bit DACs which can be for giving good quality analog output preferable for sound. Syntax: analogWrite(pin, value); In case of pwm value varies between 0-255 In case of DAC you can set resolution by analogWriteResolution(bits) Thus in case of dac value can go upto 2^12.
Installing Libraries • Download the zip file • Extract the file • Save the folder in /arduino/Libraries/(Name of library) • Library name should not contain special characters.
External Interrupts • noInterrupts(); Disables the interrupts for the code written after the function; • interrupts(); Re-enables interrupts (after they've been disabled by noInterrupts()) • Example void setup() {} void loop() { noInterrupts(); // critical, time-sensitive code here interrupts(); // other code here }
External Interrupts • attachInterrupt(interrupt, function, mode) • attachInterrupt(pin, function, mode) (for arduino due)
External Interrupts Parameters
Example(external interrupts) • Example • int pin = 13;volatile int state = LOW;void setup(){pinMode(pin, OUTPUT);attachInterrupt(0, blink, CHANGE);}void loop(){digitalWrite(pin, state);}void blink(){ state = !state;}
External Interrupts • detachInterrupt(interrupt); • detachInterrupt(pin); (for Arduino Due only) Turns off the given interrupt.
Timers and Internal Interrupts • initialize(period) Required to use any function of the library • setPeriod(period) Sets the period of the timer (highest being 1Mhz) • pwm(pin, duty, period) Generates a PWM waveform on the specified pin • setPwmDuty(pin, duty) A fast way change duty • attachInterrupt(function, period) Calls the function after the given period in microseconds
Timers and Internal Interrupts • detachInterrupt() Disables the attached interrupt. • disablePwm(pin) Turns PWM off for the specified pin so you can use that pin for something else. • read(); Reads the time since last rollover Library can be downloaded from here
Sample Code • include "TimerOne.h" • void setup() • { • pinMode(10, OUTPUT); • Timer1.initialize(500000); // initialize timer1, and set a 1/2 second period • Timer1.pwm(9, 512); // setup pwm on pin 9, 50% duty cycle • Timer1.attachInterrupt(callback); // attaches callback() as a timer overflow interrupt • } • void callback() • { • digitalWrite(10, digitalRead(10) ^ 1); • } • void loop() • { • // your program here... • }
UART: Universal Asynchronous Receiver Transmitter • UART is a simple half-duplex, asynchronous, serial protocol. • Simple communication between two equivalent nodes. • Any node can initiate communication. • Since connection is half-duplex, the two lanes of communication are completely independent.
UART: Universal Asynchronous Receiver Transmitter • What makes it ‘universal’ ? Its parameters (format , speed ..) are configurable. • Why ‘asynchronous’ ? It doesn’t have a clock .
UART Basics • Baud Rate: No. of bits transmitted/received per second = _____bits/sec. • Format of Communication
UART Basics Connections for UART
UART Characteristics • The speed of communication (measured in bauds) is predetermined on both ends. • A general rule of thumb is to use 9600 bauds for wired communication. • UART implements errordetection in the form of parity bit.
Parity Bit • Parity bit is HIGH when number of 1’s in the Data is odd. • Respectively, it is LOW when number of 1’s in the Data is even
Connecting ARDUINO with Computer • Latest Direct Way
Coding for Arduino • Serial.begin(speed) Sets the data rate in bits per second (baud) for serial data transmission. • Serial.end() Disables serial communication, allowing the RX and TX pins to be used for general input and output. To re-enable serial communication, call Serial.begin(). • Serial.read() Reads incoming serial data • Serial.println(val) • Serial.println(val, format) Prints data to the serial port as human-readable ASCII text followed by a carriage return character (ASCII 13, or '\r') and a newline character (ASCII 10, or '\n')
Coding For Arduino • • Serial.print(val) • Serial.print(val, format) Prints data to the serial port as human-readable ASCII text. • Serial.flush() Waits for the transmission of outgoing serial data to complete. (Prior to Arduino 1.0, this instead removed any buffered incoming serial data.) • Serial.available() Get the number of bytes (characters) available for reading from the serial port. This is data that's already arrived and stored in the serial receive buffer (which holds 64 bytes).
Sample Code for Arduino • IntincomingByte= 0; • // for incoming serial data • void setup() { • Serial.begin(9600); • // opens serial port, sets data rate to 9600 bps • } • void loop() { • // send data only when you receive data: • if (Serial.available() > 0) { • // read the incoming byte: • incomingByte= Serial.read(); • // say what you got: • Serial.print("I received: "); • Serial.println(incomingByte, DEC); • } • }
SPI • Serial ?? • Because it works on serial mode of transfer. It is also synchronous and full duplex. • Peripheral Interface. • Because it has the capability of communicating with many nodes. • How?? Let us see.
SPI • In SPI, the sender and receiver follows a master-slave relationship. • There may be multiple nodes in the network. • One node is master, the rest are slaves. • The communication is always initiated by the master. • The slaves can communicate only with the master. • How do master selects the slave??
SPI Pins • CLK is generated by Master and is used as the mode is synchronous. • MOSI is Master Out Slave In: Data sent by Master to Slave. • MISO is Master In Slave Out: Data sent by Slave to Master. • S̅S̅ is slave select: Slave communicates with Master only if this pin’s value is set as LOW.
Data Transfer in SPI MOSI MISO MASTER SLAVE
Data Transfer in SPI MOSI MISO MASTER SLAVE