Download
1 / 8
80 likes | 104 Views
The term aesthetics is used to describe the outward appearance of a product. Basic preparation is needed before any finish can be applied. This is referred to as cleaning up .

E N D
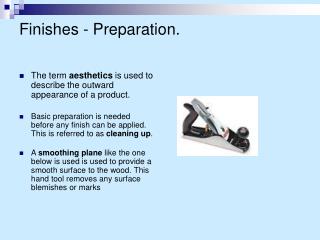
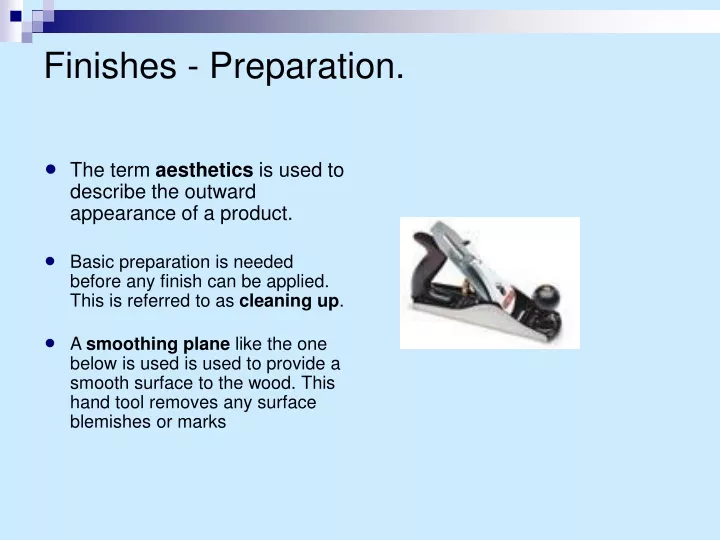
The term aesthetics is used to describe the outward appearance of a product. Basic preparation is needed before any finish can be applied. This is referred to as cleaning up. A smoothing plane like the one below is used is used to provide a smooth surface to the wood. This hand tool removes any surface blemishes or marks Finishes - Preparation.
Finishes – Glass paper • A smooth surface can be achieved with the use of glass paper. • Glass paper is an abrasive paper made from ground glass glued to paper. • Glass paper smoothes away small faults by rubbing back and forth along the direction of the wood grain. The glass paper should always be wrapped around a cork block to prevent any damage to the wood. You should be careful not to round off edges or sand hollows into the materials. • Glass paper comes in a variety of grades. Some are very coarse and are used to remove rough surfaces. Some are fine and are used to produce a very smooth surface. There are ten grades and each sheet comes in sizes 280mm x 230mm. • Glass paper comes in extra fine, fine, medium and coarse.
Softwood is sometimes stained to make it look like other types of woods such as hardwoods. This may enhance its appearance. It is not a good idea to stain after filling because the filler will show up as a darker colour than the wood. Stains can be water-based, or spirit based. These types of stains dry far more quickly. Oil based stains last the longest. The image below is of a softwood box that has been stained in order to make it look like it has been made from a darker colour wood. Finishes – Wood Stain
Oils produce a natural finish. This type of finish suits oily woods such as teak and iroko. Examples of oil finishes are teak oil and linseed oil. This form of treatment is suitable for inside and outdoor purposes but if used outside needs regular recoating. Olive oil is used on woods that come into contact with foods. Oils are applied with a clean cloth with the surplus oil wiped off. It is a good idea to leave one week between coats. The teak chair below that was examined in unit one of this topic has been treated with teak oil. Finishes – Oils
This is a traditional wood finish, which produces a dull gloss finish. Shredding beeswax and dissolving it in turpentine originally made wax. The wax should be the last finish to be applied. The wood should be sealed with French polish (shellac wood sealer) then lightly rubbed down with fine glass paper when dry. The wax should be rubbed into the surface of the wood, allowed to dry and finally polished with a soft cloth or brush. The image below is of a tie and sock storage unit. The wood has been both French polished and waxed. Finishes – Wax
These are normally referred to as plastic finishes and are made from polyurethane. This gives a tough surface, which is resistant to heat, water and spirits. It also provides resistance to knocks. Some varnishes can be used for outside purposes. It is available in clear, translucent, and coloured shades. It provides either a matt, eggshell or gloss finish. It is applied in thin coats using a brush and rubbed down in between each coat with wire wool. The image below is of a storage unit. It has been protected with polyurethane varnish. Finishes – Varnishes.
Finishes – Paints. • Paints provide a colourful and protective finish for woods. It may be used outside or inside. • There are a number of things to remember when painting; softwood knots need to be sealed with shellac to prevent resin from oozing out. This sealer is often called knotting. • Sharp corners need to be slightly rounded off to prevent the paint surface from splitting. • When painting a product it should be sealed with a primer. Secondly undercoats should be applied, sanding down between each coat with a fine glass paper. • There are lots of different types of paints available in many different colours from matt, eggshell to gloss. • Emulsion paints, vinyl or acrylic resin are all water based paints. They are not waterproof or very durable. • Oil based paints some of which are non-drip are more durable and waterproof. • Polyurethane paints go hard when exposed to air. They provide a scratch resistant, tough surface suitable for toys and some furniture.
Wood preservatives protect the timbers from fungus, insects and marine borers. They also protect the timbers from moisture and the weather. Creosote is probably the best-known preservative. It is Tar oil, which soaks into the grain of the wood and provides a matt, dull brown finish. It is relatively cheap to buy, is permanent and does not affect other materials. When using creosote it is best to wear gloves as the preservative does stain. The image below is of a garden shed, it has been treated in creosote. Finishes – Wood Preservatives.