Download

1 / 26
350 likes | 654 Views
Locard’s Exchange Principle. “When a person comes into contact with an object or another person, a cross-transfer of physical evidence can occur.”. Types of Evidence. Direct/testimonial : firsthand observations (eyewitness account, video camera, confessions)

E N D
Locard’s Exchange Principle “When a person comes into contact with an object or another person, a cross-transfer of physical evidence can occur.”
Types of Evidence • Direct/testimonial: firsthand observations (eyewitness account, video camera, confessions) • Circumstantial: indirect evidence; implies a fact, but not directly prove it • Physical – bullets, weapons, impressions • Biological – body fluids, plant parts, hair • Trace evidence
Trace Evidence • Small but measurable amounts of physical or biological material found at a crime scene
Human hair Animal hair Fibers Soil or plant material (pollen) fingerprints Body fluids (semen, blood, saliva, mucus) Paint chips Broken glass Chemical residue Examples of trace evidence
Class Evidence Narrows identity to a group of persons or things Example: blood type Individual Evidence Narrow identity to a single person or thing Example: fingerprint Categories of Evidence
The Crime Scene Investigation Team Who is at the crime scene? • Police and possibly a district attorney. • Crime scene investigators. • Medical examiners. • Detectives. • Specialists.
The Seven S’s of Crime Scene Investigation • Secure the scene. • Separate the witnesses. • Scan the scene. • See that photos are taken. • Sketch the scene. • Search for evidence. • Secure the collected evidence.
Separate the witnesses • Do not allow witnesses to talk to each other • Witness accounts will be compared • Avoid witnesses working together to create a story • Asked: who, what, where?
Scan the scene • Determine primary and secondary crime scenes • Primary: where murder took place • Secondary: where corpse was found • Where should photos be taken? • Wear protective gear to prevent contamination of crime scene
See that photos are taken:Crime Scene Photography • Show the scene exactly as it was when you first saw it • If something was moved before you arrived, don’t try to reconstruct the scene – just take the pictures the way you see it • Be careful not to destroy any evidence while taking photos
Outside the Scene • Exterior of building • Arial photos • Pictures of all doors, windows and exits
Inside the Scene • Begin with a view of the entrance • Then photograph the scene as it appears when you first step into the room • Next, move around the room to get photographs of all the walls (also show positions of any possible pieces of evidence) • Photos of other rooms connect with crime scene
Items of Evidence Take 2 shots: • Midrange shot: show how the item is related to its surroundings • Close-up: bring out details of item • Take 2 close-up shots if marking or measuring device is used • One shot without device, one shot with device
Evidence: Knife (possible weapon) Midrange Photo Close-Up (with ruler)
Sketch crime scene • Make accurate rough sketch • Note direction (N) and scale of distance • Include relevant objects (body, doors, windows, furniture, immovable landmarks) • Make final copy (on computer) for court N
Search for evidence • Grid, strip or lane, spiral search pattern • Use flashlight to find hair and fibers • Use forceps, vacuum cleaner to collect evidence Grid Strip or Lane Spiral
Secure the collected evidence • Properly package, seal, and label ALL evidence! • Liquid: airtight, unbreakable containers • Wet items (biological): dry out in breathable container • Dry item: bindle plastic or paper container • Seal with tape and labeled with pertinent info
Crease a clean paper and place the evidence in the X position (as shown above). Fold in the left and right sides, and then fold in the top and bottom. Put the bindle into a plastic or paper evidence bag affixing a seal over the opening. Write your name on the seal. Bindle: folded paper used to hold trace evidence Packaging Evidence
Chain of Custody In order to present credible evidence in court, a chain of custody log is essential. • A person bags the evidence, marks it for identification, seals it, and signs it across the sealed edge. • It is signed over to a technician in a lab for analysis who opens it, but not on the sealed edge. • After analysis, the technician puts it back in the evidence bag, seals it in another bag, and signs the evidence log (above, right).
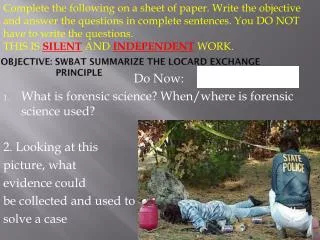
Crime Scene Evidence • Direct or circumstantial evidence? • Physical or biological evidence? • Class or individual evidence?