Download
1 / 21
210 likes | 314 Views
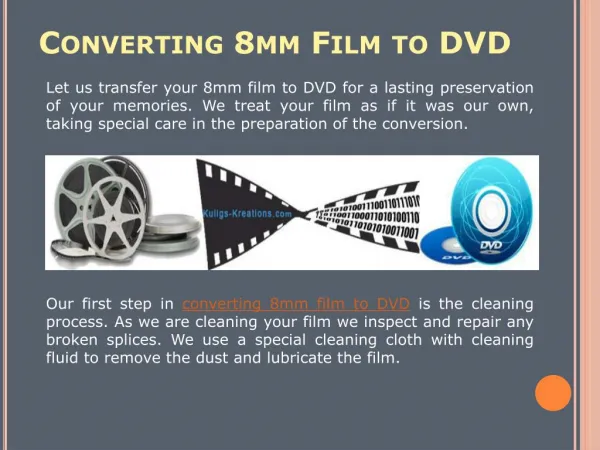
Digitizing Your Old Movie Film to play on a Television DVD Player. SIR Phil Goff Branch 116 January 20, 2011. Digitize Your Old 8mm or Super 8 Movie Film. Considerations : Cost. How much are you willing to spend?

E N D
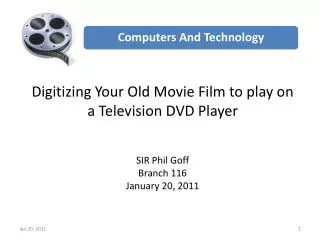
Digitizing Your Old Movie Film to play on a Television DVD Player SIR Phil Goff Branch 116 January 20, 2011
Digitize Your Old 8mm or Super 8 Movie Film Considerations: Cost. How much are you willing to spend? Quality. What quality level to you want? You may remember the movies as being very clear and crisp. They weren’t. You can’t make a bad quality movie into a high quality movie. Editing. Do you want to edit the digital movies to create a custom movie of “just the best scenes?” Time. How much time are you willing to spend to improve the finished product?
How Much Film Do I Have? • Most movies were shot on 50’ reels. However, many of us spliced them to create longer movie viewing times. • 3 inch reel (50 feet) – Viewing Time 3 mins 15 secs • 5 inch reel (200 feet ) - Viewing Time 13 mins 2 secs • 6 inch reel (300 feet) – Viewing Time 19 mins 30 secs • 7 inch reel (400 feet) – Viewing Time 26 mins 2 secs
Basic Cost • Costco is among the cheapest. They charge 11 cents per foot with a $17.99 minimum. Applies to 8mm, Super 8 & 16mm. • Same process for VHS, S-VHS, VHS-C, Hi-8, Betamax, etc. Costco charges $17.99 for 2 tapes, 2 hours total. • On the internet there are scores of mail in locations. Most are more expensive than Costco but many offer more flexibility and quality.
Three Choices Normal Guy. Take your film to Costco. Watch DVDs. Place everything in a box and give it to your kids. Somewhat Geek. Take you film to Costco. Rip DVDs so that movie can be edited. Edit movie and burn to new DVDs. Total Geek. Send your film to processor that will record digital footage on a hard drive. Options for HD, color correction, etc are available. Edit digital footage and burn to new DVDs. Quite Expensive.
Process Used by Somewhat Geek. • Take your film to Costco. (conversion takes about 2-3 weeks.) • They send the film to YesVideo in Santa Clara (same provider for CVS, Wolf Photo, Rite Aid, Walgreens, etc.) • You get a DVD with a title of your choice that plays on your Television. • Rip and edit movies. Burn back to DVD for playing on your Television.Downsides: • No flexibility. You get the DVD in Mpeg 2 format with some basic titles. • They will not give you non-compressed format for editing. • They put your film on one of their reels and won’t put it back on your reel.
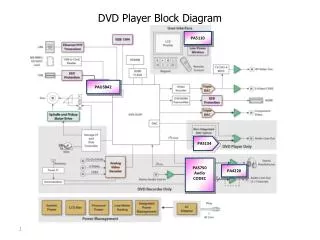
Technology of Movie DVDs • The digital image of your movie film is first recorded by the Processing Company as a MJpeg (movie Jpeg) file • MJpeg files are uncompressed and very large. They are converted to Mpeg 2 files so that they will fit on a DVD and play on a television DVD player. • Mpeg 2 is called a “lossy” format and is around 10 times smaller than the MJpeg source file. • You cannot edit Mpeg 2 files directly. You must first “convert” them to a WMV or AVI file. This converted WMV file will be of somewhat lower quality than the original Mpeg 2. • Once edited your files must be reconverted back to the Mpeg 2 format. The final product will be slightly lower quality than the original.
Process Flow to Digitize and Edit Movie and Burn to a DVD Note: There are many software programs available to do this work. I have selected two that are free and fairly straightforward. Laboratory transfers film to a DVD recorded in the Mpeg2 format Use Any Video Converter (AVC) to rip the movie to a WMV format Edit the WMV file in Windows Movie Maker. Save edited file in WMV format. Use AVC to open WMV file and Burn DVD in Mpeg2 format.
How to Rip and Edit Movies from a Mpeg 2 DVD • Step 1: Download Any Video Converter (AVC) software program. http://www.any-video-converter.com/products/for_video_free/ • Step 2: Open the AVC program and insert your movie DVD. Open the movie DVD to see the files. Add the video files into AVC. • Step 3: Select an output filetype of WMV, make certain the aspect ratio is set to 720x480 (8mm film aspect ratio) and click on “Convert.” • Step 4: The AVCprogram will convert the DVD video file to WMV and save it on your hard drive.
Ripping with Any Video Converter Use Any Video Converter to Rip Files. Select WMV and set frame size to 720x480 Insert DVD and click to Add Video Files.
Select the VOB file that is the largest size. Note: If in doubt, select all of the VOB files. Most are add-ons created by YesVideo Laboratories and can easily be deleted later on.
Ripping with Any Video Converter Click on “Convert” and let files encode to WMV format. Specify Output folder so that you can find the finished product.
Editing WMV files with Windows Live Movie Maker • There are many Movie Editing programs. Photoshop Premier Elements is well known and does an excellent job but is complicated and expensive. • Windows Live Movie Maker is free with Vista and Win 7 and does a basic job. (There is an earlier version available for Win XP download.) • Open Windows Live Movie Maker • Note: This is a free Microsoft program but must be downloaded from Windows Live Essentials • http://explore.live.com/windows-live-essentials?os=other
Editing with Windows Live Movie Maker Add the WMV files created from the DVD using AVC.
Editing with Windows Live Movie Maker Select “Edit” tab and use video screen to see what you want to keep. Cut into segments to be retained.
Editing with Windows Live Movie Maker Select “Home” tab and then Title to create opening screen and other enhancements.
Save Edited Movie Save edited movie using the “Recommended for this project” This creates a WMV file. Note: You can select “Burn a DVD” but that will open “Windows DVD Maker.” I prefer to use AVC for burning DVDs.
Open Any Video Converter to Burn DVD Select Burn icon Add edited WMV file. Click on Convert
Any Video Converter will burn a new DVD in Mpeg 2 format. Select your DVD drive and insert a blank Name the DVD Click on “Burn” to finish
Observations and Considerations • If you want top quality, find a Company that will record the uncompressed files directly to a portable hard drive. This is more expensive. Email me for a list of possible names. • You may be able to find Companies on the internet that are cheaper than Costco. Don’t know about their quality. • If you video quality is poor (like mine) then no amount of enhancement will make it very good. • If you do have your films digitized, don’t throw the film away. Ten years from now the digitizing process may be so good that they will convert them to BluRay with 3D.