Download
1 / 18
210 likes | 653 Views
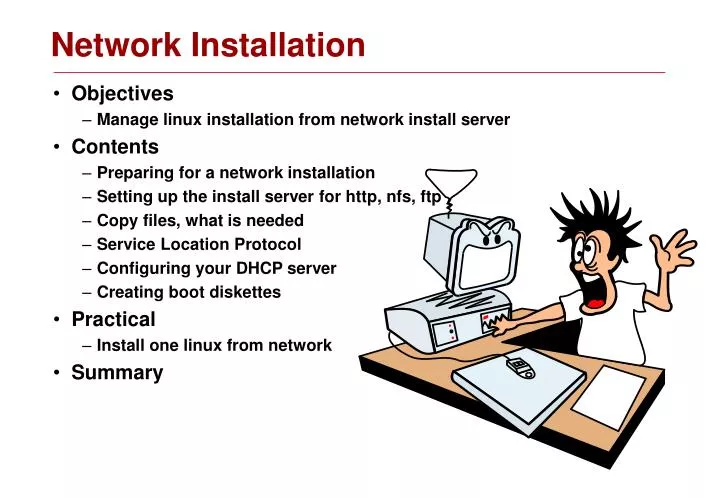
Network Installation. Objectives Manage linux installation from network install server Contents Preparing for a network installation Setting up the install server for http, nfs, ftp Copy files, what is needed Service Location Protocol Configuring your DHCP server Creating boot diskettes

E N D
Network Installation • Objectives • Manage linux installation from network install server • Contents • Preparing for a network installation • Setting up the install server for http, nfs, ftp • Copy files, what is needed • Service Location Protocol • Configuring your DHCP server • Creating boot diskettes • Practical • Install one linux from network • Summary
Prepairing network installation • Your network server need one or more of the following • NFSD • HTTPD • VSFTPD • DHCPD • NAMED • SLP • You will need to setup each server after your need • Full flexibility you can mix netowk installation modes on same server • Local machine Policy must allow you to setup, usally only root can do. • Named and DHCPD can run on any machine in network • SLP can be very dangerous and expose servers weakness
Setting up the install server • Installation server • Types which can be used: NFS HTTP FTP (SFTP) • You can support all at same time if you like or any combination • You must configure and start your selected servers • It will eat up about 3.4Gigabyte for each distribution of SuSE • Create installation root tree • HTTP, FTP and NFS preparation • Copy all contents of each 5 SuSE cdrom’s to server SuSE/9.3 –catalog. • Just insert first CD and do the copy, remove it and insert the next one. • Watch out for any I/O read errors while copy! # mkdir -p /export/network-install/SuSE/9.3 # mkdir -p /export/network-install/SuSE/ISO # cp –var /media/SUSE930_F01 /export/network-install/SuSE/9.3 # cp -var /media/SUSE930_002 /export/network-install/SuSE/9.3 # cp -var /media/SUSE930_003 /export/network-install/SuSE/9.3 # cp -var /media/SUSE930_004 /export/network-install/SuSE/9.3 # cp -var /media/SUSE930_005 /export/network-install/SuSE/9.3
Setting up the install server continued • Install tree preparation • Rename all CD’s directories to CD1, CD2 and so on • If your were using Yast preparing your install server, all files will reside in one common directory • Now we are ready to setup the ”sharepoint” with nfs, http, ftp or smb. # cd /export/network-install/SuSE/9.3 # mv SUSE930_F01 CD1 # mv SUSE930_002 CD2 # mv SUSE930_003 CD3 # mv SUSE930_004 CD4 # mv SUSE930_005 CD5
Setting up your kernelNFS server • NFS is dependent on forward and revers name-lookup (DNS) • The client to be installed must resolve in both forward and reverse Server: /etc/hosts = Client: /etc/hosts Example) • NFS make use of portmap Check if portmap & nfs is running Activate NFS and portmap at boot • NFS configuration Add to /etc/exports, use <tab> not <space> Activate your ”export” Test to mount your NFS share 192.168.1.1 server.net05.se 192.168.1.101 client.net05.se # /etc/init.d/portmap status # /etc/init.d/nfsserver status # insserv /etc/init.d/nfsserver # insserv /etc/init.d/portmap /exports/network-install/SuSE/9.3/ *(ro,root_squash,sync) # exportfs -vra # mount –t nfs localhost:/exports/network-install/SuSE/9.3 /mnt/a
Setting up SLP for kernelNFS server • SLP Registry file /etc/slp.reg.d/install.suse.nfs.reg • SLP need to know what resource to annonce • Service & Description • Name of resource registry file: install.suse • Service and directory to mount: nfs://$HOSTNAME/exports/SuSE/9.3/CD1 • Description seen in resource browsers: NFS Installation Source for SuSE9.3 • Activate the SLP resource annonce • Check that SLP reporst install.suse • Activate slp at boot # Register the NFS Installation Server service:install.suse:nfs://$HOSTNAME/exports/network-install/SuSE/9.3/CD1,en,65535 description=NFS Installation Source for SuSE9.3 # rcslpd start # slptool findsrvs service:install.suse:nfs service:install.suse:nfs://server.net05.se/exports/network-install/SuSE/9.3/CD1,65535 # insserv /etc/init.d/slpd
Setting up your vsFTPd server • Configure VSFTPd anonymous installations Add to /etc/vsftpd.conf • Standard anonymous ftp root is /srv/ftp • We changed this with the anon_root above • If you need non anonymous installations Add to /etc/vsftpd.conf uncomment Add special ftp install users with homedir inside install dir # # Anonymous FTP Root Directory # anon_root=/exports/network-install/SuSE # local_enable=YES chroot_local_user=YES # useradd -g users ftpinstall # passwd ftpinstall # usermod -d /exports/secret-install ftpinstall
Setting up SLP for vsFTPd server • SLP Registry file /etc/slp.reg.d/install.suse.ftp.reg • SLP need to know what resource to annonce • Service & Description • Name of resource registry file: install.suse • Service and directory to open: ftp://$HOSTNAME/9.3/CD1,en,65535 • Description seen in resource browsers: ftp Installation Source for SuSE9.3 • Activate the SLP resource annonce • Check that SLP reporst install.suse • Activate slp at boot # Register the FTP Installation Server service:install.suse:ftp://$HOSTNAME/9.3/CD1,en,65535 description=FTP Installation Source for SuSE9.3 # rcslpd start # slptool findsrvs service:install.suse:ftp service:install.suse:ftp://server.net05.se/9.3/CD1,en,65535 # insserv /etc/init.d/slpd
Setup your Apache2 Webserver • Apache2 need to be installed • In this case it is no use to install from anything else than YAST • Later we will do a more into the deepth installation of Apache2 1) Start yast and install only package apache2 2) Select apache2 and solve all dependencies that might appair. (in my case 3) • Apache DocumentRoot lives in /srv/www/htdocs • We will use a subdirectory in that path, more exactly alias to our installation root tree • Install source in our case will be apache alias directory • Add after Alias /icons/ … </Directory> • Restart apache • Test that you can see your sourceshttp://<inst-server-ip>/SuSE/ # Network Install Server Alias /SuSE/ "/exports/network-install/SuSE/" <Directory "/exports/network-install/SuSE"> Options Indexes MultiViews FollowSymlinks AllowOverride None Order allow,deny Allow from all </Directory> # rcapache2 restart
Setting up SLP for Apache2 • SLP Registry file /etc/slp.reg.d/install.suse.http.reg • SLP need to know what resource to annonce • Service & Description • Name of resource registry file: install.suse • Service and directory to browse: http://$HOSTNAME/SuSE/9.3/CD1 • Description seen in resource browsers: HTTP Installation Source for SuSE9.3 • Activate the SLP resource annonce • Check that SLP reporst install.suse • Activate slp at boot # Register the HTTP Installation Server service:install.suse:http://$HOSTNAME/SuSE/9.3/CD1,en,65535 description=HTTP Installation Source for SuSE9.3 # rcslpd start # slptool findsrvs service:install.suse:http service:install.suse:http://server.net05.se/SuSE/9.3/CD1,65535 # insserv /etc/init.d/slpd
Configuring your DHCP server • For most comfort in network installation use a DHCP server! • It can be any DHCP server, but in our case we uses the install server • It delivers IP parameters to clients using dhcpcd, from e definded scope • It can also deliver deligated IP addresses based on client MAC • Install your DHCP server • First check if you have it • We had only the client and yast shell for the server • Install the dhcp libs and dhcpd-server • I do it all at once this time, yes by YAST! • Do not start your DHCP server yet • The dhcp server can by mistake deliver IP parameters to someone else • We will need to deliver IP parameters based on client MAC if using PXE boot. • Isolate your server and client from the rest of the network or release client IP address from server and wait…… # rpm -qa | grep dhcp dhcpcd-1.3.22pl4-202.2 yast2-dhcp-server-2.11.6-3 # yast dhcp-server
Configuring your DHCP server • Configure the dhcpd-server with yast the first time • It is a mess to do anything else, SuSE has clobbed the DHCPD server to much • SUSE LINUX Enterprise Server is more designed to work with dhcpd servers • Basic DHCP Setup will need: domain-name net05.se //Choose your domain name. primary-name-server 192.168.1.1 //Choose your 1:st DNS (secondary-name-server 80.84.37.3 //Choose your 2:ond DNS) default-gateway 192.168.1.1 //Choose your gateway ip-address-range 192.168.1.100 - 192.168.1.100 //Choose your range Check start dhcp server manually • Yast will prepare /etc/sysconfig/dhcpd and /etc/dhcpd.conf for you. • After installation and yast session you will have a sample /etc/dhcpd.conf! • You will need to add client MAC to this! option domain-name ”net05.se"; option domain-name-servers 192.168.1.1, 80.84.37.3; option routers 192.168.1.1; option ntp-servers 192.168.1.2; default-lease-time 14400; ddns-update-style none; subnet 192.168.1.0 netmask 255.255.255.0 { range 192.168.1.200 192.168.1.250; default-lease-time 14400; max-lease-time 172800; }
Configuring your DHCP server • Adding client MAC to /etc/dhcpd.conf • Will allow client to recieve same IP address at all time • Nessesary for PXE boot • If we like we can now remove the IP range. • Doing so will stop DHCP server to deliver IP addresses to any other host exept the one with correct MAC • Its now time to start your DHCP server • Dont do this if you do not know what you are doing. host client { hardware ethernet 00:A0:C5:B7:56:BD; fixed-address 192.168.1.101; option broadcast-address 192.168.1.255; } option domain-name ”net05.se"; option domain-name-servers 192.168.1.1, 80.84.37.3; option routers 192.168.1.1; option ntp-servers 192.168.1.2; default-lease-time 14400; ddns-update-style none; subnet 192.168.1.0 netmask 255.255.255.0 { # range 192.168.1.200 192.168.1.250; default-lease-time 14400; max-lease-time 172800; } # rcdhcpd start
Creating boot diskettes in SuSE • To boot the client you need floppies or CD (CD1) • Creating bootfloppies • Insert CD1 and • Will create bootfloppies images in /root • bootdisk1 contain msdos filesystem and syslinux bootloader • syslinux can be modified after booting needs • Creating floppies is easely done with dd • For each image make one floppy # cd # /media/SU930_F01/boot/mkbootdisk /media/SU930_F01 # ls boot? bootdisk1 bootdisk2 bootdisk3 bootdisk4 bootdisk5 bootdisk6 bootdisk7 # dd if=bootdisk1 of=/dev/fd0 2880+0 records in 2880+0 records out
Creating boot diskettes in Windows • To boot the client you need the bootdisk images • They can be found on internet if you do not keep them • Using Windows rawwritewin
Creating boot diskettes in Linux • It is basically the same procedure as in Windows • Create bootdisk • Create network drivers disk • These are the steps • Mount first cdrom and insert a floppy • Remove first floppy and inser a new blank floppy # mount /mnt/cdrom # dd if=/mnt/cdrom/images/bootdisk.img of=/dev/fd0 2880+0 records in 2880+0 records out # mount /mnt/cdrom # dd if=/mnt/cdrom/images/drvnet.img of=/dev/fd0 2880+0 records in 2880+0 records out # eject cdrom
Manual Network installation with SLP • Boot on CD1 or boot floppies • Move to INSTALL Press F3 and select SLP • Hit Enter, a list should appair with possible install servers • Choose one install server (FTP, HTTP or NFS) • Hit Enter again, observe how syslinux try to get up the network and start loading. • After a while, the standard installation will start. • System analyzis is performed, after that CD1 content is fetched from the install server • After CD1 is installed, system will reboot, remove CD1 • Installation will now continue with CD2 to CD5 if needed. • You will be asked for root password • Client network interfaces is analyzed • Allow VNC if question comes • Make the internet connection checkout if you need internet • On-line update can take as long time as whole installation up to now. • Add one local user NO AUTOLOGIN! • SuSE Splash text arrives, just accept and continue • Devices are now configured • System will continue loading to runlevel 5 or runlevel 3 depending on your selections in step7-9 and you try to login as root
Manual Network installation no SLP • Boot on CD1 or boot floppies • Move to INSTALL Press F3 and select (FTP, HTTP or NFS) • Depending on your choise you will now be asked Use DHCP addresses Not using any proxy Install server IP address or name + path to install sources Username + Password (if using ftp) FTP PATH is in our case /9.3/CD1 HTTP PATH is in our case /SuSE/9.3/CD1 NFS PATH is in our case /exports/network-install/suse/9.3/CD1 • Hit Enter after you choises, observe how syslinux try to get up the network and start loading. • After a while, the standard installation will start. • Rest of installation will be standard, jump to 7 on previous page.