Download
1 / 49
490 likes | 525 Views
Learn about the principles of geometric construction, including copying segments, bisecting angles, and constructing parallel lines. Develop a solid foundation in geometry for future tests and applications.

E N D
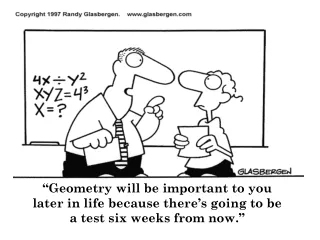
“Geometry will be important to you later in life because there’s going to be a test six weeks from now.”
Constructions E.Q. : How do we make formal geometric constructions using variety of tools and methods?
Geometric Construction Introduction • Based on principles of pure geometry and may be applied to any shape regardless of the size. • CAD is based on geometric construction so understanding geometric construction makes understanding how CAD tools work easier and increases proficiency.
Background- Euclid Euclidian Geometry was developed by a Roman citizen named Euclid. Euclid lived from approx. 330 to 260bc and wrote a 13 volume book called Elements which illustrated all the concepts used in Geometric Construction
Background- Why Didn’t He Just Use a Ruler The Greeks could not do arithmetic because: 1. They had only positive whole numbers represented by Roman numerals (I, II, III, IV, V) - no negative numbers - no fractions or decimals -no zero
Background- Why Didn’t He Just Use a Ruler So if the line were any length other than an even answer it could not be solved in Roman culture. Example: 5 / 2= 2.5 2. Had no measurement system with units so a line could not be measured. As a result they had to use other tools such as a compass and straight edge.
Drawing Guidelines • Draw constructions very lightly using guidelines. • Do NOT erase your guidelines- show your work. • Only trace over the final solution NOT the construction.
B’ Copy a Segment • Since a segment is a part of a line, we’ll start by drawing a ray that is somewhat longer than our intended segment, and call the starting point A’. A B • Place the Needle end of the compass on point A, and adjust its length to match the distance AB. • Without changing the width of the compass, put the Needle end of the compass on point A’, and draw the arc to cross your ray. Label the point of intersection B’. You’ve just copied AB to A’B’ A’
Bisecting a Segment • Place the needle of your compass on A. Make its width more than half-way to B, and make a half-circle. 2) Without changing the width of the compass, put the needle of your compass on B. Make a half-circle that overlaps the first one. A B 3) Draw a line that connects the two points of intersection of the two half-circles. That new line is both a bisector of the segment AB, and is perpendicular to AB.
C’ B’ Copy An Angle • Now go back to the original angle, and put your needle on the point of intersection of AB and the arc. Measure the distance along the arc to the ray BC. C B 5) Without changing the width of the compass, put your needle on the point of intersection of the arc and B’A’. Make an arc that crosses the first arc you drew on this new angle. A 6) Draw a ray from B’ thru the point of intersection of the two arcs. Label a point on the ray as C’. You’ve copied the angle ABC as A’B’C’. A’
Bisecting an Angle C • Place the needle of your compass on B. Draw an arc that crosses both BA and BC. E 2) Label the intersection of the arc and BA “D”, and the intersection of the arc and BC “E”. 3) Place the needle of the compass on D, and set the width to match more than half the distance to E. Make a half-circle. B A D 4) Leave the compass width as it is. Place the needle of the compass on E, and make a half-circle overlapping the previous half-circle. 5) Draw a line that connects the two points of intersection of the two half-circles. That new line is both a bisector of the angle ABC.
First, let’s review how to bisect an angle. Given an angle…
First, let’s review how to bisect an angle. Make an arc at the vertex….
First, let’s review how to bisect an angle. Go to the intersection of the arc and angle and make an arc.
First, let’s review how to bisect an angle. Now, the other intersection and make a arc
First, let’s review how to bisect an angle. Connect the intersection & vertex
Now, let’s construct the line parallel to a given line and through a given point that is not on the line. Draw a line through the point to the line.
Now, let’s construct the line parallel to a given line and through a given point that is not on the line. Make an arc.
Now, let’s construct the line parallel to a given line and through a given point that is not on the line. Make another arc.
Now, let’s construct the line parallel to a given line and through a given point that is not on the line. Measure the arc.
Now, let’s construct the line parallel to a given line and through a given point that is not on the line. Using the measure, make another arc.
Now, let’s construct the line parallel to a given line and through a given point that is not on the line. Connect the intersection and the dot
How about making a quadrilateral with one pair of parallel sides (a||b). Start off by drawing a point. a b
How about making a quadrilateral with one pair of parallel sides (a||b). Measure line b a b
Place the compass point on the dot you drew… How about making a quadrilateral with one pair of parallel sides (a||b). and make an arc. a b
How about making a quadrilateral with one pair of parallel sides (a||b). Now, draw the segment. a b
How about making a quadrilateral with one pair of parallel sides (a||b). Next draw a point not on the line, and connect the two dots. a b
How about making a quadrilateral with one pair of parallel sides (a||b). With the compass point on the first dot, create an arc. a b
How about making a quadrilateral with one pair of parallel sides (a||b). Repeat the last step with the second dot. a b
How about making a quadrilateral with one pair of parallel sides (a||b). Position the compass point halfway between the first arc and the first dot, draw an arc. a b
How about making a quadrilateral with one pair of parallel sides (a||b). Repeat the last step with the second dot; draw an arc. a b
How about making a quadrilateral with one pair of parallel sides (a||b). Measure line a. a b
How about making a quadrilateral with one pair of parallel sides (a||b). Place compass point on the second dot, and draw an arc. a b
How about making a quadrilateral with one pair of parallel sides (a||b). Connect the second arc with the second dot passing through the two intersecting arcs. a b
How about making a quadrilateral with one pair of parallel sides (a||b). Construct a line on the right side connecting the arc with the line and the lower arc. a b
How about making a quadrilateral with one pair of parallel sides (a||b). Do you see the quadrilateral? a b End day 1
3.8 Constructing Parallel and Perpendicular Lines (part deux) You will construct parallel and perpendicular lines. You will use constructions to explore attributes of geometric figures.
One last one. Let’s make a line perpendicular to another line going through a point not on the line. Create an arc from the point that cuts the line.
One last one. Let’s make a line perpendicular to another line going through a point not on the line. Create an arc from the point that cuts the line.
From the intersections make a smaller arc that goes more than a fourth of the way around.
Repeat step 3 from the other direction.
Next, connect the point with the intersection of the two arcs,
Draw a line parallel to the given line through the given point. Bisect the angle. Make quadrilateral with one pair of parallel sides (a||b). Draw a line perpendicular to the given line through the given point a b