Download
1 / 45
450 likes | 454 Views
CREATING CUSTOM CHARACTERS. IMPORTING BATCH DATA. SAVING DATA & TEMPLATES. CREATING SERIES DATA. PRINTING THE DATA. CREATING TEMPLATES. Creating Templates. CREATING CUSTOM CHARACTERS. IMPORTING BATCH DATA. SAVING DATA & TEMPLATES. CREATING SERIES DATA. PRINTING THE DATA.

E N D
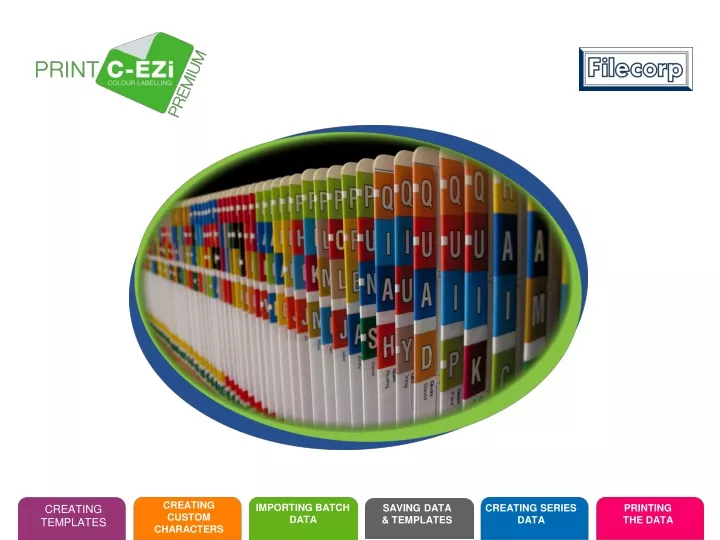
CREATING CUSTOM CHARACTERS IMPORTING BATCH DATA SAVING DATA & TEMPLATES CREATING SERIES DATA PRINTING THE DATA CREATING TEMPLATES
Creating Templates CREATING CUSTOM CHARACTERS IMPORTING BATCH DATA SAVING DATA & TEMPLATES CREATING SERIES DATA PRINTING THE DATA
How to start the “Print CEZi” Software Double click on this icon. The Print CEZi software can also be started by going to Start, All Programs and Print CEZi Filecorp The following screen will appear CREATING CUSTOM CHARACTERS IMPORTING BATCH DATA SAVING DATA & TEMPLATES CREATING SERIES DATA PRINTING THE DATA
How to create a new template Click on New template icon from the toolbar or go to File, create new template Click here CREATING CUSTOM CHARACTERS IMPORTING BATCH DATA SAVING DATA & TEMPLATES CREATING SERIES DATA PRINTING THE DATA
Selecting the required template Step One: Double clicking relevant template name from the available list Step Two: Double clicking the relevant template image Step Three: Highlight the template name and click OK Double click here Click “OK” Double click here CREATING CUSTOM CHARACTERS IMPORTING BATCH DATA SAVING DATA & TEMPLATES CREATING SERIES DATA PRINTING THE DATA
The New Template screen will appear in a format that represents the layout of the printed labels CREATING CUSTOM CHARACTERS IMPORTING BATCH DATA SAVING DATA & TEMPLATES CREATING SERIES DATA PRINTING THE DATA
Specify Label Layout - HINTS Place the pointer on any of the options to see the shaded area move. The shaded area of each label represents the portion of the label that is available to be printed on the template For Drawer filing choose TAB Top or TAB Top End Tab Click the OK buttonto create the blanklabel document. For Shelf Filing choose Lateral or Lateral End Tab CREATING CUSTOM CHARACTERS IMPORTING BATCH DATA SAVING DATA & TEMPLATES CREATING SERIES DATA PRINTING THE DATA
Label Entry Options Once you have specified the label layout you are now ready to create a label template. OR Place the mouse pointer on the first label and RIGHT CLICK to bring up a drop down list of available options Scan your mouse over the buttons (shown in the purple box) to show you what action each button can do CREATING CUSTOM CHARACTERS IMPORTING BATCH DATA SAVING DATA & TEMPLATES CREATING SERIES DATA PRINTING THE DATA
The following options are available Insert Characters - Insert individual characters (ABC or 123) onto the label. Insert Colour Flash - Insert a chosen colour flash onto the label. Insert Year Code - Insert a chosen year (09) onto the label. Insert Month - Insert a month onto the label. Insert Title Text - Insert lines of text onto the label. Insert Barcodes - Insert a barcode onto the label. - Insert a blank white space onto the label. Insert Gap Insert Image - Insert a chosen image onto the label. Repeat Last Insert - Repeat the last chosen insert. Note: Any combination of characters, flash, year codes, title text, bar codes and gaps may be used to make up the final label layout. Once your template has been created using the label entry options, save by File – Save As CREATING CUSTOM CHARACTERS IMPORTING BATCH DATA SAVING DATA & TEMPLATES CREATING SERIES DATA PRINTING THE DATA
How to insert characters TO START CLICK HERE SELECT “RANGE” CLICK “OK” • The size of the label is defaulted to 24mm (standard Filecorp label) but can be altered by using the drop down menu. • Click the OK button to place the character onto the label template. CREATING CUSTOM CHARACTERS IMPORTING BATCH DATA SAVING DATA & TEMPLATES CREATING SERIES DATA PRINTING THE DATA
Insert Characters… The label template will always default to this layout. This is to show the placement of the label CREATING CUSTOM CHARACTERS IMPORTING BATCH DATA SAVING DATA & TEMPLATES CREATING SERIES DATA PRINTING THE DATA
Alternative entry options - Characters Click here and enter the character • Click on any and type the character you want • The correct colour will automatically be allocated to each character. CREATING CUSTOM CHARACTERS IMPORTING BATCH DATA SAVING DATA & TEMPLATES CREATING SERIES DATA PRINTING THE DATA
How to insert Colour Flash Place the mouse pointer on the first label and Right Click to bring up a list of available options. Insert Colour Flash Select “Range” Click “OK” Click here • Click on a coloured square to choose the colour you want. • The size of label is defaulted to 24mm (standard Filecorp label) but can be altered by using the drop down menu. • Click the OK button to place the colour flash onto the label template. CREATING CUSTOM CHARACTERS IMPORTING BATCH DATA SAVING DATA & TEMPLATES CREATING SERIES DATA PRINTING THE DATA
Alternative Entry Options – Colour Flash • Right click the mouse on the colour flash. • Click ‘change colour flash’ on the dropdown menu and choose the colour you want • Or.. • 3. Type 0-9 on the colour flash for a different colour. CREATING CUSTOM CHARACTERS IMPORTING BATCH DATA SAVING DATA & TEMPLATES CREATING SERIES DATA PRINTING THE DATA
Change the Colour Flash • Right click on the selected label and it will bring up menu options. Click on Change Colour ID • The complete list of Colour ID will be displayed. Select the required colour. • This can be done for each label CREATING CUSTOM CHARACTERS IMPORTING BATCH DATA SAVING DATA & TEMPLATES CREATING SERIES DATA PRINTING THE DATA
Insert Year Code SELECT “RANGE” CLICK “OK” • Choose the appropriate year label that will be used. • The size of label is defaulted to 16mm (standard Filecorp label) but can be altered by using the drop down menu. • Click the OK button to place the year label onto the label template. CREATING CUSTOM CHARACTERS IMPORTING BATCH DATA SAVING DATA & TEMPLATES CREATING SERIES DATA PRINTING THE DATA
Change the Year Code • Double click on the year label area and type the two digits year code or right click the year label and it will bring up menu options. Click set text and type the two digit number you require. • This can be done for each label. Back to Option Menu CREATING CUSTOM CHARACTERS IMPORTING BATCH DATA SAVING DATA & TEMPLATES CREATING SERIES DATA PRINTING THE DATA
Insert Month Labels CLICK OK CLICK HERE • Choose the appropriate Month label that will be used • The size of label is defaulted to 24mm (standard Filecorp label) but can be altered by using the drop down menu. • Click the OK button to place the month label onto the label template Place the mouse pointer on the first label and Right Click to bring up a list of available options. Back to Option Menu CREATING CUSTOM CHARACTERS IMPORTING BATCH DATA SAVING DATA & TEMPLATES CREATING SERIES DATA PRINTING THE DATA
Alternative entry options – Month Labels Click here for “Set Text” Double Click here • Double click on the month label area and type month or right click the month label and it will bring up menu options. Click set text and type the name you require. • This can be done for each label CREATING CUSTOM CHARACTERS IMPORTING BATCH DATA SAVING DATA & TEMPLATES CREATING SERIES DATA PRINTING THE DATA
How to insert Title Text Enter text here Click here to change font style and size Right click here • Tick the ‘highlight first line’ to make the first line bold • Choose your font size (standard is 10) • Choose how big the row is to be (standard is 70mm) • Click the OK button to place the title text onto the label template Place the mouse pointer on the first label and Right Click to bring up a list of available options. CREATING CUSTOM CHARACTERS IMPORTING BATCH DATA SAVING DATA & TEMPLATES CREATING SERIES DATA PRINTING THE DATA
Alternative entry options – Title Text • Double click on the Title Text and type or edit text or right click the title text and it will bring up different menu options that include set text. Then type into the fields what you require or edit. • This can be done for each label CREATING CUSTOM CHARACTERS IMPORTING BATCH DATA SAVING DATA & TEMPLATES CREATING SERIES DATA PRINTING THE DATA
How to insert a Barcode Enter barcode ‘Information’ Click ‘OK’ • Enter the barcode information in the text box • Select the appropriate size • Click the OK button to place the barcode onto the label template Right click here Place the mouse pointer on the first label and Right Click to bring up a list of available options. CREATING CUSTOM CHARACTERS IMPORTING BATCH DATA SAVING DATA & TEMPLATES CREATING SERIES DATA PRINTING THE DATA
Alternative entry options – Barcode • Double click on the barcode and edit the text. • Then type into the fields what you require or edit • You can do this for each label. Back to Option Menu CREATING CUSTOM CHARACTERS IMPORTING BATCH DATA SAVING DATA & TEMPLATES CREATING SERIES DATA PRINTING THE DATA
How to insert a Gap Enter size Click OK • Enter the size of the gap you need. Measurement is in millimetres (mm) • Click the OK button to place the gap onto the label template. Right click here Place the mouse pointer on the first label and Right Click to bring up a list of available options. Back to Option Menu CREATING CUSTOM CHARACTERS IMPORTING BATCH DATA SAVING DATA & TEMPLATES CREATING SERIES DATA PRINTING THE DATA
How to insert a Image Browse and select the image Click OK • Enter the size of the gap you need. Measurement is in millimetres (mm) • Click the OK button to place the gap onto the label template. Right click here Place the mouse pointer on the first label and Right Click to bring up a list of available options. CREATING CUSTOM CHARACTERS IMPORTING BATCH DATA SAVING DATA & TEMPLATES CREATING SERIES DATA PRINTING THE DATA
OTHER KEY OPTIONS • Entering the key ‘+’ in a label inserts the character ‘Mc’ • Entering the key ‘-’ enters a blank in the label • To delete a row, highlight the row and use the ‘Delete’ key to delete the row • On ‘Right Click’ in a row you get the following options • Modify row size • Blank item – makes the label blank • Empty item – removes the data from the label • Delete the row • Insert ‘Mc’ CREATING CUSTOM CHARACTERS IMPORTING BATCH DATA SAVING DATA & TEMPLATES CREATING SERIES DATA PRINTING THE DATA
Creating Custom Characters IMPORTING BATCH DATA SAVING DATA & TEMPLATES CREATING SERIES DATA PRINTING THE DATA CREATING TEMPLATES
Creating Custom Characters Click on the drop down menu and select custom Click on create new to create new custom characters • To create a new custom character select the brand from the drop down menu as “Custom” • Click on “Create New” to create a custom character • Specify the details of the custom characters you want to create and click “OK” IMPORTING BATCH DATA SAVING DATA & TEMPLATES CREATING SERIES DATA PRINTING THE DATA CREATING TEMPLATES
Inserting custom characters in label • On the label, Right Click and select the option ‘Insert Custom Character’ and the list of custom characters will be displayed • Select the required custom character IMPORTING BATCH DATA SAVING DATA & TEMPLATES CREATING SERIES DATA PRINTING THE DATA CREATING TEMPLATES
Other custom characters in label • Following the same steps you can create Custom Characters for the following Label types • Colour ID • Year Code • Month Code IMPORTING BATCH DATA SAVING DATA & TEMPLATES CREATING SERIES DATA PRINTING THE DATA CREATING TEMPLATES
Importing Batch Data CREATING CUSTOM CHARACTERS SAVING DATA & TEMPLATES CREATING SERIES DATA PRINTING THE DATA CREATING TEMPLATES
Importing Batch Data - Importing Select ‘Process’ and the ‘Open CSV file’ You can import a CSV (Comma Separated Value) file toimport data onto your labels Select the CSV file you want to use. On selection the program will prompt ‘Does the File contain Column Header’ Make the appropriate selection CREATING CUSTOM CHARACTERS SAVING DATA & TEMPLATES CREATING SERIES DATA PRINTING THE DATA CREATING TEMPLATES
Importing Batch Data - Importing SELECT ‘PROCESS’ AND CLICK ON ‘ERGE DATA FIELDS’ Select ‘View’ and click on ‘data Once your CSV file is imported the data can be viewed by going to ‘View’ and click on ‘Data’. The data sheet will be displayed. CREATING CUSTOM CHARACTERS SAVING DATA & TEMPLATES CREATING SERIES DATA PRINTING THE DATA CREATING TEMPLATES
Importing Batch Data - Merging Data 1. Enter the name of the new data field Select ‘Process’ and click on ‘Merge data fields’ Select the two fields that need to be merged 3. Specify the character between the fields • Enter the name of the new data field • Select the two fields that needs to be merged • Specify the character between the fields such as space, ‘,’ etc. and then click OK • Use the pipe key ‘|’ for the text to go to next line • The user can continue merging more fields including the already merged fields. You can merge two column for example you can merge the first two columns to get a new column with the full name. For this go to ‘Process’ and then ‘Merge Data Fields’ CREATING CUSTOM CHARACTERS SAVING DATA & TEMPLATES CREATING SERIES DATA PRINTING THE DATA CREATING TEMPLATES
Importing Batch Data - Specifying Data In The Labels Select ‘View’ and then ‘labels’ to change view 1. Select the field Select Data Field 2. Select the character you want in the label from the field • To start specifying the data in the labels, go to ‘View’ and the ‘Labels’ to change the view of the labels • Then highlight a row and the right click and select ‘Select Data Field’ • Use the drop down menu to select the field you want • Select the character you need in the label from the field • Once you have clicked OK the field will be complete for all labels. Repeat the process for each field CREATING CUSTOM CHARACTERS SAVING DATA & TEMPLATES CREATING SERIES DATA PRINTING THE DATA CREATING TEMPLATES
Saving Data and Template CREATING CUSTOM CHARACTERS IMPORTING BATCH DATA CREATING SERIES DATA PRINTING THE DATA CREATING TEMPLATES
Saving The Template • The template can be saved at any time during the process of data entry • Go to ‘File’ and ‘Save’ or ‘Save As’ to save the file • If there is any data the file will be saved with the data and the user can open the template at a later time and file will open with the data in the labels CREATING CUSTOM CHARACTERS IMPORTING BATCH DATA CREATING SERIES DATA PRINTING THE DATA CREATING TEMPLATES
Saving The Data • After processing the CSV file the data can be saved directly from Print CEZi into a new .csv file • This is useful if the user has merged the data or made changes in the data sheet from within the Print CEZi program as seen in the previous section. • To save the data while in the data view go to ‘Process’ and ‘Export Data’ and specify the file name and the path CREATING CUSTOM CHARACTERS IMPORTING BATCH DATA CREATING SERIES DATA PRINTING THE DATA CREATING TEMPLATES
Creating Series Data CREATING CUSTOM CHARACTERS IMPORTING BATCH DATA SAVING DATA & TEMPLATES PRINTING THE DATA CREATING TEMPLATES
How To Insert Input Series Data • Select ‘Process’ from the top menu and click on ‘Create Series Data’ • Enter how the minimum number of character for the Series Data • Series Data specify the ‘Start at’ and ‘End at’ and the ‘Step Amount’ • Pad numbers Specify whether the series number to be padded • If the ‘Pad Number’ option is selected by checking the box, then the option to specify how many padding characters is required and what are the characters. All alpha and numeric characters can be selected. The maximum number of character allowed is 9. • Padding Positioning Specify the positioning of the Padding Character with respect to series data specified earlier, by selecting from the Drop Down box. The options are ‘Left’ and ‘Right’ • Show the total number of characters in example. CREATING CUSTOM CHARACTERS IMPORTING BATCH DATA SAVING DATA & TEMPLATES PRINTING THE DATA CREATING TEMPLATES
How To Set Up The Page • Select ‘File’ from the top menu then click on ‘Page Setup’ • Top, Left Margins are available in page settings • If the ‘Template Strips to Print’ option is selected by checking the box, then the option to specify to print • Print options Print Guide option is selected by checking the box, then the option to specify border of the Strips.Bleed colours is available 0 to 5mm is available for Strips CREATING CUSTOM CHARACTERS IMPORTING BATCH DATA SAVING DATA & TEMPLATES PRINTING THE DATA CREATING TEMPLATES
Printing the Labels CREATING CUSTOM CHARACTERS IMPORTING BATCH DATA SAVING DATA & TEMPLATES CREATING SERIES DATA CREATING TEMPLATES
Printing Labels • After specifying the data in the labels either through direct entry into the labels or through batch import, you can print the labels • Before printing you can preview the labels by going to ‘File’ and ‘Print Preview’ CREATING CUSTOM CHARACTERS IMPORTING BATCH DATA SAVING DATA & TEMPLATES CREATING SERIES DATA CREATING TEMPLATES
PRINTING LABELS • On selecting the ‘PRINT’ option under the ‘File’ menu the user can • 1. Select the printer • 2. Change the printer settings for this file • 3. Select the specific pages for printing • 4. Use the ‘Page Setup’ option in the ‘File’menu to specify • The Bleed • The specific strips for printing • Print Guides • Margins CREATING CUSTOM CHARACTERS IMPORTING BATCH DATA SAVING DATA & TEMPLATES CREATING SERIES DATA CREATING TEMPLATES
Thank you for using Print CEZi For more information and queries please contact Filecorp www.filecorp.co.nz info@sales.co.nz Phone 0800 43 45 46 Fax 09 827 5900 CREATING CUSTOM CHARACTERS IMPORTING BATCH DATA SAVING DATA & TEMPLATES CREATING SERIES DATA PRINTING THE DATA CREATING TEMPLATES