Download
1 / 26
260 likes | 415 Views
6th Grade Metal Relief Objective: T he students will. Materials 7”x7” piece of foil 7”x7” piece of paper 2 pieces of masking taper or blue tape pencil, eraser clay tools, scratch sticks, anything to use to emboss the foil felt (in red basket in closet) stack of manila paper

E N D
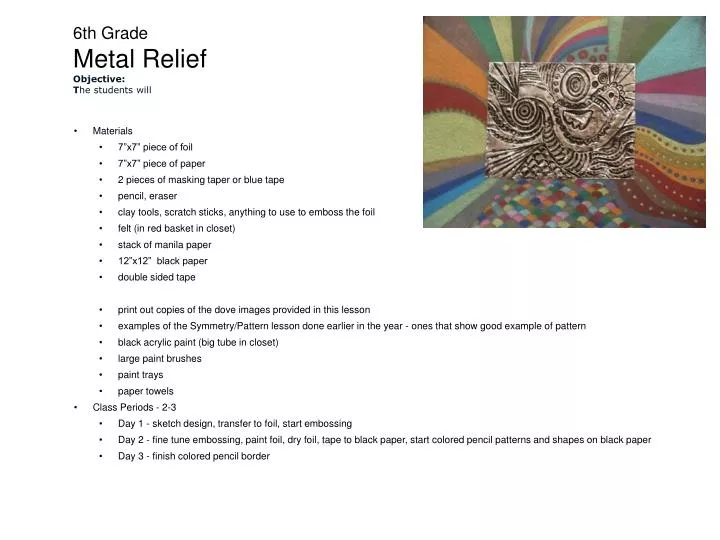
6th GradeMetal ReliefObjective:The students will • Materials • 7”x7” piece of foil • 7”x7” piece of paper • 2 pieces of masking taper or blue tape • pencil, eraser • clay tools, scratch sticks, anything to use to emboss the foil • felt (in red basket in closet) • stack of manila paper • 12”x12” black paper • double sided tape • print out copies of the dove images provided in this lesson • examples of the Symmetry/Pattern lesson done earlier in the year - ones that show good example of pattern • black acrylic paint (big tube in closet) • large paint brushes • paint trays • paper towels • Class Periods - 2-3 • Day 1 - sketch design, transfer to foil, start embossing • Day 2 - fine tune embossing, paint foil, dry foil, tape to black paper, start colored pencil patterns and shapes on black paper • Day 3 - finish colored pencil border
create a design with a dove as the focal point create patterns that radiate out from the dove
the patterns (on the foil) will later continue on to a black paper boarder • make the patterns interesting • large scale • small scale • thick lines • thin lines
Do not use tiny details or lines that are too close together. (ex. eyes on the dove) They will get lost in the transfer to foil. See how the colored pencil lines show but the embossed foil looses the detail a bit.
line up the paper and the foil tape at the top in 2 spots to keep from shifting place paper/foil on top of the felt
lift your paper to make sure all the lines transferred
remove the paper and tape go over all lines on the foil with a tool to make sure they are deep enough - (try not to go through the foil) because....
... later - paint will be used to enhance the embossed lines and show the details
flip foil over to the back emboss your design in relief from the back side - REPOUSSE BACK notice the image is in reverse FRONT
use the tools to emboss the back of the foil - making it raised on the front of the foil BACK FRONT
turn foil to front side refine embossed lines
add some textural effects front back
painting the foil use blow dryer to dry paint
center the foil on the black paper use double-sided tape to attach foil to paper
Use colored pencils to extend the patterns coming out from all sides of the foil design. Some of the patterns need to become more shape-like on the black paper.
examples of color intensity and foil pattern lines becoming pattern and shape on paper
Procedure (print this page to teach from) • Use the dove images as reference (not necessarily to copy from) to create a design on the 7x7 piece of paper. • recall the Symmetry lesson from earlier in year - using pattern, creating texture • draw radiating patterns out from the dove. Aim to have different patterns to add interest. • Different Patterns with thick/thin lines, large and small scale, close lines, far apart lines, etc. • Tape drawing to the foil • Lay on felt or pad of newspaper (or cardboard). • you need the felt as a cushion to emboss the foil • IMPORTANT - the order - felt on table, foil in middle, paper on top!!!!!!! • With your pencil, trace over all lines - • keeping the paper/foil taped - flip paper up to make sure all lines are transferred. • When all lines are transferred, carefully remove paper and tape from foil - start embossing • go over all lines with a tool to make sure they are deep enough to stand out - without going through the foil • the lines need to be deep enough for the paint to sit in later - this will show the details • Flip the foil over and tool design in relief from back side - repoussee. • Turn back over to front side and refine edges of the design. • during the repousee process, you may have lost some of your original relief lines on the front • Add any textural effects desired. For different types of lines and to create texture, use the clay tools, scratch sticks, etc. - Experiment!!
Procedure (print this page to teach from) PAINTING THE FOIL To age it and create more dimension, you paint the foil using black acrylic paint and a bit of water. Simply paint it on, then wiped away some with a paper towel. MAKE SURE YOU PUSH THE PAINT INTO THE RECESSES LINES! The paint will stay in the recesses and make the overall design pop out more. Experiment until you get the amount you like. You’ll need a little dab of water and some paint on the brush. Work quickly - no need to be fussy! Get the paint on there and start to wipe! IMPORTANT - The paint has to be wet in order to “wipe” some away. If it dries, it can’t be wiped and you should not push too hard trying to wipe away - it won’t work. If the paint dries, simply add a LITTLE water to your brush and “rework” the paint. IMPORTANT - The paint can not be too wet! If too wet - all the paint will wipe away. If it ends up being too wet, dry the brush and add more paint. Use the blow dryers to move the “drying” process along. It shouldn’t take to much time with the dryer. Make sure it’s dry to the touch. Once dry - mount onto black paper - centered Use double sided tape on all four corners - careful that it won’t show on the front. Use colored pencils to extend the different patterns coming out from all sides of the foil design. The color pencil area the patterns from the foil area need to become more shape-like on the black paper. The color needs to POP. Don’t just use simple lines. Fill in! See examples.
VOCABULARY • metal relief - a flat piece of metal that is embossed or engraved with a design • repousse - (pr. RE-poo-SAY) - the method of producing metal relief by embossing from the back • Embossing - the art of producing raised patterns on the surface of metal, leather, textiles, and paper. • radiate/radial - Radial means anything of, relating to, or arranged like rays.