Download
1 / 7
70 likes | 201 Views
ADIM-1. Windows 7 için. XP için. ADIM-2. Windows 7 için. XP için. ADIM-3. Windows 7 için. XP için. XP kullanıcılarıda aynı DNS numaralarını girecekler. ADIM-4. Windows 7 için. XP için.

E N D
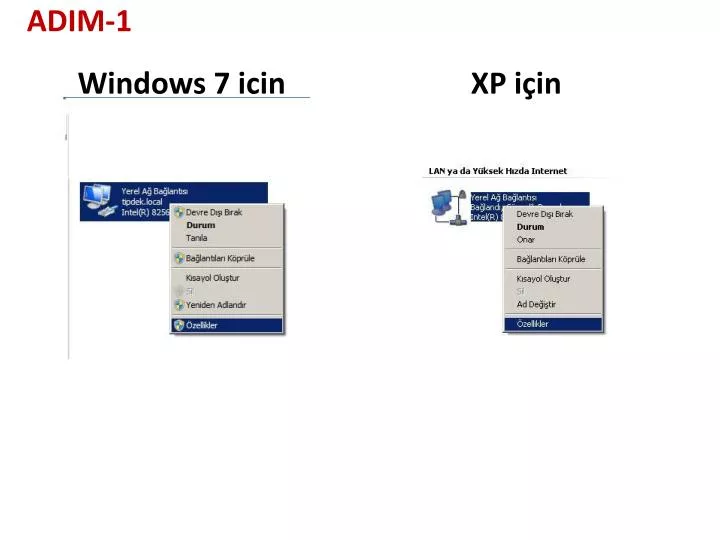
ADIM-1 Windows 7 için XP için
ADIM-2 Windows 7 için XP için
ADIM-3 Windows 7 için XP için • XP kullanıcılarıda aynı DNS numaralarını girecekler
ADIM-4 Windows 7 için XP için • Masaüstünüzde bulunan Bilgisayarım ikonuna sağ tuş ile tıklayarak Özellikler seçeneğini seçiniz.
ADIM-5 Windows 7 için XP için • Bilgisayar adı, etki alanı ve çalışma grubu ayarları kısmından Ayarları değiştir seçeneğini tıklayınız.
ADIM-6 Windows 7 için XP için • Bilgisayar adı sekmesinde Değiştir tuşunu tıklayınız. Açılan pencerede bilgisayar adınızı ve çalışma grubunuzu görebilirsiniz.
ADIM-7 Windows 7 için XP için • Etki alanı kısmına tipdek. local yazınız ve gelecek olan ekranda sizden kullanıcı adı ve parola istenecektir. Oraya küçük harflerle kullanıcı adı admin parola ad_123456 olarak girilecek ve etki alanınız artık tipdek. local olarak değişmiş olacaktır.