Download
1 / 17
170 likes | 295 Views
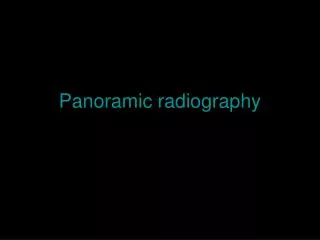
Diagnostic Panoramic Images. DHY 202 Clinical Radiology I Dental Hygiene Department William Rainey Harper College. Introduction. Dental radiographers often taught to identify panoramic technique errors by viewing the teeth.

E N D
Diagnostic Panoramic Images DHY 202 Clinical Radiology I Dental Hygiene Department William Rainey Harper College
Introduction • Dental radiographers often taught to identify panoramic technique errors by viewing the teeth. • Important to look at other anatomical features besides the teeth when assessing diagnostic quality of a panoramic radiograph.
Criteria for Diagnostic Quality of Panoramic Radiographs • Entire maxilla & mandible recorded • Symmetrical display of structures right to left • Slight smile/downward curvature of occl plane • Minimal over or under magnification of teeth
Criteria for Diagnostic Quality of Panoramic Radiographs • Tongue positioned against palate to avoid palatoglossal air space • Minimal or no cervical spine shadow • Acceptable film density & contrast • Free of technical, film handling & processing errors
Assessing The Diagnostic Quality of Panoramic Radiographs • Divide the panoramic radiograph into six zones: three are in the midline and three are bilateral Six zones
Assessing The Diagnostic Quality of Panoramic Radiographs • Zone 1: Dentition • Zone 2: Nose-Sinus • Zone 3: Mandibular Body • Zone 4 & 6: Four corners, Condyles & Hyoid • Zone 5: Ramus-Spine
Zone 1: Dentition • Smile-like upward curvature • Interocclusal space between arches • Anterior teeth neither too large or so narrow as to create “pseudospaces” between them • Posterior teeth should not be larger or smaller on one side than the other • No excessive overlap of the premolars on one side versus the other
Zone 1: Dentition (cont) • Apices of max or mand teeth shouldn’t be cut off • Crowns of anterior teeth shouldn’t appear fractured or obscured
Zone 1: Dentition The teeth should be separated and arranged with an upward curve posteriorly, producing a smile-like arrangement.
Zone 2: Nose-Sinus • Images of inferior turbinates contained within the nasal cavity • No image of the soft tissue nose cartilage • The hard palate shadow (double image) and sometimes the ghost images of the palate must be seen within the maxillary sinuses (above apices of posterior teeth) • Tongue in contact with hard palate-no intervening air
Zone 2: Nose-Sinus The inferior turbinates within the nasal fossa & the hard palate shadows above the root apices
Zone 3: Mandibular Body • Inferior cortex of mandible should be smooth & continuous • No ghost image of hyoid • Midline area should not be overly enlarged superiorly-inferiorly
Zone 3: Mandibular Body The inferior cortex of the mandibular body should be smooth & uninterrupted.
Zone 4 & 6: Four Corners; Condyles & Hyoid • Condyles somewhat centered in zone 4 & of equal size & on same horizontal plane • Body of hyoid bone in zone 6 should appear as a double image equal in size bilaterally & should not spread across the mandible.
Zone 4 & 6: Four Corners; Condyles & Hyoid Zone 4: The condyles are centered & equal in size & position bilaterally. Zone 6:The hyoid bone should remain in this zone
Zone 5: Ramus-Spine • Ramus should be same width bilaterally • Spine can be present as long as it does not superimpose on the ramus; distance between the spine and ramus should be the same bilaterally.
Zone 5: Ramus-Spine The ramus should be equal in width bilaterally & the spine should not be superimposed on the ramus.