Download

1 / 26
260 likes | 319 Views
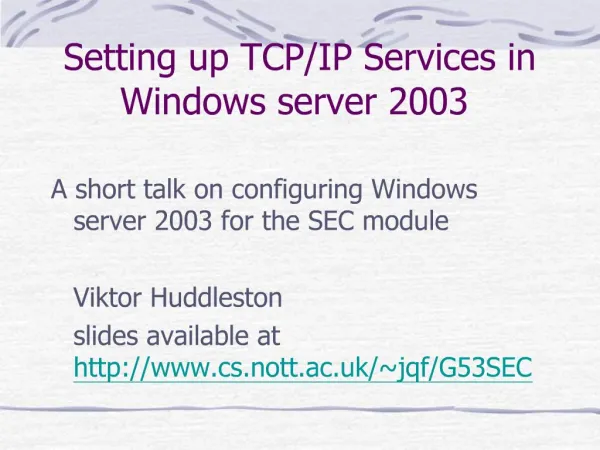
Setting up Writelog Networking for Contests at PJ2T. Version 1.0 19 July 2011 W0CG. Writelog at PJ2T Conceptual Overview. The Station # 1 computer is the main computer for the logging network.

E N D
Setting up Writelog Networking for Contests at PJ2T Version 1.019 July 2011W0CG
Writelog at PJ2TConceptual Overview • The Station # 1 computer is the main computer for the logging network. • We first build a log for a contest at Station # 1 so that it contains exactly all the windows and functions and parameters we need. (Example log follows.) • Next, we go to Station 2 and copy an exact copy of that log from Station 1 to Station 2 (procedure follows), then save that log on the Station 2 local C:\ drive. • Same thing for Stations 3 and 4. This assures that all four computers have exactly identical Writelog log setups. • Then we use Writelog networking (procedure follows) to link the Station 2 computer to Station 1, which is the master log. • Next, we link Station 3 to Station 1, and finally link Station 4 to Station 1. • For Multi/2, we use the Radio dropdown menu to designate Station 1 as Radio (A) and Station 2 as Radio (B). • Finally, one of the computers (usually Station 3) is linked via Telnet to a cluster node, normally K3LR, and the other three computers are linked to Station 3 via the Writelog local network (procedure follows) in order to get the spot data to all computers.
PJ2T Writelog Network Layout • This is what the PJ2T Writelog network looks like at the completion of the configuration process. • The rest of these slides explain how to set this up. Writelog networking link Writelog Master Computer Station 2 PC Station 1 PC Writelog Telnet link Station 3 PC Writelog networking link Internet K3LR, W8WTS, or other PacketCluster node Station 4 PC Writelog networking link
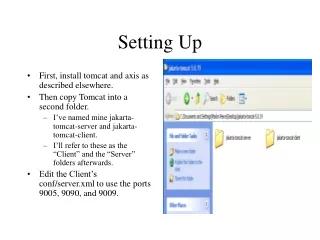
Procedure Step 1:Create Master Log on Station 1 PC • Learn Writelog. (This guide assumes that you know generally how to manipulate Writelog.) • Create a new, empty log for your contest on the Station 1 PC. Writelog Start a new log • Be sure that all the needed windows are there, and arrange them for best functionality and best use of screen space. • Be sure that: • You selected the correct contest, • You have Summary, Packet Spots, Networked Frequencies, Rates (if desired), Band Changes (if needed), QSO Entry Window, Check Call, Super Check Partial, Network Gab, and Sked (if needed) windows, • You have correctly configured Setup, Ports (next page) and Setup, Super Check Partial (two pages after this), • If it is the WPX contest, which requires separate serial numbers for each band, be sure to do Setup, Sort order and serial numbers (third page after this) • You have done Setup, Save Configuration (fourth page after this), and entered the correct name and address. • Save the log on the Station 1 PC in C:\Writelog\Contests with a name like arrl.dx.cw.2011. • Get everyone on your team to look at this log on Station 1 and be SURE it is exactly like they want. Adjust font sizes, layout, window selection until everyone is happy, because this is the master for all the other computers. • Save again (File, Save) after all changes are finalized.
Master Log Example • Here’s an example of what the Station 1 master log might look like except that it will, of course, be initially void of QSOs.
Setup, Ports • Setup, Ports window usually looks like this for the new Dell PCs • See the label on the PC, but normally the rig is on COM3 and CW is on COM4. • FT-2000 requires baud rate of 4800. Other radios are OK with “default.” • For phone contests, don’t use the Writelog DVK because we use the FT-2000 built in voice keyers or outboard MFJ voice keyers.
Setup, Super Check Partial • Setup, Super Check Partial should look like this. • The Dta files are stored in C:\Writelog\Programs\. • Use MASTER.DTA or whichever of the other three .DTA files is correct for your contest. • (Be sure you have downloaded the latest versions of these files from www.supercheckpartial.com. Sometimes these are updated only a day or so before the contest.)
Setup, Sort order & serial numbers • The WPX contest requires separate serial numbers for each band. • Use the Setup, Sort order & serial number drop down menu and select Separate by band instead of the normal Total of all bands.
Setup, Save Configuration • Don’t check “Packet” for an unassisted Single Op contest • It’s usually best to use Geoff’s address unless you are going to be submitting the log yourself.
Radio Dropdown Menu • If it’s a Multi/2 contest, on Station 1, select Radio, This Radio Is Run (A) Radio • On Station 2, make that radio (B).
Procedure Step 2:Open Master Log from Station 1 and Save it on Station 2 • Move to the PC at Station 2 • Start Writelog and select Browse for existing log • On the “Open” screen, click Network, then double-click on the entry for the PC at Station # 1. (That PC will be designated something like “PC35.” See the white paper label on the Station # 1 computer to know for sure.) • If you are asked for a user name and password, both are PJ2T (in all caps).
Procedure Step 2:Open Master Log from Station 1 and Save it on Station 2(continued) • Then click on Writelog, then on Contest, and then on the name of the master log you created at Station 1. • This will open an EXACT REPLICA of the master log that you created on Station 1. • Save that log on the local C:\ drive on Station 2 (see next page).
Procedure Step 2:Open Master Log from Station 1 and Save it on Station 2(continued) • Then save the log on the local C:\ drive of Station 2 by doing Writelog File, Save As, and click on Computer, then Local Disk (C), then Writelog, then Contest, and finally Save. Examples below. • When this is complete, you will have identical logs on C:\ of Station 1 and Station 2.
Procedure Step 3:Open Master Log from Station 1 and Save it on Station 3, then again on Station 4 • Now move to the Station 3 PC and do the same thing to open the Master log from Station 1 and save it on the local C:\ drive on Station 3. • Move to Station 4 PC and do the same thing to open the Master log from Station 1 and save it on the local C:\ drive on Station 4.
Procedure Step 4: Link PCs Together Using Writelog Networking • At this point we have four exact copies of Writelog on four computers, but they are not yet communicating on the Writelog network. • Now we need to follow the procedure on the next page to create the links so that the network will look like this: Writelog networking link Station 2 PC Station 1 PC Station 3 PC Writelog Master Computer Writelog networking link Station 4 PC Writelog networking link
Procedure Step 4:Link PCs Together Using Writelog Networking • On the Station 1 PC, do Writelog Setup, Register to accept network connections… • In the resulting window (below), be sure to click Tcp/IP, put in A for the distinguishing letter, and then click “OK.” • Do Setup, Save Configuration and then do File, Save to retain these changes. • (At PJ2T, Station 1 is always “A”, Station 2 “B”, etc. )
Procedure Step 4: Link PCs Together Using Writelog Networking • Now go to the PC at Station 2 and do Writelog Setup, Register to accept network connections, and put in “B”, select Tcp/IP, and click “OK.” • Still at Station 2, again do Setup, link to network, and in the resulting screen, put in PC35 or whatever is the number pasted on the PC at Station 1 and click “OK.” • After a moment or two Writelog will do its magic and the PC at Station 2 will be networked to its master at Station 1. • Do Setup, Save Configuration and then do File, Save to retain these changes.
Procedure Step 4: Link PCs Together Using Writelog Networking • The network will now look like the diagram below. • Now go to Station 3 and repeat the preceding procedure, designating that PC as “C” and then linking it to the machine at Station 1. • Do the same thing at Station 4, designating that PC as D and linking it to the PC at Station 1. Writelog networking link Station 2 PC Station 1 PC Station 3 PC Writelog Master Computer Station 4 PC
Procedure Step 5: Log Into a PacketCluster from Writelog • Usually the Station 3 PC is used to Telnet to a PacketCluster. This makes it easy to reconnect when necessary without bothering the operators at Stations 1 or 2. • Find the Writelog Packet Terminal window. (It is often hidden underneath the Writelog main window.) • If you can’t find it, open it from Writelog, Window, Packet Window • Then do File, Telnet… and enter the address of the desired PacketCluster as shown. • When the connect occurs, log in as PJ2T.
Procedure Step 6: Network Packet Spots to All Other Writelog Computers • At this point, spots are only flowing to the PC at Station 3, or whichever one you just Telnetted to. • Writelog has the capability to send those spots over the Writelog network • Go to the Station 1 PC, find or bring up the Writelog Packet Terminal Window, and do File, Local network… and enter the PC number of the PC that is Telnetted to a cluster. This is usually the PC at Station 3.) • Wait a moment and you should see spots appearing at Station 1. • Now do the same thing at Stations 2 and 4 and you will have spots flowing to all four PCs.
Done: The Logs are Built and Networked • Now you’ve established the network as shown below. Writelog networking link Station 2 PC Station 1 PC Writelog Telnet link Station 3 PC Writelog Master Computer Writelog networking link Internet K3LR, W8WTS, or other PacketCluster node Station 4 PC Writelog networking link
Other Setup Considerations • Be certain that you have the latest .CTY files from the contest committees. • Carefully check the date and time on every computer to be sure that they are correct and are synchronized to the Internet time servers. • (The new Dell Windows 7 machines are set up to synchronize to the Internet time servers automatically.) Start; Control Panel; Clock, Language, and Region; Set the time and date; Internet Time tab. • For CW contests, be sure that the stored CW messages are as you want them, as shown in the Writelog Setup, CW/RTTY/SSB messages… dropdown below.
When Things Go Wrong • If the spots stop coming in, first try to reconnect to the Station 3 PC • If that fails, or if you are at Station 3 itself, check to see if you are still logged into the PacketCluster. If not, then reconnect using File, Telnet… and enter the address of the desired PacketCluster as shown. • When the connect occurs, log back in as PJ2T.
When Things Go Wrong • If one of the computers becomes disconnected from the Writelog network, simply do Setup, register to accept network connections and then Setup, Link to network and re-link to Station 1’s PC. • If a computer stops altogether, try to restart Writelog. If it starts OK, answer “No” to the question about the journalled file, let Writelog start, then reconnect to the network. • Writelog will automatically resynchronize the computer with the other logs in about 15 seconds. • If nothing else works, do a cold restart of the bad PC and re-network it into the Writelog network and it will come up and resynchronize automatically.
Quick Start Checklist • Build log at Station 1 • Be sure to configure super check partial • Setup, Ports for radio and CW, then Save the log • Open that log at Stations 2, 3, 4 and save on the local C: drives • Network 2, 3, and 4 to Station 1 using Setup, register to accept network connections and Setup, Link to network • For M/2, set up Radio A at Station 1 and Radio B at Station 2 • For WPX, set up Serial numbers separate by band • Telnet to a PacketCluster on Station 3 PC • Writelog Packet Terminal, File, Local Network to Station 1 PC on 1, 3 and 4 • Check date and time on all computers • Resave log and configuration on all computers • Don’t log any QSOs until contest begins.