Download
1 / 59
590 likes | 597 Views
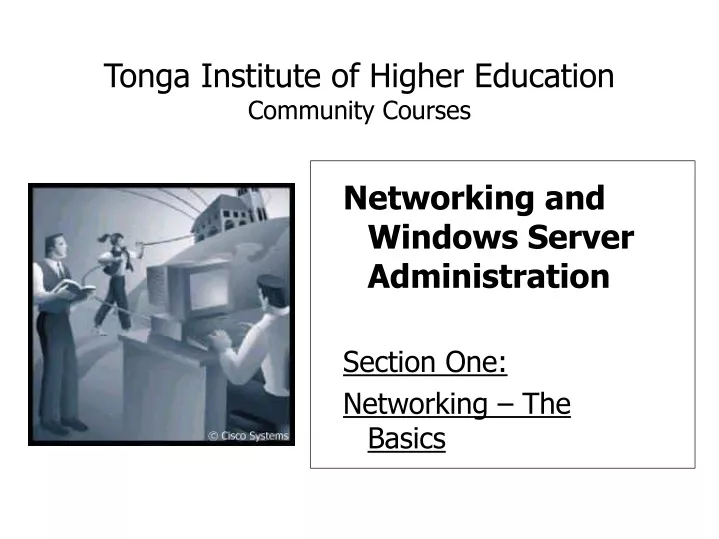
Tonga Institute of Higher Education Community Courses. Networking and Windows Server Administration Section One: Networking – The Basics. Goals. This short training course aims to achieve a few goals: All should know what a network is All should know how a network works

E N D
Tonga Institute of Higher EducationCommunity Courses Networking and Windows Server Administration Section One: Networking – The Basics
Goals • This short training course aims to achieve a few goals: • All should know what a network is • All should know how a network works • All should know how to build a network • All should know how to use Windows Server in a network • After this training, you will have built your own network and should understand all the pieces needed
Networking – The Beginning • What is a network? • A network is a group of two or more computers connected together • What types of networks are there? • The most common are LAN (Local Area Network) and WAN (Wide Area Network) • In a LAN, the computers that are connected together are physically close together (like in an office) • In a WAN, the computers may be very far apart and connected through satellites, wireless and fiber optics (like the Internet)
Purposes of Networks • Why does anyone want to use a network? • A network can let people do many things that are difficult or take a lot of time without networks. • Some examples: • If you only have one printer, you can let all the computers use that printer • If you have documents or programs you need to share between people • You want to protect your computers from bad people and need passwords
Describing Networks... • A network can be described using a few simple ideas. • 1. Topology • This describes how the computers are connected together. • Common examples are bus, ring and star BUS STAR MIXED
Describing Networks 2. Protocol • This describes the way that the computers will talk to each other on the network. • Just like people need to understand the same language in order to communicate with someone, computers must also use a language that all of them can understand • The most widely used protocol is called Ethernet, (what we will use). • An older protocol is called Token-Ring
Protocol • The difference between Ethernet and Token-Ring is in how they decide what computer is allowed to send data on a network. • In a Token-Ring network, there is something called a token, which a computer must have, before they can send data. So sometimes computers must wait awhile before sending data • In an Ethernet network, each computer sends data as fast as it can, and if two computers send at the same time there is a collision. • When a collision happens, the computers know they will just send the data again and hope it is not at the same time. • This is actually much faster than Token-Ring
Describing Networks 3. Architecture • This describes the setup of the computers • The two options are Peer-to-Peer and Client/Server • In a Peer-to-Peer network, all computers are on the same level. There is no server. Computers are in a Workgroup where they can share files, printers and programs. This is good if there are only a few computers • In a Client/Server network, there is one or more special computers, called Servers, that provide services to all the other computers, called Clients. • These services could be Internet sharing, email, web pages, printing and user logons and passwords. This is used if there are many computers and security is important
Local Area Networks • In the past, networking equipment was very expensive, so only big companies could afford it • But with prices as low as they are now, almost anyone can afford the things • For LANs, the first thing to decide how fast your network will be. • A 10Base-T sends data at 10 million bits a second. (Equipment - cheap) • A 100Base-T network sends data at 100 million bits a second. (Equipment - more expensive
Local Area Networks • To create a network, you will need three pieces of equipment • Ethernet cards – the thing that goes in your computer that will connect to a network (most have them inside already. Cost: about $40 pa'anga) • Ethernet cable – the wires that connect the network. (Cost: $3 pa'anga a meter) • Hubs, Switches, or Routers – the machines that connect the wires together (Cost: $60 - $120 pa'anga)
Ethernet Cables • There are two main types of cables you can use: Twisted Pair or Coaxial • Twisted pair (the kind we will use) is cheaper and connects directly from computer to hub. They are also known as CAT-5 cables or UTP cables. • On the end of the cables there is an ethernet connector (called a RJ-45 connector) which is a little bigger than a telephone connect • Coaxial cable is bigger, more expensive and harder to use. We will not use it
Hubs • Hubs are devices that connect the computers together. You connect the Ethernet cable from each computer to a “port” on the hub • Each hub has a different number of ports, and you can get hubs with 4,8,12,16 ports or more. The number of ports you have determines the number of computers you can connect to each other.
Hubs • There are different types of hubs you can buy depending on your network • If you have a small network with no more than 10 computers, a Stand-Alone Hub is an inexpensive solution. • A Stackable Hub are hubs that can be connected together if you have hundreds of computers. They are good if you will have many computers in one network Stand-alone Stackable
Routers • Routers are similar to hubs in that they connect networks together, but routers are used to connect different networks together. • Most of the time, you will use a router to connect your network to the Internet. • It is a special device that determines where the data should go on your network. Either to the internet (or another network) or stay inside your LAN ROUTER HUB
Bridges and Switches • A Bridge is similar to a router, except less expensive and not as complicated • It will just send data to different networks and nothing else. Routers can usually be changed to send data in faster, or different, ways • A Switch is a device that is like a very fast hub. It can switch data to go to the right place very fast. • For example, if you had more than one room of computers, you could connect the two rooms together with a switch
Repeaters • Sometimes your network might be in a lot of places and you will have to connect computers far away. • There is a limit to how far an Ethernet cable can carry data. If it is too far, the data will disappear. • So you need a Repeater to get the data before it disappears and repeat it again on the network. • For example to connect two building that are across a road, you might need a repeater to make sure the data lives
Wireless Networking • Another good option to be aware of is Wireless Networking. • Wireless networking allows you to connect networks together without wires. • This is good if you have a laptop computer and want to move around. • It is also good if it is hard to connect two places together with wires. It is possible to get a Wireless Bridge that will connect the two places together
Wireless Networking • To do wireless networking in a place, each computer needs a Wireless Network Card (about 80 pa'anga) and a Wireless Access Point • A Wireless Access Point is like a hub for wireless networks. Usually, they also have a port to put in a CAT-5 cable, so you connect wireless network to the network with wires. • Each Access Point can reach about 200 meters, but newer ones claim they can reach for a mile in every direction • An Access Point will cost around 200 pa'anga
Wireless Networking • Wireless Networking (also called Wi-Fi) is based on radio waves. • This means that data is transmitted over radio waves, just like radio stations • There are a few standards of wireless that are used. They are called 802.11a, 802.11b, 802.11g • The most common is 802.11b and will work with most wireless devices you can purchase. This is the one you should make sure you get
Peer-to-Peer • The first half of this short training will focus on Peer-to-Peer networks. The second half will look at the Client/Server networks. • With a peer to peer network, we want to be able to do a few things like share files, share printers and look at security features that need to be changed to make these happen. • We also want to know how to configure the computers to talk to each other • We also want to be able to know how to physically connect computers
Outline of steps to make a Peer to Peer Network 1. Connect wires from computer ethernet cards to hub. • Make sure lights appear on the hub. If there is no light, then there is a problem with your cable or your ethernet card 2. Open Network Properties and configure the correct network information. • This includes IP address, gateway, netmask and DNS servers. 3. Share folders, printers, internet
Changing network properties • After you log onto the Windows XP computer, we are going to change network settings so that the computers can talk to each other
Changing Network Settings • With network connections open, we will see a picture that represents our Ethernet Card. It will give the name of our Ethernet Card and tell if it is connected properly or not. • When we double-click on this we can change important settings
Important Network Setting Ideas • Before we go any further we need to discuss what some important ideas are that we use in networking. • These ideas are what allows us to connect computers together and let them talk to each other. • The most important to know about are IP Addresses.
IP Addresses • IP Addresses is the way that computers know how to find each other on a network. They are addresses where they can receive “mail” from other computers • IP Addresses will look like this: 192.168.0.1 • Four numbers, each separated by a dot “.” • Each number can go from 0-255. • Every computer that is connected to the internet, every website on the internet and every computer on any network must have an IP address, otherwise no one could send it data
IP Addresses • There are special IP Addresses that have been made just for LANs. This is so that you do not pick an IP address that is being used by a computer on the Internet. • For example, if you put your IP address of a computer as the same one as hotmail.com, then everytime you tried to go to the Hotmail.com website, your computer would try to go to the computer on your LAN • These IP addresses that are special start with 192.168.x.x • The .x.x means that any numbers between 0 and 255 can go there
Netmask • Netmask – The netmask is a number that tells your computer what kind of IP addresses to expect from other computers. • If it seems confusing, always put “255.255.255.0” • This means that all your IP addresses on your LAN start with the same first three numbers in their IP addresses • For, example if every computer on your network started with “192.168.0.x” then your netmask should be “255.255.255.0”
The Gateway • The Gateway is another IP address that the computers expect to know. • A Gateway is either a computer or a device (like a router) that connects from one network to another • So, for example, if you try to go to Hotmail.com, your computer will try to find Hotmail.com on your network, and if it cannot find it on your network, it will ask the Gateway to get the Hotmail.com webpage. • The Gateway forwards data to other networks (most often the Internet) • Your gateway should usually be given the first IP address on your network, (Ex. 192.168.0.1) • If your LAN is not connected to the Internet or a router, than you do not need a Gateway
DNS – Domain Name Service • You will also be asked for something called DNS servers. • DNS means Domain Name Service, which is a way to change names like Hotmail.com into an IP address like 206.144.22.63 • For a long time there were only IP addresses, but when a lot of computers joined the Internet, it became hard to remember all those numbers • So people made names that could be changed into IP addresses • The way they would change from the names to IP addresses is with the DNS
DNS – Domain Name Service • The DNS IP numbers that you will put in will come from whoever gives you your internet. If TonFon is providing Internet, then they will tell you the DNS numbers to put in. • If you are not connected to the Internet, you will not need to use DNS numbers. • DNS is used only to change a name (like yahoo.com) into an IP address, and if you are not connected to the Internet, it is not necessary to have DNS
Changing Network Settings • We can view our network settings by looking at the support option. This will tell us things like IP address, gateway and netmask. • If we look at “Details,” we can see even more information about our settings.
Changing Network Settings • When we are ready to change the settings, we want to go to Properties and then look at “Internet Protocol (TCP/IP)”
TCP/IP • Why do we want to look at TCP/IP and what is TCP/IP? • TCP/IP is a protocol for sending data over networks. That means it is the language that programs use if they want to send data to other computers. • It is the way they talk to each other. (Think about a protocol like a language that people use. If you don’t know the language, you cannot understand) • TCP/IP stands for Transmission Communication Protocol / Internet Protocol
What numbers should I put in? • We will click on “Use the following IP address” • This allows us to enter IP address in ourselves. • For an IP address, because it is a LAN that we are making, we will use “192.168.0.x” • Usually the server on a network has the first number (192.168.0.1) and other computers come after. You are free to use any numbers between 1-254. If you use 0 or 255, there could be problems • So for the first computer, use 192.168.0.1 and the second, 192.168.0.2
What numbers should I put in? • For the netmask, we will put in 255.255.255.0. • We will almost always use this number for all networks. • It is not important to have a gateway, so we can leave it blank. • Remember, we only need a gateway if we are connected to the internet • The same for DNS, we can leave them blank because we do not need to change names like yahoo.com to a IP number
Static and Dynamic IP addresses • Why do they have a button that says, “Obtain IP address automatically” and “Use the following IP address” • If you obtain an IP address automatically, it means that you are using a Dynamic IP address. • This means that your IP address will change every time the computer starts • Where does it get the IP from? • A server will give computers IP address. This is called “DHCP” and it means that when a computer starts, it will ask a server for an IP address • Then the server will give it one. • When you put the numbers in yourself, it means that you are using a Static IP address (because it will not change)
Checking Networks • After we enter the numbers and press “OK” how do we know if the network is working? • The first thing to check is that the IP was set correctly and the computer accepts it. • We can use a program from the command line called “ipconfig” to check the IP settings
Checking Networks • We also want to check to see if the network is working. • How can we tell if computers are talking to each other? • There is a program called “ping” that we use to check a network connection • It sends a little piece of data to another computer. If the computer gets it, the computer will respond. • This will show you if the network is correctly set up
Your Network is Working • Now that your network is working, it’s time to decide what you want your network to do. • Since we only have a “Workgroup,” our choices are limited. • We will try to share files, learn about permissions and users, share printers, share programs, and map network drives • When we set up the server there will be many more options that you have. • But knowing what kind of network you need is important. You do not want to waste a lot of time doing more work when you do not need to. • If you just need to share files, then a workgroup will be enough
Computer Names • How do computers access your computer now? • First they need to know your computer name. • Your computer name is a name that Windows has for each computer. It is like an IP address, except it is a name and easier to remember. • You can change the name of your computer by editing some system information
Computer Names • You should give your computer a name you can remember and that means something. If it is the first computer in the office, name it Office1. Or you really like your computer, name it TupouIV • You will also see on this screen a Workgroup field. Remember, Workgroup means you are using a Peer-to-Peer architecture. The Domain is for the Client/Server • All your computers on a network should have the same Workgroup name to make things easier. • If you work at a Bank, your Workgroup could be “BankGroup”
Creating a Workgroup • Since we are making a Peer-to-Peer network, we will put the computer in a workgroup. • All the computers on a network should preferably be in the same Workgroup. (That means they have the same Workgroup name) • You will be able to share files and printers even if you do not have the same workgroup, but to make things easier, try to use the same names
Computer Names • After you change the name or Workgroup, you need to restart to make the changes. • After the computer restarts, your name will be changed and other computers can access your computer with that name • How do they access a computer (and your shared folders)??? • Go to the Start->Run and you want to type something special in. • Type “\\” and then the name of the computer. • If you want to access a computer named “Office1” type “\\Office1” • You will see a list of the shared folders for the Office1 Computer
Sharing Files • File sharing is an important goal for any network. To get file sharing working on Windows there are a few steps we need to take • First, make the folder that you want to share and then go to “Sharing and Security”
Sharing Files • Then we need to enable sharing and set the right security permissions. • So first, enable sharing by clicking on “Share this folder” • Give it the name that you want other people to see on your network. • This is called the “Share name”
Sharing Files • Security Permissions: • Before a folder is shared correctly, it needs to have the correct permissions • Permissions is a way to limit who is allowed to do things to files and folders on a network. • Maybe you want some people to be able to change a file, but other people to only read that file • Maybe you have secret loves notes that you do not want your wife to see. Making the right permissions will be very important for that
Security Permissions • Windows has two ideas for permissions: the user and what their permission is • The username will come from any usernames you have created. You can add users by going to the control panel and clicking on the Users and Groups picture. • Then, when another computer tries to connect to your computer, they will be asked for a username. They will have to enter a username that you have made.
Security Permissions • The other thing necessary for security is knowing about permissions. • Windows allows you to choose different things that a user is allowed to do, like Read, Write, Open, Execute and so on. If the user is not given the correct permissions, they will not be able to access the folder or documents.
Sharing Folders • Now back to sharing folders. The first thing to do is click on “Share Permissions.” • A window will appear that shows who is allowed to access this shared folder. • We can give “Everyone” all access because there is another place to edit security. • Windows tries to make things confusing. So after we hit “OK”, we need to go to “Security”