Download
1 / 84
840 likes | 858 Views
This project guides you through building and programming an Autopilot robot that can move forward, reverse, and turn. Discover new hands-on opportunities to deepen your understanding. Follow step-by-step build instructions for creating the completed look of the robot. Explore the functionality of the robot and challenge yourself with engineering questions. Learn about VEX IQ Smart Motors and how to set velocities for different tasks. Get ready to experiment with driving velocities and enhance your logic skills.

E N D
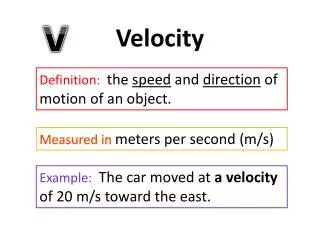
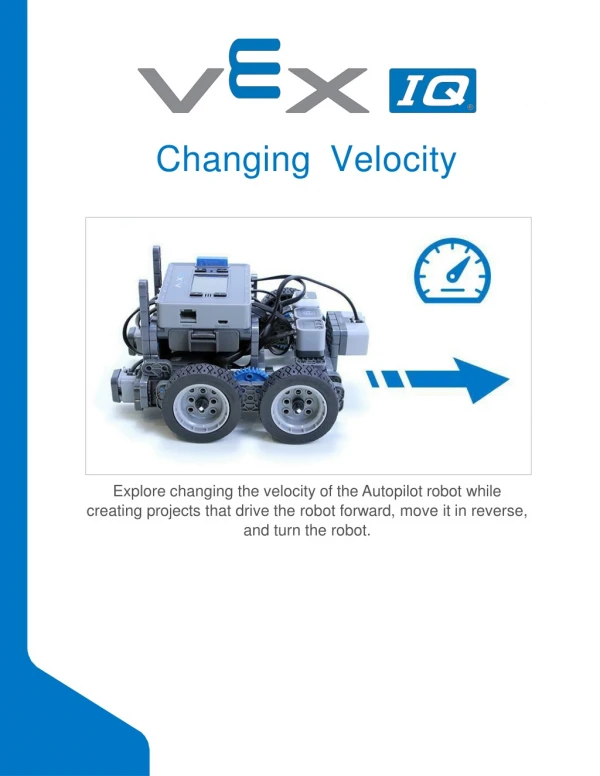
Changing Velocity Explore changing the velocity of the Autopilot robot while creating projects that drive the robot forward, move it in reverse, and turn therobot.
Discover new hands-on builds and programming opportunities to further your understanding of a subjectmatter.
The Completed Look of the Build The completed Autopilot robotbuild. This robot is designed so that it can be built quickly and drive around either autonomously or with the Controller in a short amount oftime.
Steps 1-6 will be repeated for steps 7–12, so it’s possible to make both at once. Count all pieces before starting your build and have them readilyavailable.
When adding the 4x Pitch Shaft, twist the pitch shaft to check for tension while turning. If it spins freely, it is not properly inserted into the motor.
Make sure the gears fit together properly before locking the Beam inplace. After attaching the wheels, twist the wheel that has the shaft going into the motor. If the wheel spins freely and without tension, the 4x Pitch Shaft has slipped out of place.
The highlighted blue numbers placed in gear shapes represent the assemblies completed from those specific steps.
Ensure the Smart Radio and Robot Battery are inserted before attaching the Brain to the rest of theassembly. Steps 29-30, when you attach the Smart Cables, make sure they are tucked away so as to not block the Smart Sensors. The orange arrows indicate to turn the robotaround.
Exploration • Now that the build is finished, explore and see what it can do. Then answer these questions in your engineeringnotebook. • Why does the Autopilot have four wheels instead of only two? Why is having four wheels better? • VEX IQ calls their motors Smart Motors. Why do you think they call them smart? What might VEX IQ Smart Motors do that would make them seemsmart? • Should the Autopilot always drive as fast as it can? Why or why not? Give at least one example of when it should drive its fastest and at least one example of when it should drive moreslowly.
Test your build, observe how itfunctions, and fuel your logic and reasoning skills through imaginative, creativeplay.
Changing Velocity VEX IQ Smart Motors can be programmed to spin or drive at many different velocities. If you have programmed your robot to drive or turn before, you probably did it with the default velocity. The default velocity is the velocity that the Smart Motors turn at automatically - if you don’t add any type of block for setting the velocity. The default velocity is 50% of the maximum velocity. The maximum velocity is100%. The blocks for setting velocity are important because you might want your robot to drive or turn faster or slower. For example, you might be racing against another robot and want your robot to drive as fast as possible. Or, you might want your robot to drive or turn more slowly like when it has to carefully complete a task like moving through amaze.
Exploration of Velocity - Part 1 Autopilot is ready to drive at differentvelocities! This exploration will give you the tools to be able to start creating projects that can move the Autopilot’s motors at velocities that fit the robot'spurpose. VEXcode IQ Blocks that will be used in the first part of thisexploration: To find out more information about the block, open the Help and then select the block you want to readabout.
The Builder in each group should get the hardware required. The Recorder should get the group’s engineering notebook. The Programmer should open VEXcode IQBlocks. Hardware/SoftwareRequired:
1. Preparing for theExploration • Before you begin the activity, do you have each of these items ready? The Builder should check each of thefollowing: • Are all the motors and sensors plugged into the correctport? • Are the smart cables fully inserted into all of the motors andsensors? • Is the Brain turnedon? • Is the batterycharged? • 2. Start a NewProject • Before you begin your project, the Programmer needs to select the correct template project. The Autopilot template contains the Autopilot motors and sensors configuration. If the template is not used, your robot will not run the project correctly. • The Programmer should complete the followingsteps: • Open the Filemenu. • Select OpenExamples.
Use the filter bar at the top of the application and select"Templates." • Select and open the Autopilot (Drivetrain)Template. • Rename your project Drive Velocity because we will be using the set drivevelocity • block. • Save your project. Click here for more information onsaving. • Check to make sure the project name Drive Velocity is now in the window in the center of thetoolbar.
Exploration of Velocity - Part 2 1. Add a Connector Pin to the WheelHub. • The Builder should add a 1x1 Connector Pin to one of the wheel hubs so that you can easily see how fast the motor and wheel areturning. • 2. Drive Forward for 15 inches at DifferentVelocities • The Programmer should build this project in VEXcode IQBlocks.
Click on the Slot icon. You can download your project to one of the four available slots in the Robot Brain. Click on the number1. • The Programmer should connect the robot to your computer or tablet. The Brain icon in the toolbar turns green once a successful connection has beenmade. • Then, click the Download button on the toolbar to download the Drive Velocity project to the RobotBrain.
The Operator should check to make sure your project has downloaded to the Autopilot’s Brain by looking at the Robot Brain’s screen. The project name should be listed in slot1. • The Driver should now run the project on the Autopilot robot by making sure the project is highlighted and then press the Checkbutton. • 3. Drive Forward and in Reverse at DifferentVelocities • The Programmer should change the second drive for block to drive in reverse instead offorward. • The Programmer should then download theproject. • The Driver should now run the project on the Autopilot robot by making sure the project is highlighted and pressing the Check button.
Turning at Different Velocities Next, turn the Autopilot at differentvelocities! Setting the velocity for driving and setting the velocity for turning are two separate blocks. This is helpful when you want the robot to drive at a certain velocity but turn at a different one. In a timed competition for example, the robot might drive very quickly around the field but turn more slowly andcarefully. Add the following blocks to your DriveVelocities:
The Programmer should add these blocks to your project and then download it to your Autopilot. • The Driver should then run theproject. • Notice how the turning velocities compare to each other. Also, notice how they are different than the drivingvelocities. • Your group should discuss your observations and the Recorder should write them in your engineeringnotebook.
Become a 21st century problem solver by applying the core skills andconcepts you learned to otherproblems.
TheVelocityofVehicles A vehicle sensing objects in front of it in order to slow down or speedup. Adaptive CruiseControl Today’s robots and cars in particular have the ability to perform many automated movements. Some cars can park and even drive themselves. Many new vehicles and self- driving cars have Adaptive Cruise Control (ACC). This feature sets the vehicle at a certain velocity and uses sensors to determine if it should slow down or speed up depending on the objects in front of it. How is this helpful? The faster an object is moving, the more momentum or energy it has. So colliding with objects like other cars is dangerous. Let’s say you are driving on the highway and you set your ACC to 65 mph. Your car will drive at 65 mph until it needs to change its velocity. If a car in front of you suddenly uses their brakes, your car will be able to sense the car slowing down in front of you and also slow down so that you do not crash into them. When the car in front speeds up, your car will speed up. When the road starts up a hill, the car will speed up in order to maintain the 65 mph that youset. Elevators are another example of robots that need to change velocities in order to function properly. Can you imagine stepping into an elevator and it immediately started going up or down at its max velocity? You would probably fall over! Elevators must start and end at a lower velocity to ensure the safety of itspassengers.
ChangingtheVelocityof Competition Robots Changing the velocity is an important skill incompetitions Speed andControl Competition robots are required to move through a course with precise and accurate movements. They also move, stack, or grab certain objects in order to be awarded points. Due to the rules, teams cannot touch their robot after an autonomous match begins. That means that the robot has to be able to properly change its velocity in order to make more controlled movements. For example, if a robot is required to pick up an object, having the robot approach the object at its full velocity before picking it up will likely cause the robot to run into or over the object. It would be more beneficial for the robot to slow down in front of the object before picking itup. Time is one of the biggest constraints in a competition match. The robot has to try to accumulate as many points as possible during the given time limit. To do this, the robotmust
move as fast as it can while still maintaining control. If the robot needs to move around a specific object, reducing the velocity allows the robot to have more control while turning. In order to move the robot forward or in reverse as fast as it can, the velocity must also be able to increase. The challenge in competition matches is finding the balance between having the robot move at a high velocity and control in order to obtain as many points aspossible!
Is there a more efficient way to come to the same conclusion? Take what you’ve learned and try to improveit.
ImproveYourProject • Setting AppropriateVelocities • You got your Autopilot to move at different velocities! Let’s explore how to set appropriate velocities to program your Autopilot. • The Builder in each group should get the hardwarerequired. • The Recorder should get the group’s engineeringnotebook. • The Programmer should open VEXcode IQBlocks. • Hardware/SoftwareRequired:
Before you begin theactivity... • Before you begin the activity, do you have each of these items ready? The Builder should check each of thefollowing: • Are all the motors and sensors plugged into the correctport? • Are the smart cables fully inserted into all of the motors andsensors? • Is the Brain turnedon? • Is the batterycharged?
Remix Your Project The Programmer should complete the followingsteps: • Open the Filemenu. • Select OpenExamples. • Select and open the AutopilotTemplate. • Name your project VelocityRemix. • Save yourproject. • Tag You’reIt! • Turn quickly, drive slowly, turn quickly to play a game oftag! • The robot wants to play a game of tag-you’re it! Programmer, use the set turn velocity, turn for, set drive velocity, and drive forblocks to program the Autopilot to turn quickly to avoid being tagged, drive slowly to tag someone, and then turn quickly again to run away! The velocity percentage for turning should be at least twice as high as the velocity percentage for driving. The project below is started but incomplete. It needs more blocks and setvelocities.
Programmer, save the Tag project and download it to thebrain. • Operator, run the Tagproject. • Does the robot turn quickly, drive slowly, and then turn quicklyagain? • Recorder, take notes about the robot’sbehavior. • Bonus Challenge: Have the Autopilot play a sound once it tagssomeone! • Protect theCastle! • Move in a square to protect the castle fromintruders! • Your king asked you to protect the castle! You must drive around the square castle to make sure it is safe from intruders! Programmer, use the set turn velocity, turn for, set drive velocity, and drive forblocks to program the Autopilot to move in a square. The Autopilot should drive quickly along the sides of the square but turn slowly at the corners. The project below is started but incomplete. It needs more blocks and setvelocities.
Programmer, save the Castle project and download it to thebrain. • Operator, run the Castleproject. • Does the robot move quickly in a square shape but turn slowly at thecorners? • Recorder, take notes about the robot’sbehavior. • BonusChallenges: • Have the Autopilot’s Touch LED display a different color while it drives on each side of the square. • The perimeter of the square castle that needs to be guarded is 20 inches. Program the robot to move around theperimeter. • The area of the square castle that needs to be guarded is 49 inches. Calculate the length of each side and move in a square that covers thearea. • RobotWaiter • Don’t spill thedrinks!
Your robot is training to be a waiter at a new restaurant in town. Program the robot waiter to be able to move quickly without spilling what it is carrying! Use the 6x Pitch Standoff to simulate food or drinks that the waiter would be carrying. Programmer, use the set turn velocity, turn for, set drive velocity, and drive for blocks to program the Autopilot to turn 360 degrees and drive 12 inches as quickly as possible while balancing a 6x Pitch Standoff on the Autopilot’s brain. The project below is started but incomplete. It needs to have the velocities and distancesset. • Builder, lay a 6x Pitch Standoff from the VEX IQ Kit across where VEX IQ is written on the brain.
Programmer, set the velocities and distances. Then save the Robot Waiter project and download it to thebrain. • Operator, run the Robot Waiterproject. • Does the robot turn and drive while keeping the beam on top of the brain? How fast can the robot move before the beam slidesoff? • Programmer, test faster and faster velocities until you find the limit. The limit for turning might be different than the limit for driving. Use the information from the Recorder in order to make decisions on which velocity is the bestchoice. • Recorder, take notes about the robot’s behavior, its velocity, and whether the beam falls off. Make note of how the velocities are changing each time the project istested.
Remix Questions • Answer the following questions in your engineering notebook after completing theactivities. • In Protect the Castle!, did the robot turn in a perfect square? What might be the reason why the robot did not move and turn the exact distances written in theproject? • In Robot Waiter, the turn velocity could be set higher than the drive velocity. Why do you think that wastrue?
Understand the core concepts andhow to apply them to differentsituations. This review process will fuel motivation to learn.
Review You have accomplished a lot in this STEM Lab! The following questions will help you think back over everything you have learned. You can only answer once, so think carefully before yousubmit! • True or False: You can program your robot to move without using a block that setsvelocity. • True • False • When would it be appropriate to use a block that sets velocity in your project? • To change the robot's direction from driving forward to driving inreverse. • To drive the robot forward a certain number ofinches. • To allow the robot to have more control when carefully completing a task such as maneuvering through an obstacle course ormaze. • To stop all of the motors frommoving. • True or False: There is only one block that sets velocity for both drivingand turning. • True • False • In this example project, how far does the robot move at 10%velocity?
5inches • 3inches • 4inches • 12inches • Erin programmed her robot to drive forward for 12 inches at 50% velocity. If Erin wants to move the same 12 inches in a faster amount of time, how should she change the velocity if at all? • Increase the velocity so it is more than50% • Decrease the velocity so it is less than50% • Keep the velocity the same at50% • Bobby wrote the example project below. He noticed that when he runs the project, the robot starts to move out of control when it begins to turn. What should Bobby do in order to have his robot make more controlled movements when it begins toturn?