Download
1 / 23
230 likes | 232 Views
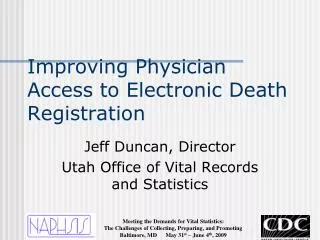
Electronic Death Registration In California. MEDICAL FACILITY TRAINING. 2 0 0 7_ 0 409. DP Disposition Permit. DC Death Certificate. VS-9e. VS-11e. PI Personal Info MI Medical Info CI Coroner Info. VS-11e. Icons. ?. Field Sensitive Help Select Date Remote Attestation

E N D
Electronic Death Registration In California MEDICAL FACILITY TRAINING 2 0 0 7_ 0 409
DP Disposition Permit DCDeath Certificate VS-9e VS-11e
Icons ? Field Sensitive Help Select Date Remote Attestation View PAC Fax image Listen to Voice • Search Lists • State/Foreign Country • Hispanic • Race • Occupation • Kind of Industry • Embalmers • Funeral Homes • Medical Facilities • Physicians (MDs & DOs)
TRAINING NOTE: • When using the Training Environment of EDRS, DO NOT create a Death Certificate of any live person • Please use Cartoon, TV, Movie or other fictional characters • Creating a DC of a living person is a violation of privacy
STEP 1 LOG IN & CREATE RECORD • Enter User Name and Password • Record Options > Create New Record • DO NOT Assign Record Access • DO NOT alter default values Note: Assigning Record Access allows other EDRS users to edit/modify a given record. Record Access is NOT the Funeral Home, Medical Facility, ME/Coroner, or Local Registrar on the Death Certificate.
STEP 2 PERSONAL INFORMATION • Enter PI • First Name • Last Name • DOD • Time of Death • Sex • DOB (optional)
Use search icon to auto-populate Fields 115 & 116 or enter Physician’s name & • . Title in Field 115, Physician’s License in Field 116. • These fields may be blank when Submitting MI for LR Review. • If Coroner assigns number BEFORE Physician attests, select Record Options > Refer to ME/Coroner, then enter number in Field 108A • If Coroner assigns number AFTER Physician attests, select Record Options > Refer to ME/Coroner STEP 3 MEDICAL INFORMATION • Enter MI • Validations • Required BEFORE Submitting MI for LR Review, if applicable • Validations > Validate MI • Validations > SpellCheck MI • Record Options > Print Working Copy
STEP 3 MEDICAL INFORMATION (continued) • Submit MI for LR Review • Verify MI Review status in Decedent Folder • For Coroner Referrals, go to STEP 4A • For Physician Signature, go to STEP 4B • Record Options > Submit MI for LR Review • MI (excluding 115 and 116)is now LOCKED for updates • Record Options > Decedent Folder • MI Review = SUBM
STEP 4A REFER TO ME/CORONER • Refer to ME/Coroner • Contact the Local Health Department for additional county specific requirements • Verify attestation status in Decedent Folder • Record Options > Refer to ME/Coroner • Record Options > Decedent Folder • REV - ME/C reviews reportable case, assigns coroner referral # • ACC - ME/C accepts case, assigns coroner referral#, ME/C attests • DECL - ME/C declines case, no further action needed, “NONE” will appear • in coroner referral field
Use search icon to auto-populate Fields 115 & 116 or enter Physician’s name & • . Title in Field 115, Physician’s License in Field 116. • If Coroner assigns number BEFORE Physician attests, select Record Options > Refer to ME/Coroner, then enter number in Field 108A • If Coroner assigns number AFTER Physician attests, select Record Options > Refer to ME/Coroner. STEP 4B Remote Attestation • Required BEFORE Requesting Remote Attestation • Request Remote Attestation • Record Options > Request Remote Attestation • Enter Physician’s fax number. • MI (including 115 & 116) is now LOCKED for updates
Physician Fax Coversheet
Physician’s Copy of the Death Certificate. To be signed and Faxed back to CA-EDRS.
STEP 4B Remote Attestation (continued) • Verify attestation status in Decedent Folder • Review Attestation • Record Options > Decedent Folder • MI Rem ATTEST = REQ when requested • MI Rem ATTEST = ATT when attested • View FAX Attestation • Listen to Voice attestation
view FAX remote attestation • or • hearVOICE remoteattestation
View the Remote Attestation from the Medical Certifier / Physician
View Remote Attestation FAX • Confirm: • Physician’s signature • No Changes • No modifications • No additions
View Remote Attestation FAX • Confirm: • Physician’s signature • No Changes • No modifications • No additions
Hear the Remote Attestation from the Medical Certifier / Physician Physician’s voice stating Physician name + information is correct + Decedent name Physician’s voice stating License Number = License Number in field 116
TRANSFER RECORD • Select Record • Transfer to Funeral Home • Record Options > Transfer • Select Funeral Home “Organization” or Medical Facility. Note: Transfer allows an EDRS Funeral Home or EDRS Medical Facility “Organization” to edit/modify a given record. The “Organization” is NOT the Funeral Home or Medical Facility on the Death Certificate.
Death Certificate VS-11e DEMO REGISTRAR, MD MPH DEMO PHYSICIAN MD
THANK YOU This completes the Medical Facility training