Download
1 / 10
100 likes | 286 Views
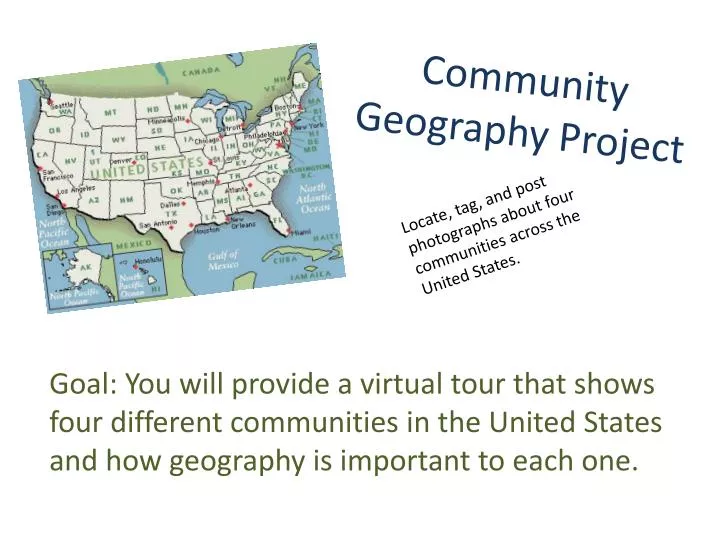
Community Geography Project. Locate, tag, and post photographs about four communities across the United States. Goal: You will provide a virtual tour that shows four different communities in the United States and how geography is important to each one. Create Personal Folder.

E N D
Community Geography Project Locate, tag, and post photographs about four communities across the United States. Goal: You will provide a virtual tour that shows four different communities in the United States and how geography is important to each one.
Create Personal Folder • Right-click on My Places • Add Folder • Name folder “______’s Community Project”
Insert Placemarks • Search • Enter the name of the community where you live • Right-click on folder • Add Placemark • Follow both steps for the three communities in Chapter 3
Change Placemark • Placemark • Name the placemark using the name of the continent or ocean. • Change the icon and label so that each is a different color. • Make the size between 5-10. • You may change the type of icon to fit the location. • Be sure it makes sense.
Description • Open a new Word document. • Save As: ___________ (your name) Geography Project Facts • Type the 2-3 facts about the location as complete sentences. • Check spelling and grammar. • Click “Review” tab. • Click ABC Spelling
Research • Locate facts about each location. • Use “Elementary Research Resources” • http://cbsd.schoolwires.net/Page/990 • Start with: Reference and Databases • Hint: Almanacs have information about different locations • List at least 3 facts in your Microsoft Word document. • Facts must include: state, region of the country • Facts may include: population, economy, points of interest, climate, physical features
Insert Facts into Google Earth • Highlight and copy each set of facts for one location at a time. • Open one placemark at a time. • Double-click Properties • Paste under the “Description”. • You will know it worked if you click on the pin and the information pops up in a bubble.
Image Search • Brainstorm a list of words you could use to find pictures for each continent and ocean. • Example: Pennsylvania, state flag, Philadelphia, capital of Pennsylvania • Use Google Images to search for a photo for each location
Copying Image Location • When you locate the photo you want to use: • Click on the image. • Click on it again to go to the website where it was found. • Right click the image on the website. • Select “Properties” • Copy URL • Click and highlight • Right-click copy
Pasting Image Location • Open the placemark for that location. • Right-click it. • Properties. • Click “Add image”. • Paste the URL address copied from the photo. • Click “OK”.