Download
1 / 31
310 likes | 540 Views
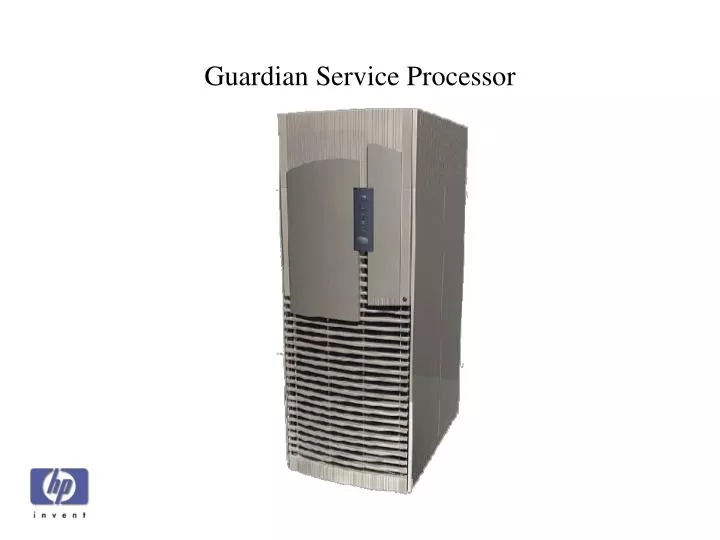
Guardian Service Processor. Module Objectives. Upon completion of this module, you will be able to: Define the GSP List three ways to connect to the GSP Log onto the GSP Define BCH Effectively use the VFP (Virtual Front Panel) View Console Logs View Chassis Logs Exit the GSP.

E N D
Module Objectives Upon completion of this module, you will be able to: • Define the GSP • List three ways to connect to the GSP • Log onto the GSP • Define BCH • Effectively use the VFP (Virtual Front Panel) • View Console Logs • View Chassis Logs • Exit the GSP
What is the GSP? • The GSP is used to monitor activity in the cabinet containing the GSP and every other cabinet in the complex (where more than one SPU cabinet is installed and connected to the GSP). • Menu driven
Connecting to the GSP There are three ways to connect to the GSP: • Local RS232 port with a null modem cable • Remote RS232 using a modem cable over a modem • LAN connection with laptop running Reflection1 (recommended)
Recommended Console Devices Customers can choose to supply or purchase one of the following devices to provide LAN Console connection for their Superdome complexes: • Any HP workstation product running HP-UX 11.x • Any PC with Windows NT >= 4.0 and Reflection 1 • Any PC with Windows 98 or 2000 and Reflection 1
Logging into the GSP • GSP login: Admin • GSP password: • Welcome to • Superdome's Guardian Service Processor • GSP MAIN MENU: • Utility Subsystem FW Revision Level: 6.26 • CO: Consoles • VFP: Virtual Front Panel • CM: Command Menu • CL: Console Logs • SL: Show chassis Logs • HE: Help • X: Exit Connection • GSP>
GSP Main Menu Components • Title GSP MAIN MENU: • Firmware Version Utility Subsystem FW Revision Level: 6.26 • Options • CO: Consoles Allows access to partitions on complex • VFP: Virtual Front Panel Allows you to view boot progress. • CM: Command Menu Run GSP commands • CL: Console Logs View Console Logs • SL: Show chassis Logs View Chassis Logs • HE: Help Get Help with GSP commands • X: Exit Connection Exit • Prompt • GSP>
GSP Command Menu SubMenus GSP Commands are subdivided into three sections: • Service commands • Status commands • System and Access config commands
GSP Service Commands • BO : Boot a partition. • DF : Display FRU information of an Entity. • MA : Return to the Main menu. • MR : Modem Reset • PE : Power entities on or off. • RE : Reset entity. • RR : Reset a partition for reconfiguration. • RS : Reset a partition. • TC : Send a TOC signal to a partition. • TE : Broadcast a message to all users of the GSP Command Handler. • VM : Margin the voltage in a cabinet • WHO: Display a list of GSP connected users
GSP Status Commands • CP : Display partition cell assignments • HE : Display the list of available commands • LS : Display LAN connected console status • MS : Display the status of the Modem • PS : Display detailed power and hardware configuration status.
GSP System and Access Config Commands • AR : Configure the Automatic System Restart • CA : Configure Asynchronous and Modem parameters • CC : Initiate a Complex Configuration • CP : Display partition cell assignments • DATE : Set the time and date • DC : Reset parameters to default configuration • DI : Disconnect Remote or LAN Console • DL : Disable Lan console access • EL : Enable Lan console access • ER : Configure remote/modem port access options • ID : Change certain stable complex configuration profile fields • IT : Modify command interface inactivity timeout • LC : Configure LAN connections • LS : Display LAN connected console status • ND : Enable/Disable Network Diagnostics -Continued-
GSP System and Access Config Commands – cont’d • PD : Modify default Partition for this login session. • RL : Rekey Complex Profile Lock • SO : Configure Security Options and Access Control • XD : GSP Diagnostics and Reset
GSP Most Used Commands • CO: Console menu for each partition • CM: Command Menu • VFP: Virtual Front Panel • MA: The “home” button, goes back to Main Menu • PE: Power Entity on/off • PS: Power Status (combination of DE/DU) • BO: Boot • CC: Complex configuration • LC: LAN Configure • RR: Reset Partition for reconfiguration • RS: Reset Partition • SO: Security Options
GSP Main Menu – ma Command Welcome to Superdome's Guardian Service Processor GSP MAIN MENU: Utility Subsystem FW Revision Level: AMAZON_QUAL CO: Consoles VFP: Virtual Front Panel CM: Command Menu CL: Console Logs SL: Show chassis Logs X: Exit Connection GSP> “ma” is useful for moving from Command Menu “CM” to “CO”
Power Entity – pe Command GSP:CM> pe This command controls power enable to a hardware device. B – Cabinet (supply cabinet #) C – Cell (supply cabinet #, slot #) I - IO Chassis (supply cabinet #, IO bay #, IO Chassis #) Select Device: Most common method of turning on/off +48Vdc remotely; requires front panel switch to be enabled.
Power and Configuration Status – ps Command GSP:CM> ps This command displays detailed power and hardware configuration status. The following GSP bus devices were found: +----+-----+-----------+----------------+-----------------------------------+ | | | | | Core IOs | | | | | | IO Bay | IO Bay | IO Bay | IO Bay | | | | UGUY | Cells | 0 | 1 | 2 | 3 | |Cab.| | | |IO Chas.|IO Chas.|IO Chas.|IO Chas.| | # | GSP | CLU | PM |0 1 2 3 4 5 6 7 |0 1 2 3 |0 1 2 3 |0 1 2 3 |0 1 2 3 | +----+-----+-----+-----+----------------+--------+--------+--------+--------+ | 0 | * | * | * |* * | | | | | You may display detailed power and hardware status for the following items: B - Cabinet (UGUY) C - Cell G - GSP I - Core IO Select Device:
ps Command, Option B – Cabinet (UGUY)Screen 1 HW status for SD32000 compute cabinet #0: NO FAILURE DETECTED Power switch: OFF; Power: not enabled, not present; Door: closed Fan speed: normal; Temperature state: normal Redundancy state: fans or blowers redundant, BPSs INVALID | Main BP| | IO Backplanes | | Power | | IO Bay 0 | IO Bay 1 | | Main | Boards | Cells | Chassis | Chassis | | BP | 0 1 2 | 0 1 2 3 4 5 6 7 | 0 1 2 3 | 0 1 2 3 | +--------------+------+--------+-----------------+----------+----------+ Populated | * | * * * | * * | * | * | Power Enabled | | | | | | Powered On | | | | | | Power Fault | | | | | | Attention LED | | | | | | | Cabinet | IO | | BPS | Blowers | Fans | | 0 1 2 3 4 5 | 0 1 2 3 | 0 1 2 3 4 | +-----------+-------------+---------+-----------+ Populated | * * * * * * | * * * * | * * * * * | Failed | | | | -- Press <CR> to continue, or 'Q' to Quit --
ps Command, Option B – Cabinet (UGUY)Screen 2 -- Press <CR> to continue, or 'Q' to Quit -- Voltage margin: nominal; Clock margin: nominal CLU Status PM Status CLU POST UGUY LEDs: ***_____ _*__ ____ | Parity | Connected | Location | Flex connections | Connected | error | to cabinet | (Upper/Lower) | +-----------------+-----------+----------+------------+---------------+ XBC [7-0] | NYNYNYNY | NNNNNNNN | 00000000 | N/A | RC [7-0] | NNNNNNNN | NNNNNNNN | 00000000 | LLLLLLLL | PM firmware rev 6.8, time stamp: FRI SEP 22 16:16:19 2000 CLU firmware rev 6.10, time stamp: WED SEP 06 20:56:50 2000 GSP:CM>
ps Command, Option C – Cell Power status: OFF, no fault Boot is blocked; PDH memory is not shared Cell Attention LED is off RIO cable status: connected RIO cable connection physical location: cabinet 0, IO bay 1, IO chassis 3 Core cell is INVALID PDH status LEDs: ____ CPUs 0 1 2 3 Populated Over temperature DIMMs populated: +----- A -----+ +----- B -----+ +----- C -----+ +----- D -----+ 0 1 2 3 4 5 6 7 0 1 2 3 4 5 6 7 0 1 2 3 4 5 6 7 0 1 2 3 4 5 6 7 PDC firmware rev 255.255 PDH controller firmware rev 6.10, time stamp: WED SEP 27 03:53:48 2000 GSP:CM>
ps Command, Option G – GSP HW status for GSP (in cabinet 0): NO FAULT DETECTED Complex model string: 9000/800/SD32000 Front Panel Attention LED is off Remote LED is OFF SBCH POST LEDs: ____ LAN 0 is connected at 100 Mbps, full duplex LAN 1 is not connected Battery state is good SBCH programming model revision: B Last GSP software reset occurred THU JAN 01 00:00:00 1970 GSP firmware rev 6.26, time stamp: Sep 28 2000 15:12:46 GSP:CM>
ps Command, Option I – Core IO GSP:CM> ps This command displays detailed power and hardware configuration status. The following GSP bus devices were found: +----+-----+-----------+----------------+-----------------------------------+ | | | | | Core IOs | | | | | | IO Bay | IO Bay | IO Bay | IO Bay | | | | UGUY | Cells | 0 | 1 | 2 | 3 | |Cab.| | | |IO Chas.|IO Chas.|IO Chas.|IO Chas.| | # | GSP | CLU | PM |0 1 2 3 4 5 6 7 |0 1 2 3 |0 1 2 3 |0 1 2 3 |0 1 2 3 | +----+-----+-----+-----+----------------+--------+--------+--------+--------+ | 0 | * | * | * |* * | | | | | You may display detailed power and hardware status for the following items: B - Cabinet (UGUY) C - Cell G - GSP I - Core IO Select Device:
Boot Partition – bo Command GSP:CM> bo This command boots the selected partition. # Name --- ---- 0) mvsd1p0 1) mvsd1p1 Select a partition number: 0 Do you want to boot partition number 0? (Y/[N]) n -> The selected partition will NOT be booted. GSP:CM> CM> BO releases BIB and allows BCH to finish booting CM> VFP to determine forward progress
Complex Configuration – cc Command This command allows you to change the complex profile. WARNING: You must either shut down the OSs for reconfiguration or execute the RR (reset for reconfiguration) command for all partitions before executing this command. G - Build genesis complex profile L - Restore last complex profile Select profile to build or restore: Genesis profile defines cell for partition 0. Cell chosen should have bootable device attached.
LAN Configuration – lc Command This command modifies the LAN parameters. Current configuration of GSP customer LAN interface MAC address : 00:10:83:fd:07:68 IP address : 15.32.65.48 0x0f204130 Name : mvsd1-g Subnet mask : 255.255.248.0 0xfffff800 Gateway : 15.32.64.1 0x0f204001 Status : UP and RUNNING Do you want to modify the configuration for the customer LAN? (Y/[N])
Reset Partition for Re-configuration – rr Command This command resets for reconfiguration the selected partition. WARNING: Execution of this command irrecoverably halts all system processing and I/O activity and restarts the selected partition in a way that it can be reconfigured. # Name --- ---- 0) mvsd1p0 1) mvsd1p1 Select a partition number:
Reset Partition for Re-configuration – rs Command This command resets the selected partition. WARNING: Execution of this command irrecoverably halts all system processing and I/O activity and restarts the selected partition. # Name --- ---- 0) mvsd1p0 1) mvsd1p1 Select a partition number:
Security options – so Command GSP:CM> so 1. GSP wide parameters 2. User parameters Which do you wish to modify? ([1]/2) 2 Current users: LOGIN USER NAME ACCESS PART. STATUS 1 Admin Administrator Admin 2 Oper Operator Operator 3 a a Admin Disabled 1 to 3 to edit, A to add, D to delete, Q to quit : q GSP:CM> 1 to 3 to edit, A to add, D to delete, Q to quit : q
Other Things to Know “q” is extremely useful in aborting commands “Ctrl B” is necessary to exit the console and gain access to GSP Main Menu
Virtual Front Panel E indicates error since last boot # Partition state Activity - --------------- -------- 0 HPUX heartbeat: *
When bringing a system up, it is useful to open three windows: • CM for commands. To determine: • If action is required • If BIB blocked • CO for BCH console so when you are ready to go to BCH, you are already there. • VFP to watch forward progress. You can see what's happening, where's its booting, and what boot process you are at.