Download
1 / 34
370 likes | 549 Views
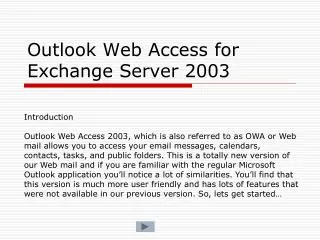
Outlook Web Access ( OWA ). Outlook Web Access ( OWA ) is a web mail service of Microsoft Exchange; allow users to connect remotely via a Web browser

E N D
Outlook Web Access (OWA) • Outlook Web Access (OWA) is a web mail service of Microsoft Exchange; allow users to connect remotely via a Web browser • OWA is used to access e-mail, calendars, contacts, tasks, and other mailbox content when access to the Microsoft Outlook desktop application is unavailable
What it means to you: • SASED E-Mail Password will change; check your mail at home for your new SASED e-mail password • Ability to use the same e-mail interface from any computer connected to the Internet • SASED tech team will monitor hardware / software • Less junk mail • Ability to share calendars & global distribution lists (for e-mail addresses of all SASED employees)
What it means to you cont. • If you are currently using Outlook mail: When we switch to Outlook Web Access mail, mail will not be available everywhere until one of the SASED tech team changes e-mail settings on your computer. • If you are currently using web mail: there is a possibility that you could loose all past mail.
What you need to do to prepare for conversion to OWA: • Clean up your current e-mail; delete any unnecessary e-mails or folders, then Empty the Trash • Print copies of e-mails you MUST have • Possibly forward copies of important e-mails to a personal account, then you can forward them to your SASED account once the move has been made.
Current Web E-Mail Log-In screen Current Web E-Mail Opening screen SASED CurrentWeb Mail Service (hosted by ROE)
OWA: Logging On 1) Connect to the Internet and open Web browser. (Internet Explorer) 2) Type the following into the Address field of your browser: http://mail.sased.org 3) Type username (same as first part of email address) into User Name Field example: kreeter 4) Type your network password into the Password field. (arriving in the mail) 5) Click Login button
Folders appear in list at the top of the Outlook Bar. OWA: Welcome E-Mail Screen; Folders/File Management Mail Folders – allow you to create folders to organize your mail (right click on your name to make a new folder.)
OWA: Shortcuts • Inbox – the place you receive your mail • Calendar – allows you to make appointments • Contacts – an on-line rolodex (address book) • Tasks – Allows you to keep track of you tasks with a simple or detailed list. • Public Folders – Location of public documents. You must have permission to put materials in these folders. • Rules – allows you to set rules automatically move or delete email. • Options – change settings for Out of Office Assistant, E-Mail, Calendar, Reminders, Contacts, Password, Recover
OWA: Inbox The place where you receive e-mail. Toolbar Toolbar TIP: Click on field heading to sort mail by From, Subject, Received or Size. TIP: Click on field heading to sort mail by From, Subject, Received or Size.
Type E-Mail address or click To: (which will bring up distribution or contact list) Click New Message Click Send Add Subject Formatting Bar Add Message OWA: Composing/Sending e-Mail
Click the Paper Clip Click attach Attached file shows OWA: Add Attachments Browse for the file(s) to attach
Schedule an appointment Calendar Views OWA: Calendar
Save/Close Type in Subject/ Location See Availability Set Start/End Times Set Reminders Show time as: OWA: Appointment/Reminder Type any additional information
Click Recurrence Set Time Set Recurrence pattern Set Range of Recurrence Click OK OWA: Making Recurring Appointment
Use Required, Optional and Resources to enter names of Attendees By clicking Required, Optional, or Resources, the screen to choose from distribution or contact list appears. Click Invite Attendees Invite Attendees
Add New Contact Save and Close Enter information; Details tab allows you to enter additional information. OWA: Contacts An on-line rolodex (address book).
OWA: Distribution Lists Global distribution list vs. Personal contact list.
Fill in Task & Details Keep track of your tasks with simple detailed list. OWA: Tasks
2) Click New 1) Click Rules OWA: Rules Set rules automatically, move or delete mail. To forward email to another account:
8) Save and Close • Name rule • Keep blank the fields for - when the message arrives • 5) Uncheck Sent only to me • 6) Type where you want mail forwarded • 7) Leave blank - keep a copy in my Inbox. OWA: Rules To forward email to another account cont…
OWA: Options Change settings for Out of Office Assistant, E-Mail, Calendar, Reminders, Contacts, Password, Recover
1) Scroll down Option menu click change password. OWA: Options To Change Your Password:
Internet Service Manager screen appears: • Domain = sased60540 • Account = user name • (ex: kreeter) • Type in Old Password • Type in New Password • Confirm New Password Click OK Confirmation page appears that it changed. OWA: Options To Change Your Password cont:
OWA: Log Off! Very Important: When you are finished, don’t forget to Log Off, and Exit Web Browser.
Terminate your connection to OWA server and EXIT the web browser To ensure that no one can access your Exchange account from computer, exit the browser application. *This is especially important in a public setting where someone could use the Back button to open your mailbox.
SASED Help Desk Log on to Sased website http://www.sased.org Go To SASED Help Desk button or type in browser… http://support.sased.org/
SASED Help Desk 1) Connect to the Internet and open your Web browser. (Internet Explorer) Log on to Sased website http://www.sased.org 2) Go To ….SASED Help Desk button or type in browser… http://support.sased.org/ 3) Type sased60540\username (same as first part of email address) into the User Name Field (example: sased60540\kreeter) 4) Type your password (same as email password) into the password field – Click OK
Type sased60540\username (same as first part of email address) into User Name field example: sased60540\kreeter Type your password (same as email password) into the password field Click OK SASED Help Desk
Choose Create New Case SASED Help Desk
Type description of problem Click Submit SASED Help Desk
SASED Help Desk Confirmation screen appears. It will take a minute to process.
SASED Sharepoint Coming soon…