Download
1 / 71
730 likes | 921 Views
KX-N C P New Features/Functions Ver.2. Panasonic Communications CO.,LTD. “. New Features/Functions. The new features/function are available from, - NCP MPR 2.0 - TDE MPR 3.0. “. Minor Improvement. From, - NCP MPR 2.0 - TDE MPR 3.0. Screened call transfer by cellular telephone. “.

E N D
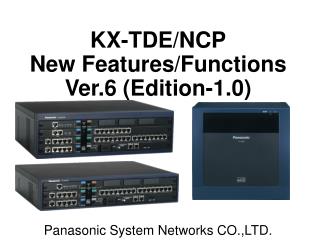
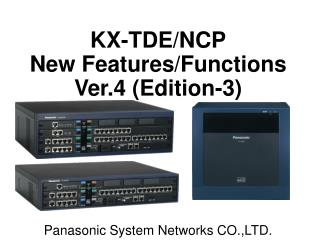
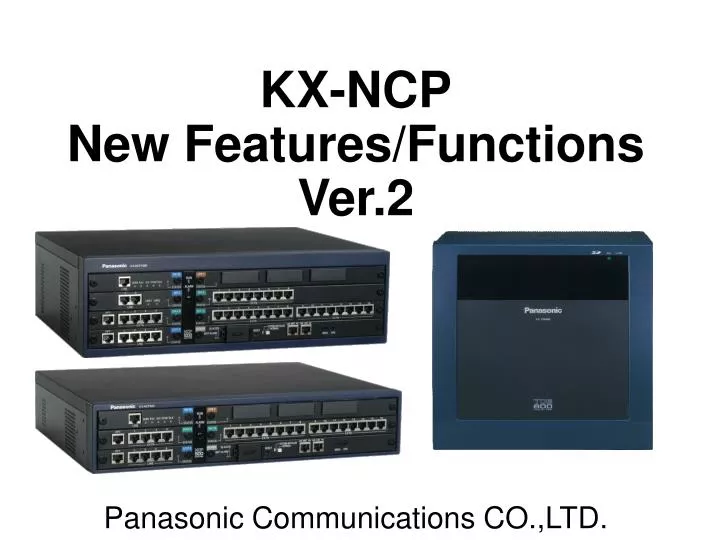
KX-NCP New Features/Functions Ver.2 Panasonic Communications CO.,LTD.
“ New Features/Functions The new features/function are available from, - NCP MPR 2.0 - TDE MPR 3.0
“ Minor Improvement From, - NCP MPR 2.0 - TDE MPR 3.0
“ Screened call transfer by cellular telephone - 1 Customer Request Function Your Extension Subscriber-A 1 C-FWD to your cellular ISDN 2 3 Ext.1002 Secretary Your cellular 1- Subscriber-A calls your extension. 2- The call is re-routed to your cellular. 3- Answer the call, and want to transfer to the secretary. 4- Un-screened transfer is possible (MPR 3.02). → # 1002 5- But, if Ext.1002 is busy, → the call is disconnected. Customer wants to use screened transfer function.
“ Screened call transfer by cellular telephone - 2 Condition - MSG card (E.g. KX-TDA0191/0192/0194) is needed. - Enhanced SD card/Enhanced Activation key is needed. - OPB-3 software version should be 3.002 or later. - The transfer recall function is not performed. (The request is on the wish list.) System Programming Default: Disable Option: Enable (Get DISA) Default: Disable (DTMF “#”) Option: Enable (Flash)
“ Screened call transfer by cellular telephone - 3 Your Extension Subscriber-A 1 C-FWD to your cellular ISDN 2 Ext.1002 Secretary 3 Your cellular 1- Subscriber-A calls your extension. 2- The call is re-routed to your cellular. 3- Answer the call, and want to transfer to the secretary. 4- Dial # 1002. 5- Ext.1002 answers the call. 6- Disconnect the line. 7- The Subscriber-A is connecting to Ext.1002.
“ Screened call transfer by cellular telephone - 4 Your Extension Subscriber-A 1 C-FWD to your cellular ISDN 2 Ext.1002 Secretary (Busy) 3 Your cellular If Ext.1002 is Busy ? Ext.1003 1- Subscriber-A calls your extension. 2- The call is re-routed to your cellular. 3- Answer the call, and want to transfer to the secretary. 4- Dial # 1002. 5- If Ext.1002 is busy, → the busy tone. 6- Dial # → We can retrieve the call. 7- Dial # 1003 → call to Ext.1003.
“ Screened call transfer by cellular telephone - 5 Your Extension Subscriber-A 1 C-FWD to your cellular ISDN 2 Ext.1002 Secretary (No-Answer) 3 Your cellular If Ext.1002 does not answer ? Ext.1003 1- Subscriber-A calls your extension. 2- The call is re-routed to your cellular. 3- Answer the call, and want to transfer to the secretary. 4- Dial # 1002. 5- If Ext.1002 is No-Answer. 6- Dial # → We can retrieve the call. 7- Dial # 1003 → call to Ext.1003.
“ Screened call transfer by cellular telephone - 6 If a customer wish to use the previous Function There is no option setting to disable the new function.
CLIP 488-1234 ISDN “ CO-to-CO call with Ext. CLIP - 1 Previous Function System Speed Dial (SSD) Entry 000: 0488-1234: CLI Ext.201 Ext.201:COS-1 DISA DDI call to DISA Ext.202:COS-x DISA answers the call, “Welcome to Panasonic” If the CLIP is matched with SSD entry and CLI has a destination. The call is handled as the destination. The caller can access System directly (External call, System Feature) without certification (E.g. PIN)) Enhanced SD card/Enhanced Activation key is needed.
ISDN “ CO-to-CO call with Ext. CLIP - 2 Previous Function System Speed Dial (SSD) Entry 000: 0488-1234: CLI Ext.201 CLIP 488-1234 Ext.201:COS-1 DISA DDI call to DISA CLIP: 477-1234 DISA Answers - Dial 0/9 + 653500 (CO-to-CO Call) Outside call with COS-1 (0/9-653500) (CO-to-CO Call) Outgoing CLIP 488-1234
“ CO-to-CO call with Ext. CLIP - 3 System Programming Default: Disable Option: Enable System Program (System Speed Dial) Tanaka 04881234 201 Yamada 04881235 202 Toyota 04881236 203
ISDN “ CO-to-CO call with Ext. CLIP - 4 Previous Function System Speed Dial (SSD) Entry 000: 0488-1234: CLI Ext.201 CLIP 488-1234 Ext.201:COS-1 DISA DDI call to DISA CLIP: 477-1234 DISA Answers - Dial 0/9 + 653500 (CO-to-CO Call) Outside call with COS-1 (0/9-653500) (CO-to-CO Call) Outgoing CLIP 488-1234 Problem is “Outgoing CLIP 488-1234” is not accepted by the ISDN network provider (out of range 477-xxxx).
ISDN “ CO-to-CO call with Ext. CLIP - 5 Customer Request Function System Speed Dial (SSD) Entry 000: 0488-1234: CLI Ext.201 CLIP 488-1234 Ext.201:COS-1 DISA DDI call to DISA CLIP: 477-1234 DISA Answers - Dial 0/9 + 653500 (CO-to-CO Call) Outside call with COS-1 (0/9-653500) (CO-to-CO Call) Outgoing CLIP 488-1234 But, Customer wants to send the Ext.’s CLIP. Outside call with COS-2 (0/9-653500) (CO-to-CO Call) Outgoing CLIP 477-1234 (Ext.’s CLIP) Possible by New MPR software
“ CO-to-CO call with Ext. CLIP - 6 CLIR/COLR Function Tanaka 4771234 Yamada 4771235 Toyota 4771236 This programming does not work for CO-to-CO call with Ext. CLIP function.
ISDN “ CO-to-CO call with Ext. CLIP - 7 If a customer wish to use the previous Function There is no option setting to disable the new function. The following alternative idea to send the calling party CLIP. System Speed Dial (SSD) Entry 999: 0488-1234: CLI Ext.299 CLIP 488-1234 Ext.299:COS-1 DISA DDI call to DISA CLIP: 488-1234 Ex.299: Dummy
“ MOH from DISA Msg. - 1 Customer Request Function Out Side Caller Ext.201:Company-A CO Ext.202:Company-B Own Company MOH Ext.203:Company-C Ext.204:Company-D Customer wants to send own company MOH.
“ MOH from DISA Msg. - 2 New MPR Out Side Caller Ext.201:Company-A CO Ext.202:Company-B Ext.203:Company-C Ext.204:Company-D We can select one of these MOH resources (1-8) for every tenants.
“ MOH from DISA Msg. - 3 New MPR Sample Out Side Caller Ext.201:Company-A Tenant-1 External CO Ext.202:Company-B Tenant-2 External Ext.203:Company-C Tenant-3 DISA-1 Ext.204:Company-D Tenant-4 DISA-2 We can select one of these MOH resources (1-8) for every tenants.
“ MOH from DISA Msg. - 4 New PCMC Programming
“ MOH from DISA Msg. - 5 Programming (OGM Music Sources) External Internal-BGM-1 Internal-BGM-2 DISA-01 DISA-02 DISA-xx DISA-63 DISA-64 Tone BGM BGM-2 BGM-3 BGM-4 BGM-5 BGM-6 BGM-7
“ MOH from DISA Msg. - 6 Programming (MOH for Tenant) Reference Music Sources
“ MOH from DISA Msg. - 7 Programming (Conditions) LPR for OPB3 must be V5.001 or later. DISA card setting (Card Property) We can not change DISA card setting by the PCMC batch mode. Every BGM 2-8 needs one DISA port resource. (MOH and BGM feature each occupies one channel resource.)
“ MOH from DISA Msg. - 8 Programming Sample B-SVM (Two Ports) TDA0194 (Four Ports) B-SVM (Two Ports)
“ MOH from DISA Msg. - 9 Impossible Programming Sample
“ MOH from DISA Msg. - 10 DISA resource condition Sample: No E-SVM card, only B-SVM card. One DISA port available No DISA port available
“ MOH from DISA Msg. - 11 DISA resource condition Practice: KX-TDA0194 + B-SVM card. How many DISA ports available ? How many DISA ports available ?
“ MOH from DISA Msg. - 12 MOH play condition - Max. of user: Max. of users can put a call on hold using the same source Music Source of BGM from OGM at the same time. → No-limit - Sometimes MOH playbacks from the middle of message. E.g. Ext.101, Ext.102, Ext. 103 (Tenant-1 BGM-2) Ext.101 receives a call and press “Hold” button. → Sometimes MOH playbacks from the middle of message. Ext.102 receives a call and press “Hold” button. → Sometimes MOH playbacks from the middle of message. NB: MOH/BGM feature each occupies one channel resource. If all available BSVM/ESVM channels are used for MOH/BGM feature and *360 xxx feature will not function.
“ MOH from DISA Msg. - 13 Installation The following cases, we have to delete all message in E-SVM card. 1- New Installation 2- Change the E-SVM card. 3- Change the OPB-3 card. How to delete: Select the E-SVM card. Click
“ 5-Digits DECT Extension Numbering - 5-digits S-XDP is possible. Ext.30001 - Compatibility DECT-CS KX-TDA0141 (Ver.5.00 later) KX-TDA0142 (Ver.5.00 later) KX-TDA0158 (Ver.5.00 later) KX-NCP0158 (Ver.1.000) Ext.20001 - Compatibility DECT-PS KX-TCA175/275 New PCMC Programming
CTI Application “ DECT Control by CTI (TAPI) - 1 Outline LAN Ext.20001 CTI Server CTI Ver.5001 TSP: Ver. 3.1.1.1 Un-supported DECT operation. - Answer Call (AnswerCall) - Call monitor, Take over (IntrudeCall) - Compatibility DECT-CS KX-TDA0141 (Ver.5.00 later) KX-TDA0142 (Ver.5.00 later) KX-TDA0158 (Ver.5.00 later) KX-NCP0158 (Ver.1.000)
CTI Application “ DECT Control by CTI (TAPI) - 2 Receive call operation Call information Ext.20001 2.Ring 1.Call Ext.20001 Ext.30001 3.Answer 1. Ext.30001 calls Ext.20001 (DECT) 2. We can not answer by the CTI Application. 3. We have to answer by the DECT PS. We can not answer by CTI Application.
CTI Application CTI Application “ DECT Control by CTI (TAPI) - 3 Make call operation Old Type DECT-PS 1.Call Ext.30001 Ext.20001 2.Ring 5.Ring 4.Answer Ext.30001 3.Answer Make a call to Ext.30001 by CTI Application. The DECT-PS rings, → Off-hooks → Ext.3001 rings. New Type DECT-PS 1.Call Ext.30001 Ext.20001 2.Ring 5.Ring 4.Answer Ext.30001 3.Auto-Answer Make a call to Ext.30001 by CTI Application. The DECT-PS rings, → Auto-Answer → Ext.3001 rings.
“ DECT Control by CTI (TAPI) - 4 *1 : Requires manual answer to the call back ringing by PS, like by SLT.
“ DECT Control by CTI (TAPI) - 5 *1 : Requires manual answer to the call back ringing by PS, like by SLT.
“ Different Ring Tone for ICD-G call - 1 Customer Request Function Two companies are sharing the one operator. ICD-G 601 (Company-A) An operator wants to distinguish the arrival calls to two companies by a different tone. Ext.20001 Tone-A Incoming call to ICD-G601 ICD-G 602 (Company-B) Ext.20001 Incoming call to ICD-G602 Tone-B
“ Different Ring Tone for ICD-G call - 2 To enable the function, we have to program the reserved bit 06-1 and 06-2 to “Enable” Reserved bit 06-1: TCA175/TCA275 Reserved bit 06-2: TD7684/TD7694/TD7685/TD7695 (US-DECT). Enable : The function is enabled. Disable : The function is disabled. (Default) TCA175 and TCA275 TD7684/TD7694/TD7685/TD7695 (US-DECT)
“ Different Ring Tone for ICD-G call - 3 Condition - Compatibility DECT-CS KX-TDA0141 (Ver.5.00 later) KX-TDA0142 (Ver.5.00 later) KX-TDA0158 (Ver.5.00 later) KX-NCP0158 (Ver.1.000) - Compatibility DECT-PS KX-TCA175/275 KX-TD7684/7694/7685/7695 (US-DECT) Only. - Ring Tone Ring Tone is fixed by an ICD-Group number.
“ Different Ring Tone for ICD-G call - 4 Condition • Group Ring setting. • The Group Ring setting is disabled after the reserved bit 06-1 and 06-2 are set to “Enable”.
“ Transfer Wav File to Build-in-SVM - 1 High Quality OGM (OGM01–64) PBX Data Bus Build-in-SVM MSG Not Support SVM-1 1 2 3 4 - 62 63 64 65 66 67 - 247 248 249 250 Not Support SVM-2 1 2 3 4 - 62 63 64 65 66 67 - 247 248 249 250 Saved for OGM SVM
“ Transfer Wav File to Build-in-SVM - 2 High Quality OGM (OGM01–64) PBX Data Bus Build-in-SVM Wav Format 8KHz 16bit Monaural 1 2 3 4 - 62 63 64 65 66 67 - 247 248 249 250 High Recording Quality mode 1 2 3 4 - 62 63 64 65 66 67 - 247 248 249 250
“ Transfer Wav File to Build-in-SVM - 3 Recording 1- Set “Build-in-SVM” to “OUS” 2- Go to “Utility”- “Message File Transfer” PC to PBX 3- Select “Build-in-SVM” 4- Click 5- Select a wav file. Wav Format 8KHz 16bit Monaural 8- Click 6- Click 7- Select OGM Message Number
“ Transfer Wav File to Build-in-SVM - 4 File transfer to PBX 9- Click 10- Click 11- Set “Build-in-SVM” to “INS” Finish