Download
1 / 37
370 likes | 507 Views
Yeast Culturing 101: History , Basics and Best Practices. Presented by Shawn McBride on behalf of the Carolina BrewMasters @ NHC June 28 th 2013. History. Most of history fermentation was a divine mystery. Known as “ godisgood ”.

E N D
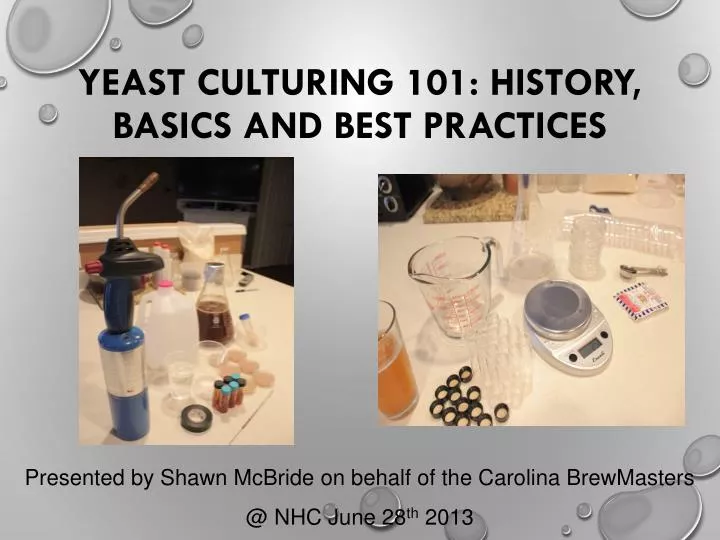
Yeast Culturing 101: History, Basics and Best Practices Presented by Shawn McBride on behalf of the Carolina BrewMasters @ NHC June 28th 2013
History Most of history fermentation was a divine mystery. Known as “godisgood”. Reuse began in twelfth century and yeast “domestication” began occurring. Brewers used yeast from successful batches and discarded yeast from bad batches.
History 1680 Anton van Leeuwenhoek first to observe yeast through a microscope. He did not know it was living. Fermentation was thought of as a spontaneous process. 1789 Antoine-Laurent Lavoisier described chemical nature of fermentation as parts of sugar turning into carbon dioxide and alcohol.
History Mid 1800’s Loius Pasteur established yeast as a living organism. Pasteur made the greatest advances than anyone in the history of beer. His breakthroughs led to important advances for the whole civilization. Brewers adopted Pasteurs ideas and began cleaning their yeast cultures.
History Carlsberg Brewery isolated the first lager yeast strain. Emil Christian Hansen was the first to develop pure culture techniques. Same techniques we still use today
Fermentation Timeline • Lag phase: Zero to 15 hours after pitching. • Yeast begins acclimating to environment. • Cells begin uptake of oxygen, minerals, and amino acids. • Yeast need oxygen in order to produce sterols which are critical in yeast membrane permeability.
Fermentation Timeline • Exponential Growth Phase: 4 hours to 4 days. • Yeast begin consuming sugars and produce CO2. • Cell counts increase rapidly. • Yeast produce ethanol and flavor compounds. • Layer of foam forms on surface of beer.
Fermentation Timeline • Stationary Phase: Three to ten days. • Yeast growth slows. • Much of the flavor and aroma compounds have been produced. • Yeast will re-absorb much of the diacetyl and acetaldehyde produced. • Yeast begin to settle
What Yeast Strain Do I Use? • Dr. George Fix devised a unique system for categorizing ale and lager brewing yeast. • He created five categories for ales in an attempt to organize them in terms of flavor characteristics. • Ales – • Fruity: Complex flavors, ferment and clear quickly. Traditionally from England • Hybrid: Ale strains that create lager like beer. Kolsch & Altbier. • Phenolic: Clove and banana. Belgians and German Weizen. • Clean: Low fruitiness and fusel • Eccentric: Unusual characteristics. Sours, Super High Gravity. • Lager – • Dry: Crisp, clean, refreshing. • Full: Maltier
Yeast Criteria/Characteristics • Attenuation: Percentage of sugars yeast consume. Usually between 65%-85%. • Flavor Profile: Fruity, Phenolic, Dry, & Malty are some examples. • Temperature Profile: • Fermentation temperature recommendations. • Ales typically 60 - 75°F • Lager typically 45 - 55 °F • Flocculation: Ability of yeast cells to aggregate into clumps and drop to the bottom. Resulting in clearer beer.
Flocculation • High - • start to flocculate by day 3-5. • higher levels of diacetyl and lower attenuation. • good for malty ales. • Medium - • start to flocculate by day 6-15. • ideal for ales. • clean, balanced flavor production. • Low – • fail to flocculate by day 15. • good for Belgians and Hefeweizens
Reasons To Culture Yeast • Cost. • Brewing flexibility. • Year around strain availability. • Sharing with others. • Nerd/Homebrew Bug factor.
Equipment • Scale that can weigh grams accurately. • Stir-plate w/ stir bar • Propane torch • Bunsen burner * • Inoculation loop • Syringe or Pipette • Test Tubes • Petri-dishes * • Erlenmeyer flasks (50ml, 250ml, 500ml, 1000L, 2000ml)* • Para film/Vinyl Tape • Aluminum foil • Pressure cooker or autoclave • Agar (strongly suggest against gelatin since it will melt) • Wort (malt based 1.030 – 1.040 SG) • Yeast Nutrient * • Labels * = In my opinion these are optional to some degree
Lab Space • No or very little airflow. • Minimal foot traffic, noise and vibration. • Adequate lighting and ambient temperatures. • Wipe down all surfaces with sanitizing solutions. • Clean hands and clothing.
Sterilizaton • Use a pressure cooker and hold the temperature between 250 & 273 °F for at least 15 minutes (15 PSI). • When using a pressure do not vent rapidly, let the pressure cooker release the pressure itself when the 15 minutes are up. (Releasing the pressure will result in the liquid inside boiling rapidly and gushing out.)
Wort Starter • Mini batch of beer (but usually without hops). • Specific gravity between 1.030 and 1.040. • 10 to 1 ratio of malt and water. • 1 gram of DME for every 10ml of final wort volume. • 2 liter wort starter = 200gm DME and enough water to equal 2000ml, and 1/8tsp yeast nutrient • You can also make extra wort and can it in quart size and 8 oz mason jars. These can be used to step up slants later. Include the jars in the pressure canner with your slants so the starter wort is sterile.
Preparing Slants & Plates • Slants and plates are made with 1-2% agar mixed with 1.030 -1.040 wort and nutrient. (agar solution) • 10-20 grams of agar to 1 liter of prepared wort.
Preparing Slants • Prepare 1 liter of 1.040 wort without hops and with nutrient. • Sprinkle 15 grams of agar powder on wort surface. Allow to hydrate for a few minutes. • Stir and heat in a microwave or stove to melt the agar and boil for a few minutes until agar is dissolved. • Transfer to 4 dram (15ml) vials with a sanitary syringe or pipette. Fill ½ way. • Place filled vials and caps in pressure cooker for 15 min @ 250°F (15 PSI). Allow to vent normally. • Cap slants loosely and place at a 20-35° angle and allow to cool. • Store at room temp for about 24 hours. • Tighten caps and wrap with para film or vinyl tape and place in fridge. • Once inoculated label slant with strain and date or production
Preparing Plates • Prepare agar solution as for slants. • Place agar solution in Erlenmeyer flask. • Place flask and petri-dishes (if glass) in pressure cooker at 250°F (15 PSI) for 15 minutes, making sure to vent normally. • Once you can hold flask comfortably pour agar into plates and cover with lids. • Once plates cool and agar has set stack them and wrap a rubber band around the stack. Flip over onto lids. • Place at room temp for a day or two until condensation evaporates. • Wrap in para film or vinyl tape and store in the fridge. • Once inoculated label strain and date of production
Streaking a slant • Ensure work area is sanitized and free of drafts. • Sterilize or “flame” inoculation loop. • Open slant (vial/smack pack) and flame opening. • Cool loop by placing in sterile distilled water or touching agar portion of slant. • Touch loop to yeast on surface of slant. Do not get a loop full, you only want to touch the yeast slick. • Re-flame slant and close.
Streaking a plate • Pick up agar side of plate. Great Website with flash Animation showing this • Grow plate 2-3 days at room temp. • Once grown seal with para film or vinyl tape and store in fridge. • When streaking a slant only 1 streak is done
Storage Alternatives • Oil Immersion – • After inoculating slant add a layer of sterile food grade mineral oil. Store in fridge. • Sterile Distilled Water Immersion – • Add 2-3 ml of distilled water to a vial. • Sterilize in pressure cooker at 250°F (15 PSI) for 15 min. • Using sterile loop transfer colony from plate to water. (match head size) • Cap vial tightly, seal with para film or vinyl tape. • Store at room temp or fridge.
Storage Alternatives • Freezing • 1000ml starter fermented out with chosen yeast. • Crash cool in fridge till yeast drop out of suspension. (2-3 days) • Fill storage vials with 20% glycerine (make sure it’s the kind that is safe to ingest). • Loosely cap vials and place in pressure cooker at 250°F (15 PSI) for 15 minutes. Vent normally, and let cool to room temp. • Decant off most of the wort in the starter and with a sanitized syringe or pipette extract enough yeast slurry to fill the vial roughly 80% full. (You want to pull from the middle of the yeast cake where the yeast is most healthy.) • Cap vial and shake vigorously to thoroughly mix glycerine with yeast slurry. • Place vials inside of a small cooler filled with ice packs and store in the freezer. This is especially essential if you have a self-defrosting freezer.
Picking a Colony • Colony selection is a vital part of culturing. • Remove plate or slant from storage and allow to warm-up to room temp. • Analyze plate/slant for unusual looking colonies or moldy areas. If moldy discard. • Shiny colonies usually are a bacterial infection. • Misshapen colonies often are wild yeast. • Yeast colonies are round, creamy, and off-white or milky-manilla colored discs with a peak in the center. • Colonies should be between 1/8” to 3/16” (3-5 mm) • Select about 10 colonies to maintain genetic diversity when adding to a starter.
Yeast colonies in slants • Healthy yeast in 4 vials, a mold spot in the far right vial. This vial is contaminated and the yeast colony should not be saved.
Stepping up a starterAll steps should be done in a clean, sanitized environment. Spray, wipe or dip vials, jars and workspace with starsan/one-step. • Plan to step up slants 6-7 days in advance of your brew session • Use a flamed/sanitized inoculation loop and scrape a small amount out of a slant and place in a 15ml test-tube starter. Cap the vial and gently shake it to mix the yeast into the wort. • Slightly loosen the slant vial cap – let it sit 24-48 hours at room temp.
Step 2 • Tighten the vial cap – gently shake, then pour the wort and yeast mix into 8oz jar or 250ml of sterile wort. • Add sanitized stir bar, put lid on the jar and tighten it down. (If using a flask use a sanitized piece of aluminum foil as a cap.) • Shake the 8oz jar or 500ml flask gently to aerate, then slightly loosen the lid so it’s not tightly sealed. (If using a flask loosen aluminum foil to unseal.) • Put the jar/flask on a stir plate and allow the yeast to grow at room temp (68-70 degrees) for 36 – 48 hours.
Step 3 • On day 3 or when yeast activity is visible in the jar/flask, pour the contents into a larger jar or flask with enough sterilized wort to make a 1-3 liter starter. • If doing 10 gallon batches split evenly between 2 separate 2000ml flasks and grow them separately, or use a 5000ml flask. • Place on stir-plate for 24-36 hours.
Typical step up schedule for 5 gal average OG brew (Sunday brew day) Sunday Evening Tuesday Evening Thursday Evening Saturday Step up the starter to 1-3 liters depending on the requirements of the brew. Keep on stir plate for an additional 24-36 hours. Cold Crash Starter in the fridge. Decant spent wort prior to pitching. Add sterile wort from 8oz jar into slant vial and let the yeast wake up and grow 8-24 hours. Alternately Scrape loopful from slantand place inside 15ml test-tube. Pour vial back into 8oz jar with sterile wort. Alternately place contents from vial into a 500ml flask filled with 250ml of sterile wort. Keep on stir plate 36-48 hours until wort shows activity.
Yeast Washing(Technically this is yeast rinsing – yeast washing includes an acid wash process) • Yeast washing allows home brewers to store ‘washed’ yeast from a batch for several weeks or longer. Viability decreases over time, and some yeasts store longer than others. • The rinsing process removes most of the trub and leaves healthy yeast that can be stored in the refrigerator for a short time. • Starters should be used if the yeast is stored for more than a few days. • Yeast from high gravity or high IBU beers should not be re-used, it may be stressed. • After a few generations you may risk changes/mutations in the yeast. You may end up with less flocculant/ more attenuative beers in future batches depending on what yeast stays in suspension during the washing process.
Yeast Washing Process • To begin, add 1 1/2 to 2 gal of water in a pressure cooker. Add a large jar (2-4 qt) and 2 pint jars and lids and cook for 15 minutes at 15 PSI. (250f) This will sanitize the jars, lids and the water. • After pressure has been released fill the jars with water from the pot, screw on lids and let them cool to room temp. • Rack and keg/bottle your beer. Then add the cooled, sanitized water from the jars into your fermenter.
Yeast Washing Process • Gently swirl the water around in your fermenter, and let it settle for a few minutes • Next, pour the yeast/trub mix into the large jar. Wait 10-15 minutes for it to settle. • Carefully fill the pint jars from the large without stirring up the settled trub/dead yeast on the bottom of the large jar. Cover and refrigerate. Make a starter before re-using the yeast.
Top Cropping • Some ale strains of yeast can be top cropped. This is the process of skimming yeast off the surface of the beer near the end of fermentation. This skimmed yeast can either be immediately pitched into another brew, or added into a jar with sanitized (boiled and cooled) water. It can be stored in the refrigerator similar to a batch of washed yeast. • Here is Wyeast’s description on when to top crop: Yeast can be harvested once the gravity has dropped below 50% of original gravity. First head will rise approximately 24-36 hours into fermentation. Discard 1st skim (“dirt skim”). A clean, 2nd head will rise which can be harvested with a 2nd skim. • To top crop, you must use a bucket to ferment so that you have access to the beer surface during fermentation. Wyeast 1318 ready to be skimmed from a beer
Top Cropping • Use a sanitized stainless steel spoon or glass measuring cup and skim the yeast off the surface of the beer. • Top cropping will only work with some wheat beer yeasts and some English yeasts. Yeast manufacturer web descriptions will usually specify if the yeast is suitable for top cropping. I’ve had great success top cropping with Wyeast 1318 London Ale III (see pics below). It also makes great EPAs, porters and stouts.
Yeast Culturing Websites Freezing Yeast: http://www.homebrewtalk.com/wiki/index.php/Yeast_bank Sterile Distilled Water Storage: http://brewery.org/library/SterileDW1096.html Excellent culturing site that covers everything: http://www.alsand.com/beer/yeast/index_E.html Another great culturing site: http://brewiki.org/Yeast/Culturing Yet another great culturing site: http://www.jimsbeerkit.co.uk/forum/viewtopic.php?f=12&t=35033 Discountvials.com (I buy the 4 dram vials): http://www.discountvials.com/4-Dram-Glass-Vial-Pkg-of-25-p/ct182170-25.htm Mr Malty Yeast Pitching Rate Calculator: http://www.mrmalty.com/calc/calc.html Laboratory Methods from KSU: http://www.phys.ksu.edu/gene/g1a.htm
References • “Yeast the Practical Guide to Beer Fermentation” – Chris White & Jamil Zainasheff (2010). • “The Fungus among Us: Yeast Culturing for Home Brewers” -Yuseff Cherney & Chris White (1994). • “Sterile Distilled Water Yeast Storage” - Dave Whitman (1996). • “ Yeast Experiments” Part G: Methods & Materials – Kansas State University (1999)