Download

1 / 11
110 likes | 114 Views
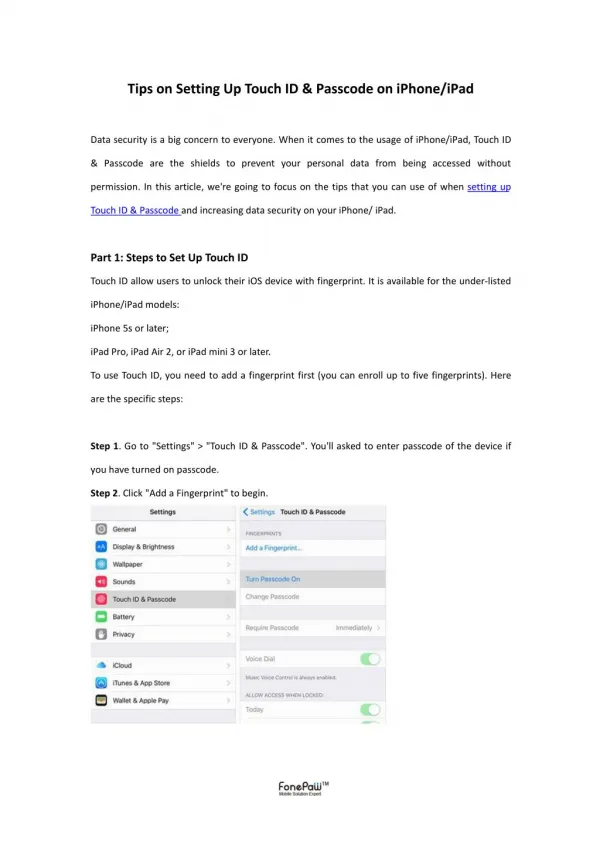
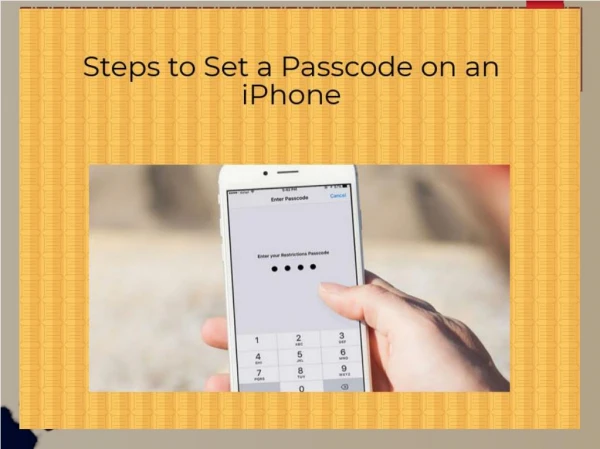
How to Set a Passcode on iPhone and iPod Touch<br>

E N D
Introduction - Set a passcode on your iphone or ipod touch. This essential security measure protects all the personal information — financial details, photos, emails and texts, and more — that's stored on your mobile device. Without a passcode, anyone who has physical access to your device — like a thief, for example — can access that information. Putting a passcode on your device introduces a strong layer of security for your sensitive data. You must establish a passcode to use face id or touch id.
Set up email, calendar, and contacts - You can connect to your office 365 or other exchange-based email on an iphone or ipad. When you set up an exchange account on your phone or tablet, you’ll be able to access and synchronize your email, calendar, and contacts. If this is the first email account on your iphone, select mail. Otherwise, select settings > mail, contacts, calendars > add account. 2. Select microsoft exchange. 3. Enter your full email address, and your password. Then select next on the upper-right corner of the screen. Your mail program will try to find the settings it needs to set up your account. Skip to step 5 if your mail program finds your settings.
Set up email, calendar, and contacts - 4. If your iphone can’t find your settings, you’ll need to manually enter your server name. If you’re connecting to your office 365 email. 5. Choose the type of information you want to synchronize between your account and your device, and then select save. By default, mail, contacts, and calendar information is synchronized. 6. If you're prompted to create a passcode, select continue, and enter a numeric passcode. If you don’t set up a passcode, you can’t view your email account on your iphone.
Install the Lync 2013 app - With the lync 2013 for iphone app you can choose from several ways to communicate with others, including IM, phone calls, and video calls, using either wi-fi only or your cellular data connection when you’re not connected to wi-fi. 1. From your phone, go to the app store, and search for microsoft lync 2013 for iphone. 2. Select the free button in the app, select install, and then enter your app store apple ID and password. As soon as the app is installed, it appears on your home screen. 3. To sign in, use your sign-in address and password. In some instances a user name should be provided in the advanced options. If you haven’t used lync on your desktop computer and this is the first time you’re using lync, you need to have a lync account created and a sign-in address. If you don’t know this information, contact your workplace technical support. You cannot create a new lync account from the lync for iphone app.
Install the office mobile app - Install the office mobile for iphone app on your iphone, so you can edit documents. The office mobile app lets you access and edit office word, excel, and powerpoint documents. It is optimized for the screen size of an iphone. Before you install office mobile, check the system requirements to make sure your phone can run it. Then: -1. Select app store on your iphone, and search for office mobile for office 365 subscribers. 2. After installing the app, sign in with your office 365 user name and password. Once installed, you can create new documents or view existing ones on your onedrive for business or sharepoint team sites.
Install and set up the onenote app - Microsoft onenote for iphone or ipad gives you instant access to your notebooks on onedrive and sharepoint team sites. To get started, all you need is a microsoft account. If you’re installing onenote for the first time, from your iphone or ipad, go to the app store, and search for onenote for iphone or onenote for ipad. 2. Select the free button in the app, and then select install. 3. Enter in your app store apple ID and password. As soon as the app is installed, it appears on your home screen. 4. To sign in, use your office 365 user name and password.
Install and set up the onenote app - To sync your notebooks – if you already have onenote installed with a personal microsoft account you can add your work-related office 365 account to access any of your office 365 notebooks. 1. Open the onenote app on your iphone or ipad. 2. Select notebooks. 3. Select the settings icon. 4. Select Accounts > Add a Service > Office 365 SharePoint. 5. Enter your email address and password, and select Sign In to add the account. 6. Close OneNote Settings. 7. Select More Notebooks. Your notebooks appear under Recent.
Thank you for watching this site Click here to install webroot setup http://webrootcomsafe.Support