Download
1 / 15

E N D
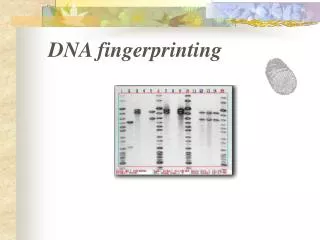
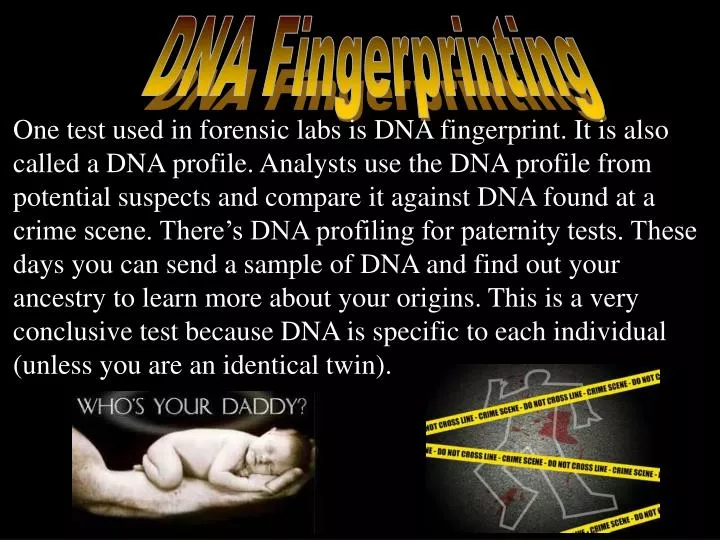
DNA Fingerprinting One test used in forensic labs is DNA fingerprint. It is also called a DNA profile. Analysts use the DNA profile from potential suspects and compare it against DNA found at a crime scene. There’s DNA profiling for paternity tests. These days you can send a sample of DNA and find out your ancestry to learn more about your origins. This is a very conclusive test because DNA is specific to each individual (unless you are an identical twin).
HOW ARE DNA FINGERPRINTS MADE??? • The process begins with a sample of DNA • Isolate & replicate the DNA http://learn.genetics.utah.edu/content/labs/pcr/
Cut the DNA with restriction enzymes (each enzyme looks for a specific pattern) • Place fragmented DNA in the wells of a polyacrylamide gel and electrophoresis is performed (negative charge on top by wells and positive charge on bottom) - +
HOW DOES IT WORK??? - • DNA has a negative charge, so the fragments of DNA are attracted toward the positive charge (bottom of gel). • The smaller fragments of DNA will be able to move quicker toward the bottom than the larger pieces. • Thus DNA is separated by size (smaller pieces toward the bottom and the larger pieces toward the top). 10 9 8 7 6 5 4 3 2 1 http://www.dnalc.org/resources/animations/gelelectrophoresis.html + http://www.pbs.org/wgbh/nova/sheppard/cleared.html
You would be given a sequence of DNA and told of a restriction enzyme that cuts at a particular sequence of base pairs. • You would then make a cut in the DNA (draw a line) to make the DNA fragments (you will be the restriction enzyme). • Remember: Restriction enzymes only cut 5’ to 3’ EXAMPLE: Restriction enzyme BAM H1: AATT 7 15 GAATTCGGAATTCCATTGGTAAGAATTCGGTA CTTAAGCCTTAAGGTAACCATTCTTAAGCCAT • Now count the number of DNA bases between each of the cut sites using the top DNA sequence only. There are 7 bp between the 1st two cuts & then there are 15 bp between between the 2nd and 3rd cuts!!!! Then what???
Based on the counted number of base pairs in the DNA fragment, make a band at the appropriate spot in the gel using the ladder. 16 15 14 13 12 11 10 9 8 7 6 5 4 3 2 1
Let's Try reading a DNA fingerprint!!!
DNA Fingerprints of a family (D=daughter, S=son) What can you say about this family looking at their DNA fingerprints?? D1 & S1 are the biological offspring of both parents D2 is the biological child of mom but not dad S2 is not the biological son of either of the parents tested
HOW DO THE NUMBER & TYPE OF RESTRICTION ENZYMES DIFFER ON THE RESULTS OF A DNA FINGERPRINT?
There’s been a murder!!!
It’s time for some DNA Fingerprinting • In the lab packet you need to do the following: • Circle chemicals needed • Underline the equipment needed • Highlight the purpose of this lab • Next to each step, write why you are doing this.
Procedures for Casting Gels Seal the ends of the gel tray securely with strips of standard masking tape. Press the tape firmly to the edges of the gel tray to form a fluid-tight seal. Place the gel tray flat on the lab table (Make it as level as possible). Place the plastic comb into the appropriate slot of the gel tray. Gel combs should be placed within ½ inch of the end of the gel casting tray. The combs will form the wells into which the samples of DNA will be loaded. Pour enough agarose to cover the gel comb teeth or to a depth of 0.5-0.75 cm. Do not move or handle the gel tray until the gel has solidified. This will take 10 to 20 minutes. It will appear cloudy, or opaque, when ready to use. Carefully remove the comb from the solidified gel. Remove the tape from the edges of the gel tray. Place the tray into the DNA electrophoresis chamber so that the sample wells are at the black (cathode) end of the base. DNA samples will migrate towards the red (anode) end of the chamber during electrophoresis.