Download
1 / 76
760 likes | 938 Views
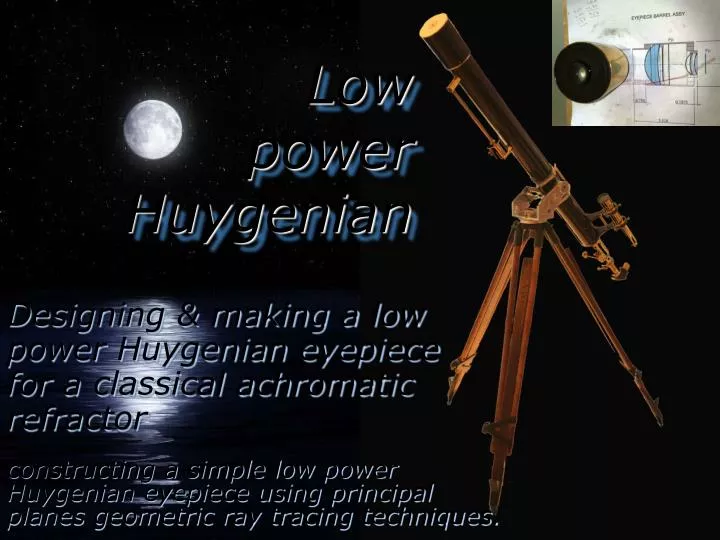
Low power Huygenian. constructing a simple low power Huygenian eyepiece using principal planes geometric ray tracing techniques. Designing & making a low power Huygenian eyepiece for a classical achromatic refractor. LOW POWER HUYGENIAN Constructing a Huygenian eyepiece. LOW POWER HUYGENIAN

E N D
LowpowerHuygenian constructing a simple low power Huygenian eyepiece using principal planes geometric ray tracing techniques. Designing & making a low power Huygenian eyepiece for a classical achromatic refractor
LOW POWER HUYGENIAN Constructing a Huygenian eyepiece
LOW POWER HUYGENIAN Constructing a Huygenian eyepiece
LOW POWER HUYGENIAN Constructing a Huygenian eyepiece
LOW POWER HUYGENIANConstructing a Huygenian eyepiece RAY TRACING by PRINCIPAL PLANES _ ACHROMATIC HUYGENIAN EYEPIECE •1) PP1 lies @ EFL behind OG focal plane
LOW POWER HUYGENIANConstructing a Huygenian eyepiece •2) Draw chief ray through OG centre to edge of image field (taken to be 2-inches) •3) Draw edge rays through OG top & bottom to edge of image field
LOW POWER HUYGENIANConstructing a Huygenian eyepiece • •4) Field lens lies @ F1 in front of PP1; PP1 & F1’ coincide
LOW POWER HUYGENIANConstructing a Huygenian eyepiece •5) Construct line parallel to axis touching edge of field lens
LOW POWER HUYGENIANConstructing a Huygenian eyepiece •6) Construct line from intersection of PP1 & axis to edge of field lens
LOW POWER HUYGENIANConstructing a Huygenian eyepiece •7) Eye lens lies @ 1/2(F1+F2) behind field lens _ F2 •8) Construct line parallel to (6) intersecting centre of eye lens @ axis
LOW POWER HUYGENIANConstructing a Huygenian eyepiece •9) Construct perpendicular to axis @ F2 behind eye lens • During acclimation, an f/14 achromat, compared to an f/7 apochromat would require ~43% less frequent focus correction over an 80% longer cool down time, over a focal shift 3 times greater.
LOW POWER HUYGENIANConstructing a Huygenian eyepiece •10) Construct line from intersection of (8) & (9) @ F2 behind eye lens through intersection of (6) & eye lens to cross (5)
LOW POWER HUYGENIANConstructing a Huygenian eyepiece •11) Where (5) & (10) cross construct perpendicular to axis _ PP2
LOW POWER HUYGENIANConstructing a Huygenian eyepiece •12) Field stop lies @ F2 in front of eye lens
LOW POWER HUYGENIANConstructing a Huygenian eyepiece •13) Where (10) crosses axis, lies the Ramsden Disc _ Fc
LOW POWER HUYGENIANConstructing a Huygenian eyepiece •14) Construct line from intersection of PP1 @ axis to edge of field lens. Where it crosses PP2 gives the radius of the field stop. Angle subtended from Fc @ axis gives geometric afov semi-angle
LOW POWER HUYGENIANConstructing a Huygenian eyepiece •15) Construct line parallel to axis touching lower edge of field lens
LOW POWER HUYGENIANConstructing a Huygenian eyepiece •16) Drop perpendicular from eye lens to (15)
LOW POWER HUYGENIANConstructing a Huygenian eyepiece •17) Construct line from intersection of (15) & (16) through intersection of PP2 & axis
LOW POWER HUYGENIANConstructing a Huygenian eyepiece •18) Construct line parallel to (17) through field lens & back to (16); where it intersects (15) construct perpendicular to axis _ PP2’
LOW POWER HUYGENIANConstructing a Huygenian eyepiece •19) Construct line through intersection of image plane Fp & axis & intersection (17) & field lens, to intersect (18) @ PP1’ & F1’
LOW POWER HUYGENIANConstructing a Huygenian eyepiece •(20) Construct rays from field lens intersecting lower edge of field stop to eye lens •(21) Construct chief ray from F2 to Fc @ axis •(22) Construct oblique rays parallel to it. Ray height @ Fc gives exit pupil
LOW POWER HUYGENIANConstructing a Huygenian eyepiece •(23) Fc - F2 = Eye Relief
LOW POWER HUYGENIANConstructing a Huygenian eyepiece The apparent field of view:
LOW POWER HUYGENIANConstructing a Huygenian eyepiece The actual lenses are not thin, so the raytrace has to be revised to take into account the principal planes within the thick lenses. This is done using Gullstrand’s equations. The lens radii are measured using a spherometer, and their focii and principal planes calculated. For the eye lens crown element: The achromatic is a cemented doublet so the internal radii cannot be directly measured. For calculations to determine the internal surface radii refer to end of article.
LOW POWER HUYGENIANConstructing a Huygenian eyepiece And for the flint lens element: The achromatic is a cemented doublet so the internal radii cannot be directly measured. For calculations to determine the internal surface radii refer to end of article.
LOW POWER HUYGENIANConstructing a Huygenian eyepiece For the field lens:
LOW POWER HUYGENIANConstructing a Huygenian eyepiece The lenses need to be drawn in CAD: The eye lens
LOW POWER HUYGENIANConstructing a Huygenian eyepiece The lenses need to be drawn in CAD: The field lens
LOW POWER HUYGENIANConstructing a Huygenian eyepiece And the revised raytrace:
LOW POWER HUYGENIANConstructing a Huygenian eyepiece The improvised optical bench • Even an ATM optical bench is expensive. But you can always improvise with plasticine and a carpenter’s rule. • More precise separation mesures can be made with a vernier caliper. • Lens radii can be measured using a spherometer. • This is a “Fob Watch” style spherometer, graduated in Dioptres, and Pouces (a French inch - there are 36 Pouces in a Dioptre). • A lens with a focal length of 1m has a power of 1 Dioptre. • Surface powers can be added or subtracted to find the overall power of the lens. • These values are then inputted into Gullstrand’s equation to find the true focal length and the position of the principal planes.
LOW POWER HUYGENIANConstructing a Huygenian eyepiece Machining the eyepiece barrel • You could machine the barrel from brass barstock, but brass bar is very expensive, and since most of the barrel is hollow it would take an awfully long time at the lathe producing bin loads of swarf. • The sensible thing to do, from both a machining time and cost viewpoint is to select suitable tubestock, and design the barrel from available stock tube outside diameters and wall thicknesses. • Brass tubes are not always compatible so some barstock maybe required, but it can be kept to a minimum. • Turning screw threads is awkward so a design that relies on good fits and soldered parts makes the machinist’s job simpler. • Finished parts can be fastened together using hidden compression rings & circlips (not shown). • CZ121 tube & barstock costed @ £43.48 inc VAT. Compared to £83.19 inc VAT for 3” round x 6” length. • Alternative is scrap brass pipe & fittings.
LOW POWER HUYGENIANConstructing a Huygenian eyepiece prepping 2".75 OD x 4" length brass barstock for use as mandrel, held in 3 jaw scroll chuck & live centre
LOW POWER HUYGENIANConstructing a Huygenian eyepiece turning down 2".75 OD x 4" length barstock to ID of 2".5 OD x 16swg tube for use as mandrel
LOW POWER HUYGENIANConstructing a Huygenian eyepiece 2".5 OD x 16swg tube mounted on mandrel & turned to exact length 2".768
LOW POWER HUYGENIANConstructing a Huygenian eyepiece enlarging pilot hole
LOW POWER HUYGENIANConstructing a Huygenian eyepiece boring out barstock to 2".010 ID using single point tool
LOW POWER HUYGENIANConstructing a Huygenian eyepiece hard soldering 2".365 OD sleeve to 1"5 x 1/4" wall tubestock