Download
1 / 22
240 likes | 415 Views
NUR 111: SKILL 9-1. Using Safe & Effective Transfer Techniques. SKILL 9-1: Using Safe & Effective Transfer Techniques.

E N D
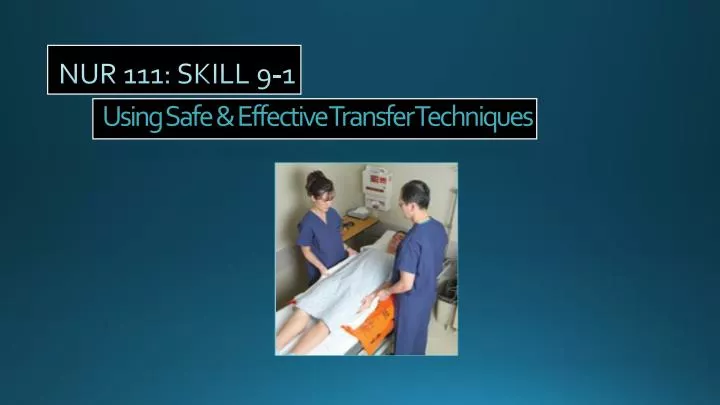
NUR 111: SKILL 9-1 Using Safe & Effective Transfer Techniques
SKILL 9-1: Using Safe & Effective Transfer Techniques • Transferring is a nursing skill to help a dependent patient or a patient with restricted mobility to attain positions to regain optimal independence as quickly and safely as possible. • Physical activity maintains and improves joint motion, increases strength, promotes circulation, relieves pressure on skin, and improves urinary and respiratory functions. • It also benefits a patient psychologically by increasing social activity and mental stimulation and providing a change in the environment.
Using Safe & Effective Transfer Techniques • One of the major concerns during transfer is the safety of the patient and the nurse. • The nurse prevents self-injury by using correct posture, minimal muscle strength, effective body mechanics, and lifting techniques, and appropriate lift devices. • Consider individual patients patient problems during transfer. For example, a patient who has been immobile for several days or longer may be weak or dizzy or may develop orthostatic hypotension (a drop in blood pressure) when transferred. • If there is any doubt about safe transfer, use a transfer belt and obtain assistance when transferring patients.
ASSESSMENT • 1. Assess physiologic capacity of a patient to transfer and the need for special adaptive techniques (see Chapter 6). Assess the following: • A. Muscle strength (legs and upper arms). • B. Joint mobility and contracture formation • C. Paralysis or paresis (spastic or flaccid) • D. Bone continuity (trauma, amputation), or calcium loss from long bones
ASSESSMENT – CONT’D • 2. Assess presence of weakness, dizziness, or postural hypotension • 3. Assess level of endurance • A. Assess level of fatigue during activity • B. Assess Vital Signs • 4. Assess patient’s proprioceptive function (awareness of posture and changes in equilibrium). • A. Ability to maintain balance while sitting in bed or on side of bed. • B. Tendency to sway or position self to one side. • 5. Assess patient’s sensory status, including adequacy of central and peripheral vision, adequacy of hearing, and presence of peripheral sensation loss.
ASSESSMENT – CONT’D • 6. Assess patient for pain (e.g., joint discomfort, muscle spasm) and measure level of pain using a scale of 0 to 10. Offer prescribed analgesic 30 minutes before transfer. • 7. Assess patient’s cognitive status • A. Ability to follow verbal instructions. • B. short term memory • C. Recognition of physical deficits and limitations to movement. • 8. Assess patient’s level of motivation, such as their eagerness versus unwillingness to be mobile. • 9. Assess previous mode of transfer (if applicable). • 10. Determine if a lift device is needed and the number of people needed to assist with the transfer. Do not start the procedure until all required caregivers are available – as this ensure safe patient transfer.
PLANNING • Expected outcomes following completion of procedure: • Patient dangles legs or sits without dizziness, weakness or orthostatic hypotension. • Patient tolerates increased activity • Patient can bear more weight. • Patient transfers without injury • Patient is more motivated to be mobile. • Patient transfers with minimal discomfort. • Explain procedure to patient. Repeat instructions simply and with continuity to patient with cognitive dysfunction.
IMPLEMENTATION • 1. Perform hand hygiene. • 2. Assist patient to a sitting position (bed at waist level). • A. Place patient in supine position – this enables you to assess patient’s body alignment continually and administer additional care such as suctioning or hygiene needs. • B. Face head of the bed at 45 degree angle and remove pillows. • C. Place feet in wide base of support with foot closer to head of bed in front of other foot. • D. Place hand near head of bed under patient’s shoulders, supporting patient’s head and cervical vertebrae. • E. Place other hand on bed surface. • F. Raise patient to sitting position by shifting weight from front to back leg. • G. Push against bed using arm that is placed on bed surface.
IMPLEMENTATION – cont’d • 3. Assist patient to sitting position on side of bed with bed in low position, using electric bed: • A. With patient in supine position, raise head of bed to 30 degrees. • B. Turn patient onto side, facing you on side of bed on which patient will be sitting. • C. Stand opposite patient’s hips. Turn diagonally so you face patient and far corner of foot of bed. • D. Place feet apart in wide base of support with foot closer to head of bed in front of other foot. • E. Place arm nearer head of bed under patient’s shoulders, supporting head and neck. • F. Place other arm over patient’s thighs. • G. Move patient’s lower legs and feet over side of bed. Pivot toward rear leg, allowing patient’s upper legs to swing downward. • H. At the same time, shift weight to rear leg and elevate – allows you to transfer weight in direction of motion.
IMPLEMENTATION – CONT’D • 4. Transfer patient from bed to chair with in the low position: • A. If patient has partial weight bearing with upper body strength, use bariatric transfer aid with minimum of two or three caregivers – the use of mechanical lift devices is strongly recommended to transfer a patient to reduce the risk for musculoskeletal injury. • B. If the patient has normal weight bearing and upper body strength, first assist them to sitting position on side of body (see Steps 3a to h). Have chair in position at 45 degree angle to bed. If using wheelchair, make sure that wheels are locked. Allow patient to sit on side of bed (dangling) for a few minutes before transferring to a chair. Ask them if they feel dizzy. Do not leave the patient unattended during the dangling.
IMPLEMENTATION – CONT’D • C. Apply transfer belt or use transfer board. Place board across bed to chair so patient can slide across it. Patient’s arm should be in a sling if flaccid paralysis is present. • A transfer belt allows you to maintain stability of patient, during transfer and reduces risk for falling. Transfer board makes sliding over to chair easy with less physical effort. A transfer belt is contraindicated after abdominal surgery. • D. Help patient apply stable, nonskid shoes. Place patient’s weight-bearing, or strong, leg forward, with weak foot back. • E. Spread your feet apart. • F. Flex hips and knees, aligning knees with patient’s knees – Flexing knees and hips lowers your center of gravity to object to be raised; aligning knees with patient’s allows for stabilization of knees when patient stands.
IMPLEMENTATION – CONT’D • G. Grasp transfer belt along patient’s sides. • H. Rock patient up to a standing position on count of three while straightening hips and legs and keeping knees slightly flexed. While rocking the patient in a back and forth motion, make sure that your body weight is moving in the same direction as the patient’s to ensure that you and the patient are moving in the same direction simultaneously. Unless contraindicated, patient may be instructed to use hands to push up if applicable. • I. Maintain stability of patient’s weak or paralyzed leg with your knee. • The ability to stand can b\often be maintained in paralyzed or weak limb with support of knee to stabilize. • J. Pivot on foot farther from the chair. • K. Instruct the patient to use armrests on the chair for support and ease into chair. • L. Flex hips and knees while lowering patient into chair – this prevents injury from poor body mechanics.
IMPLEMENTATION – CONT’D • M. Assess patient for proper alignment in a sitting position. Provide support for paralyzed extremities. Lap board or sling supports flaccid arm. Stabilize leg with bath blanket or pillow – this prevents injury to patient from poor body alignment. • N. Proper alignment for sitting position; head is erect, and vertebrae are in a straight alignment. Body weight is evenly distributed on buttocks and thighs. Thighs are parallel and in a horizontal plane. Both feet are supported on the floor, and ankles are comfortably flexed. A 2.5 to 5 cm (1 to 2 inch) space is maintained between edge of seat and popliteal space on posterior surface of knee • O. Praise patient’s progress, effort, and performance.
IMPLEMENTATION – CONT’D • 5. Perform horizontal transfer from bed to stretcher using slide board or friction-reducing board. • A. Determine number of staff required to horizontally transfer patient safely (three nurses recommended). • B. Lower head of bed as much as patient can tolerate. Be sure to lock bed brakes. • C. Cross patient’s arms on chest. • D. Lower side rails. To place slide board under patient, position two nurses on side of bed to which patient will be turned. Position third nurse on other side of the bed.
IMPLEMENTATION – CONT’D • E. Fanfold draw-sheet on both sides. • G. Place slide board under draw-sheet. • H. Gently roll patient back onto slide board • I. Line up stretcher with bed. Lock brakes on stretcher. • J. Two nurses position themselves on side of stretcher while the third positions self on side of bed without stretcher. • K. Fan-fold draw-sheet; using count of three, the two nurses pull draw-sheet with patient onto stretcher while the third nurse holds slide board in place. • L. Position patient in center of stretcher. Raise the head of the stretcher if not contraindicated. Raise the stretcher’s side rails. Cover patient with a blanket.
IMPLEMENTATION – CONT’D • 6. Use mechanical / hydraulic lift to transfer patient from the bed to the chair: • A. Bring left to bedside or lower ceiling lift and position properly. • B. Position chair near bed and allow adequate space to maneuver lift. • C. Raise bed to high position with mattress flat. Lower side rail on side near the chair. • D. Raise opposite side rail unless a second nurse is assisting. • E. Roll patient on side away from you.
IMPLEMENTATION – CONT’D • F. Place hammock or canvas strips under patient to form a sling. With two canvas pieces, lower edge fits under the patient’s knees (wide piece), and upper edge fits under patient’s shoulders (narrow piece). • G. Raise bed rail. • H. Go to opposite side of bed and lower side rail. • I. Roll patient to opposite side and pull hammock (strips) though and smooth over bed surface. • J. Roll patient supine onto canvas hammock. • K. Remove patient’s glasses if appropriate. • L. Place horseshoe bar of lift under side of bed (on side with chair.) • M. Lower horizontal bar to sling level by following manufacturer directions. Lock valve if required.
IMPLEMENTATION – CONT’D • N. Attach hooks on strap (chain) to holes in sling. Short chains on straps hook to top holes of sling; longer chains hook to bottom of sling. • O. Elevate head of bed. • P. Fold patient’s arms over their chest. • Q. Pump hydraulic handle using long, slow, even strokes until patient is raised off bed. For ceiling lift turn on control device to move lift.
IMPLEMENTATION – CONT’D • R. Use steering handle to pull lift from bed and maneuver the patient to the chair. • S. Roll base around the chair. • T. Release check valve slowly (turn to left) and lower patient into the chair. For ceiling lift again use control device to lower the patient. • U. Close check valve or turn off control device as soon as patient is down and straps can be released. • V. Remove straps and mechanical/hydraulic lift. • W. Check patient’s sitting alignment, and correct if necessary. • 7. Perform hand hygiene.
EVALUATION • 1. Assess patient’s body alignment, position, and level of comfort. Patient’s body should be supported by adequate mattress, and vertebral column should be without observable curves. • 2. Measure ROM • 3. Observe for areas of erythema or breakdown involving the skin. • UNEXPECTED OUTCOMES: • 1. Joint contractures develop or worsen • 2. Skin shows localized areas of erythema and breakdown. • Patient avoids moving
RECORDING & REPORTING • Record procedure & observations (e.g., condition of the skin, joint movement, patient’s ability to assist with positioning). • Report observations at change of shift and document in nurses’ notes and electronic health record • Record time and position change of patient throughout the shift.
END OF SKILL • This is the end of the skill • Again, while it may seem easy “on paper”, you must practice this skill in the nursing lab in order to pass it. • One student can be “the patient” and the other student can be “the nurse” and then vice-versa! • Your book has provided a video for you to watch and the link is below: • http://booksite.Elsevier.com/Perry-Potter/ClinicalSkills/video11.php • Elsevier: Perry-Potter: Clinical Nursing Skills and Techniques, 83 – 9.1; Safe and Effective Transfer Techniques.