Download
1 / 55
550 likes | 556 Views
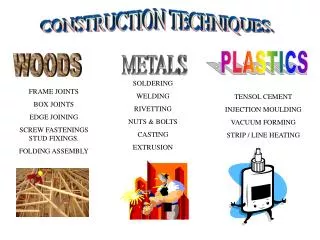
Construction Techniques and Moisture Control Module 28206-05. Transparency 1. Objectives. Upon completion of this module, you will be able to: 1. Explain and demonstrate techniques for constructing masonry around windows, doors, and other openings.

E N D
Construction Techniques and Moisture Control Module 28206-05
Transparency 1 Objectives • Upon completion of this module, you will be able to: • 1. Explain and demonstrate techniques for constructing masonry around windows, doors, and other openings. • 2. Explain the requirements for wall bracing, and demonstrate the techniques used to construct pilasters and other types of bracing. • 3. Identify the various types of insulation used in conjunction with masonry construction, and explain installation techniques. • 4. Identify the need for moisture control in various types of masonry construction, and demonstrate the techniques used to eliminate moisture problems. • 5. Construct corbeling in a double-wythe wall. • 6. Join intersecting walls. • 7. Install flashing.
Transparency 2 Performance Tasks • 1. Construct a four-course corbel starting at the fifth course of a double-wythe wall. • 2. Construct an intersecting block wall joined with wire mesh or metal lath. • 3. Install a row of flashing in an anchored veneered wall.
Transparency 3 Figure 2 – Specialized Blocks
Transparency 4 Figure 3 – Typical Chase in a Masonry Wall
Transparency 5 Figure 5 – Lug Sill and Slip Sill
Transparency 6 Figure 6 – Placement of a Lintel
Transparency 7 Figure 7 – Steel Angle Used as a Lintel
Transparency 8 Figure 9 – Form for Casting Lintels
Transparency 9 Figure 10 – Typical Form for Cast-in-Place Lintel
Transparency 10 Figure 11 – Standard Lintel Blocks
Transparency 11 Figure 12 – Brick Window Sill
Transparency 12 Figure 13 – Steel Lintels for Brick
Transparency 13 Table 1 – Steel Angle Size for 4-Inch Masonry Walls
Transparency 14 Figure 14 – Toothing in Concrete Block
Transparency 15 Figure 16 – Corbeling in a Brick Wall
Transparency 16 Table 2 – Lateral Support Requirements for Nonreinforced Concrete Masonry Walls
Transparency 17 Figure 17 – Wind Bracing for Masonry Wall
Transparency 18 Figure 18 – Temporary Lateral Bracing for a Foundation Wall
Transparency 19 Figure 19 – Bracing Requirements for Brick Walls Based on Wind Speed and Wall Height
Transparency 20 Figure 20 – Anchor Bolts for Wood Plates
Transparency 21 Figure 21 – Dovetail Anchors
Transparency 22 Figure 22 – Strap Anchor for Intersecting Brick Wall
Transparency 23 Figure 23 – Masonry Bonding and Flexible Connectors
Transparency 24 Figure 24 – True Masonry Bond at Intersecting Walls
Transparency 25 Figure 25 – Rigid Connections for Intersecting Walls
Transparency 26 Figure 26 – Flexible Joints Using Tiebars
Transparency 27 Figure 27 – Flexible Joints Using Metal Lath
Transparency 28 Figure 29 – General Requirements for Pilaster Size
Transparency 29 Figure 30 – Pilaster Unit
Transparency 30 Figure 31 – Bonded Pilaster
Transparency 31 Figure 32 – Unbonded Pilaster
Transparency 32 Figure 33 – Brick Wall with Pilasters
Transparency 33 Table 3 – Heat Transfer Coefficients
Transparency 34 Figure 34 – Heat Transfer By Conduction
Transparency 35 Figure 35 – Heat Transfer by Convection
Transparency 36 Table 4 – R-Values for Different Insulation Types
Transparency 37 Figure 36 – Loose Fill Insulation in Concrete Masonry Walls
Transparency 38 Figure 38 – Installing Rigid Insulation Board
Transparency 39 Figure 40 – CMU with Insulation Insert
Transparency 40 Figure 41 – Block Coatings
Transparency 41 Figure 42 – Rigid Board Insulation
Transparency 42 Figure 45 – Use of Furring Strips
Transparency 43 Figure 46 – Weather Exposure Based on Precipitation and Wind Pressure
Transparency 44 Figure 47 – Parging a Masonry Surface
Transparency 45 Figure 49 – Foundation Parging
Transparency 46 Figure 50 – Flashing in a Cavity Wall
Transparency 47 Figure 51 – Flashing at a Window Sill
Transparency 48 Figure 52 – Flashing at a Wall Opening
Transparency 49 Figure 53 – Flashing of Coping and Parapet Wall