Download
1 / 17
180 likes | 372 Views
Parametric Constraints. Assignment D5. CONSTRAINTS. There are two types of constraints Dimensional Constraints – You already know how to do Show Size & Location Geometric Constraints – Show relationship between two objects HORIZONTAL, PARALLEL PERPENDICULAR TANGENT

E N D
Parametric Constraints Assignment D5
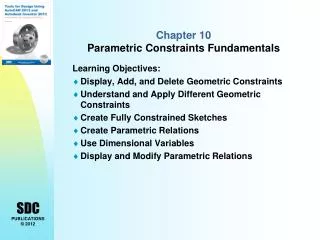
CONSTRAINTS • There are two types of constraints • Dimensional Constraints – You already know how to do • Show Size & Location • Geometric Constraints – Show relationship between two objects • HORIZONTAL, • PARALLEL • PERPENDICULAR • TANGENT • Constraints can be applied manually or automatically • Using Constraints well, will make it easier to change dimensions
Do 1 Second Point • Make a new Standard(in).ipt Part • Start a new sketch on the XY plane • Create a triangle of arbitrary size like mine Make sure the bottom is horizontal First Point Third Point
Do 2 • Highlight everything (Ctrl-A) • The pick Show Constraints from the ribbon
Constraints • There are 12 types of geometric constraints • Coincident – Constraints two points together or one point to a curve • Collinear – Causes two lines or ellipse axes to lie along the same line • Concentric – Constraints two arcs, circles, or ellipses to the same center point • Fix – Constraints points or curves to a fixed location
Constraints • Parallel – Causes selected lines or ellipse axes to lie parallel to one another • Perpendicular – Causes selected lines, curves or ellipse axes to lie at right angles to one another • Horizontal – Causes lines, ellipse axes or pairs of points to lie parallel to the X-Axis • Vertical - Causes lines, ellipse axes or pairs of points to lie parallel to the Y-Axis
Constraints • Tangent – Constraints a curve and line to be tangent to one another • Smooth – Create a curvature condition between a spline and a line, arc or spline. • Symmetric – Constraints two lines or curves to become symmetrically constrained about a selected line. • Equal – Selected arc/circles constrained to the same radius, or lines to the same length
Do 3 • Notice at the bottom of the screen inventor tells you that you need more dimensions to completely define the triangle
Do 4 • Create the bottom dimension as shown, your number will be different that mine, do not change the number to match mine • Notice the number at the very bottom of the screen was lowered
Do 5 • Select the Vertical Constraint Icon • Pick the inclined line on the right and watch what happens
Do 6 • If you hover your mouse over the top orange box, you’ll see two Coincident constraints, this is what ties to the lines together to make a loop. • When you can’t make a loop, it’s because these constraints are missing or changed. • If you try to click the orange dot an move it, you’ll only be able to move it up and down, because it MUST be VERTICAL
Do 7 • Add the lock constraint to the bottom right corner • The angle dimension to the bottom left angle • You drawing should now say FULLY CONSTRAINED
OVER Constraining • If you get this box, that means that the dimension will be DRIVEN • It will have parentheses (0.03) and not be a regular dimension
Do 8 • Move your mouse over the orange block in the lower right corner of the shape • Delete the lock constraint by clicking on it and choose delete, do not clik the little X • Click and drag the top corner of the triangle, and see what happens. • Now click one of the corners and try and move the triangle, it should keep its shape because it’s constrained
Auto Dimension • Auto Dimension will help you create a fully constrained sketch. • After you’ve put in the measurements you know, Auto Dimension will fill in any missing details, and help you see what Inventor is thinking. • Fully Constrained sketches are easier to work with too
Do 9 • Draw a circle inside the triangle of arbitrary size
Do 10 • Click the Tangent constraint, then the inclined line, and the circle • If you click the center point of the circle and try and move it, you’ll se it will change position and size, but it will stay tangent to the line. • Show me this on your screen • Save this as D5.triangle • Ask me for the 4 exercises • D5.ex1-D5.ex4