Download

1 / 19
210 likes | 469 Views
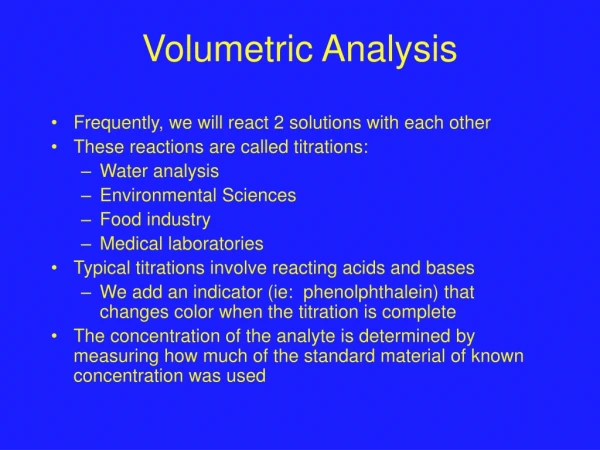
Experiment 2. A volumetric Analysis. Experimental Procedure Lab 406. Summary 1. Preparation of Stock NaOH solution 1M NaOH 25 mL + 225 mL distilled water in a 250-mL volumetric flask 2. Standardization of NaOH solution (3 times)

E N D
Experiment 2. A volumetric Analysis Experimental Procedure Lab 406
Summary • 1. Preparation of Stock NaOH solution • 1M NaOH 25 mL + 225 mL distilled water in a 250-mL volumetric flask • 2. Standardization of NaOH solution (3 times) • (You are to complete at least three good trial (±1% reproducibility) in standardizing the NaOH solution.) • KHP + 50 mL of distilled water + 2 drops of Phenolphthalein • Analysis of Unknown Acid (3 times) • (For good results, three determinations should agree within 1.0%).) • Unknown 25 mL + 2 drops of phenolphthalein 250mL
A. The Standardization of a sodium hydroxide Solution • 1. Prepare the stock NaOH solution • Transfer 25 mL of 1 M NaOH solution into a clean, dry 250 mL volumetric flask. Slowly add distilled water to the flask. Keep adding water until you reach the 250 mL mark on the neck of the flask. Place the stopper in the flask and gently swirl flask until all the chemical is mixed. • Calculate an approximate molar concentration of your diluted NaOH solution. • (Caution!: NaOH is very corrosive-do not allow skin contact.) Clay triangle Bunsen burner
2. Prepare the primary standard acid • Calculate the mass of KHC8H4O4 that will require about 15 mL of your diluted NaOH solution to reach stoichiometric point. Show the calculations on the Report Sheet. • (Have the TA approve your calculation results before continuing) • Measure this mass (±0.001 g)of KHC8H4O4 on a piece of weighing paper and transfer it a clean, labeled 250 mL Erlenmeyer flask. Similarly, prepare all three samples while you are occupying the balance. Dissolve the KHC8H4O4 in about 50 mL of distilled water and add 2 drops of phenolphthalein solution. Clay triangle Bunsen burner
3. Prepare a clean buret • Flush the buret with tap water and rinse 3 times with distilled water. • Rinse the buret with three 5-mL portions of the diluted NaOH solution, making certain that the solution wets the entire inner surface. Drain each rinse through the buret tip. • Discard each rinse in the Waste Bases container. Clay triangle Bunsen burner
4. Fill the buret • Using a clean funnel, fill the buret with the NaOH solution. After 10-15 seconds, read volume by viewing the bottom of the meniscus with the aid of a black line drawn card or see Figure 9.4. Record this initial volume according to the guideline in Technique 16A.2. • Place a sheet of white paper beneath the Erlenmeyer flask. • 5. Titrate the primary standard acid • Slowly add the NaOH titrant to the first acid sample. Swirl the flask after each addition. • Initially, add the NaOH solution in 1- to 2-mL increment. As the stoichiometric point nears, the color fade of the indicator occurs more slowly. Clay triangle Bunsen burner
c) Continue addition of the NaOH titrant until the endpoint is reached. The endpoint in the titration should be within one-half drop of a slight pink color. • d) The color should persist for 30 seconds. After 10-15 seconds, read and record the final volume of NaOH in the buret. • 6. Repeat the analysis with the remaining standard acid sample • Refill the buret and repeat the titration with the remaining two samples in PART A.4. • 7. Do the calculations • Calculate the molar concentration of the diluted NaOH solution. The molar concentrations of the NaOH solution from the three analyses should be within ±1%. Clay triangle Bunsen burner
Swirl the flask continuously until on drop of titrant causes a color change throughout the entire solution A sheet of white paper or towel below the flask will help in recognizing the color change at the end point.
B. Molar concentration of an Acid Solution • Three samples of the acid having an unknown concentration are to be analyzed. (Acid Type: HA or H2A) Prepare three clean 250-mL Erlenmeyer flasks for this determination. • 1. Prepare the acid samples of unknown concentration • In a Erlenmeyer flask, pipet 25.00 mL of the acid solution. Add 2 drops of phenolphthalein. • 2 . Fill the buret and titration • Titrate the acid sample to phenolphthalein endpoint. Read and record the final volume of titrant. • 3 . Repeat. Similarly titrate the remaining samples of the acid solution. • 4. Calculations. Calculate the average molar concentration of your acid unknown. Clay triangle Bunsen burner
CLEANUP: Rinse the buret and pipet several times with tap water and discard through the tip into the sink. Rinse twice with distilled water. Similarly clean the Erlenmeyer flasks. Check and clean the balance area. DISPOSAL: All solids and solutions should be discarded in the Waste Acids container in the chemical hood. Clay triangle Bunsen burner
Using of Buret Cleaning the Buret In order for your buret to perform optimally, it must be properly cleaned. To clean the buret, use the following procedure: 1. Rinse with distilled water:With the stopcock closed, add some distilled water to the buret. Tip and roll the buret, allowing the water to have contact with all of the inside surfaces. Open the stopcock and allow the water to drain. If the water drains without leaving any droplets on the side, repeat the rinse twice more then move to step two. If droplets remain on the inside surface, wash the buret with detergent solution, rinse several times with tap water, then rinse three times with distilled water. 2. Rinse with solution:After draining the final distilled water rinse, close the stopcock and add about 5 mL of the solution to be dispensed from the buret. Again, roll and tip the buret so the solution has contact with all the inside surfaces. Open the stopcock and allow the solution to drain. Repeat this twice more. Discard the solution used in the rinses. After you are finished with the buret in your experiment, rinse it by filling it with distilled water and allowing it to drain.
Loading the Buret Once the buret is clean, clamp it to a stand using a buret clamp. Always make sure the burette is clamped in a perfectly vertical position before taking any readings. When adding solutions to the buret, make sure the stopcock is closed (horizontal position). Unclamp the buret and tilt it slightly while pouring the solution slowly down the inside surface. This will prevent the formation of air bubbles. 1. Get the appropriate amount of solution in a clean, dry beaker. 2. Pour a few milliliters of solution into the buret. Open the stopcock all the way in order to force all the air out of the stopcock and tip. Close the stopcock before the solution drains below the stopcock. If the tip still contains air, add a few more milliliters of solution and repeat the process. Repeat this until you are convinced no more air is left in the stopcock or tip. Discard the solution that you have run through the buret.
3. Using the procedure described above for adding solutions to the buret, fill it to a level just above 0.00 mL. Drain the buret to just under 0.00 mL. This will properly form the meniscus. DO NOT ATTEMPT TO ADJUST THE MENISCUS TO EXACTLY 0.00 mL. THIS IS AN INCREDIBLE WASTE OF TIME. 4. Touch the tip of the buret to the inside wall of a beaker in order to remove any drops on the tip. Do not wipe the tip. Wait a few seconds for the solution to drain to the top of the fluid level, then record the initial buret reading in your notebook. 5. Loosely cover the top of the buret with a cocked, small beaker or a loosely fitting piece of aluminum foil. This will keep dust out of the buret.
Reading the Buret In order to make the meniscus easier to see, place a white card with a black mark on it behind the buret. Align the black mark so that it is just under the meniscus. 1. Get your eye level with the bottom of the meniscus. Looking up or down on the meniscus will cause a parallax error. 2. Read the buret to the nearest 0.01 mL. The marks occur every 0.1 mL, so the last number will have to be an estimate. With practice, you should be able to do this quite accurately.
Operating the Buret Proper buret technique is an important laboratory skill that may take some practice to develop. Although is may seem initially awkward, a right handed person should operate the buret with the left hand, and a left handed person should operate the buret with the right. This leaves your more coordinated hand to swirl the reaction flask if needed. 1. Before delivering any solution, record the initial buret reading in your notebook. 2. Open the stopcock by twisting it 90 degrees into the vertical position and allow the solution to drain. As you near the desired volume, slow the flow by turning the stopcock back toward the closed position. You should be able to control the buret to deliver one drop at a time. When the desired volume has been delivered, close the stopcock.
3. Wait a couple of seconds, then record the final buret reading. 4. Calculate the volume delivered by subtracting the initial reading from the final reading: initial reading - final reading When delivering solutions, you must not allow the solution to drain below the bottom of the calibration range. If this is about to occur, close the stopcock and take a final reading. Refill the buret, get an initial reading, and continue delivering solution. The total volume delivered is the sum of the volume delivered the first time and the volume delivered the second time.