Download
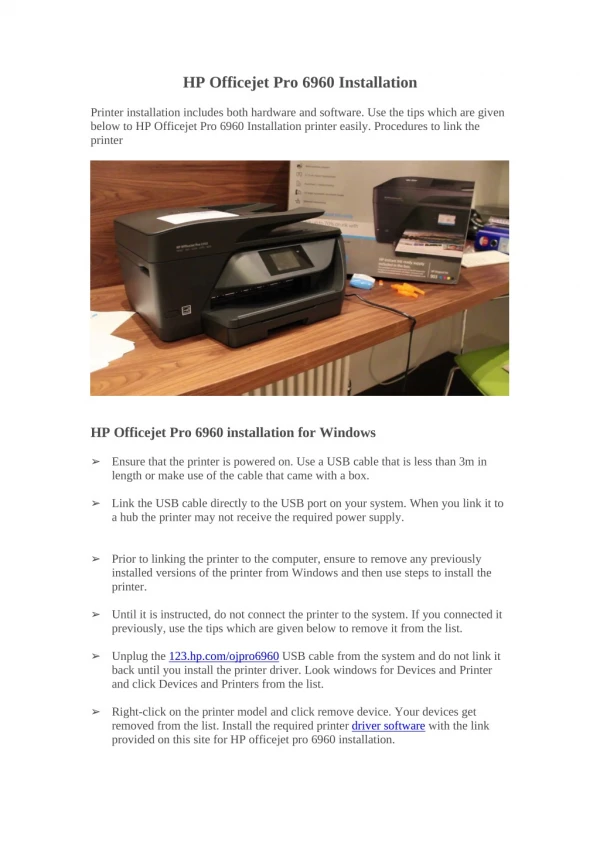
1 / 22
230 likes | 303 Views
HP PrecisionScan Pro. HP PrecisionScan Pro. To save this presentation, right-click this link. All About the Scanners. All About the Scanners.

E N D
HP PrecisionScan Pro HP PrecisionScan Pro To save this presentation, right-click this link.
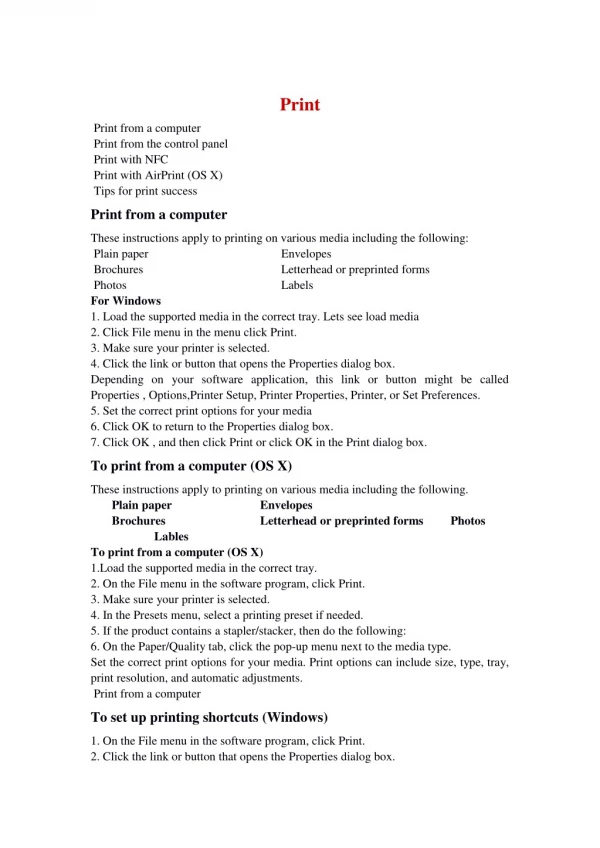
All About the Scanners All About the Scanners The computers labs across campus each have at least one scanner. Those scanners are the HP ScanJet 6200C. The scanners on campus are capable of scanning documents and pictures, and outputting them in either text or image formats. For picture formats, you can scan output pictures in black and white, true color, grayscale and 256 color. We will talk about these options and show examples later.
Opening PrecisionScan Pro Opening HP PrecisionScan Pro • Click on Start. • Click on Programs. • Click on HP ScanJet Software. • Click on HP PrecisionScan Pro. 3 2 4 1
Scanning Scanning To scan, place the document/picture on the scanner glass face-down. To scan the object correctly, place the top of the object towards the top of the scanner glass. That way it will right-side up and not upside down. 1 One way to scan is by clicking the Preview Scan button on the toolbar (1). A message should appear saying “Warming up the lamp”, but only if the scanner has not been used in some time. Another way to start scanning an object is to is to choose Preview from the Scan menu. Also pressing Ctrl + R will bring up the preview.
Here’s an example of what the screen will look like once you select preview. Scanning (2) Document Image
Saving an Image Saving an Image When to comes to saving images, there are several steps that you must go through. You’ll need to select the area you want to save, choose the output type and change different image settings. 1) Selecting the Area you want to save To select an area you want to save, place your cursor on the preview of your scanned object. The cursor should turn into a “+” sign. Place your cursor on the corner of the object’s area you want to save. Hold down your left mouse button and draw a box around the object’s area. A dashed line should then appear around the area you selected. You can resize the box by holding and dragging the little black boxes on the edges, and moving them to reach your desired size.
2) Selecting the Output Type Output Type There are four options when it comes to saving pictures. True Color: Use true color when the original contains colors and you plan on printing through a color printer. Grayscale: Use grayscale when picture is black and white, when the picture is color and you plan on printing on a black and white printer, and the original picture has shades of gray. Black & White (Bitmap): This should be used if the resulting picture will not be scaled in another program. Black & White (Scalable): This should be used if the remaining picture will be scaled in another program.
Output Type (2) 256 Color options are used for displaying on a monitor. 256 Color (Web Palette): Use to display color images on the internet. 256 Color (System Palette): Used to change the color original to a color image suitable for displaying on a monitor. 256 Color (Optimized Palette): Better recommended for images being in a sort of presentation; not recommended for Web pages or Desktop wallpaper.
Examples of Image Output Types Output Type (3) True Color Grayscale
Black & White (Raster) Output Type (4) Black & White (Vector)
256 Color (Web Palette) Output Type (5) 256 Color (System Palette) 256 Color (Optimized Palette)
3) Other Image Settings • Resolution • Resolution deals with how clear a picture prints out and/or is displayed on your monitor. To change the resolution of the image, select Output Resolution from the Tools menu (1). Then from the Output Resolution box, select the resolution you want. The higher the resolution, the larger the file will be. Resolution 1 2
Sharpen Level • Sharpening is used to enhance low-resolution pictures and bring out finer details of the picture. To change the sharpen level, choose Sharpen Level from the Tools menu (1). Then choose the sharpen level you want from the different levels in theSharpen Level box. Sharpen Level 2 1
Dimensions • Instead of manually setting the size of the selection area, you can use the Dimensions tool to enter the dimensions. To use this option, select Dimensions from the Tools menu (1). Then manually enter the dimensions of the selection area. Then click the close button when finished. The dimensions should then appear in the bottom left corner (3). Dimensions 2 1 3
Exposure Adjustment • You can use exposure adjustment to make changes to specific properties of an image. Some properties include: • Highlights: the lightest part of an image. • Midtones: the overall brightness of the image. • Shadows: the darkest parts of the image. • The amount of detail in very light or dark areas. • To edit the Exposure Adjustment, choose Exposure Adjustment from the Tools menu (1). Then, adjust the knobs for the different properties on the Exposure Adjustment box (2). Once you are done, click the Close button inside that box. Exposure Adjustment 2 1
Color Adjustment • Through the color adjustment option, you can change the intensity of a color (thesaturation) or the amount of a particular color in a color image (the hue). To change either of these options, select Color Adjustment from the Tools menu. To change the saturation, select the area you want to edit. Then move the saturation button on saturation scale (2). The saturation scale ranges from 0 to 150. “0” means that no color will show up. “150” means the colors will be more intense. On the next page, there will be an example of a color image with saturation at 0 and 150. Color Adjustment 1 2
Color Adjustment (1) The original picture Saturation at 0 Saturation at 150
To change the hue, you can move the white circle in the color pie towards which color you want to be more emphasized (1). Just drag the white dot towards the color you want to have more emphasized. You can also use the x and y coordinates box to move the white dot. Just type in the coordinates of where you want the dot to be placed (2) and it’ll automatically move the dot to where you chose. On the next slide, there are examples of the pictures with changed hues. Color Adjustment (2) 2 1
Color Adjustment (3) These are examples of images that have had their emphasized color changed. The top left has a emphasis on red, the top right has an emphasis on blue, and the bottom left has an emphasis on yellow.
Black and White Threshold • Use the Black & White Threshold tool for a black and white image to set the level at which gray is changed to black. Gray levels below the threshold become white. To change this property, select B & W Threshold from the Tools menu (1). By using the knob on the Black & White Threshold, you can adjust the point where gray is changed to black (2). Just move it to where you would like the transition to take place. Black and White Threshold 2 1
Save as Image File Save as Image File To save the image, choose Save As from the Scan menu. Then choose what kind of image you want it to be saved as (JPEG, GIF, BMP, etc.).
If you have questions about PowerPointXP, either consult the Help Menu or you can contact the HelpDesk at ext. 41950. You can also contact the Web Development at either ext. 44495 or ext. 41850. Thank you and have a nice day. The End THE END