Download
1 / 61
1.05k likes | 2.46k Views
EXTRA AND INTRA ORAL EXAMINATION. UNCLASSIFIED//REL TO NATO/ISAF. Equipment and supplies. Gauze sponges (2x2) Tongue depressor (optional) Mouth mirror Explorer Probe Patient record to document findings. Procedural steps. Patient preparation Extraoral features Cervical lymph nodes

E N D
EXTRA AND INTRA ORAL EXAMINATION UNCLASSIFIED//REL TO NATO/ISAF
Equipment and supplies • Gauze sponges (2x2) • Tongue depressor (optional) • Mouth mirror • Explorer • Probe • Patient record to document findings
Procedural steps • Patient preparation • Extraoral features • Cervical lymph nodes • Temporomandibular joint • Indications or oral habits • Interior of the lips • Oral mucosa and tongue • Floor of the mouth • Examination of the periodontium • Examination of the teeth
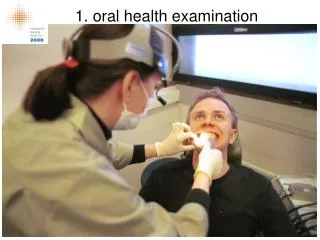
Patient preparation • When escorting the patient to treatment area, observe the patient’s general apperance • Purpose: unusual behavior or apperance • Seat the patient in the dental chair in an upright position, put patient personal protection • Protection glasses • bib
Patient preparation • Explain the procedure to the patient. • The patient who knows what to expect will be more comfortable and more willing to participate in the procedure.
Extraoral features • Examine the face, neck and ears for asymmetry or abnormal swelling • Purpose: the two sides of the face should be symmetric
Extraoral features • Look for abnormal tissue changes, skin abrasions and discoloration • Purpose: unusual bruising, scratches, fistula or cuts may require further evaluation of the area
Extraoral features • the vermillon border, the commissures of the lips, the philtrum Normal Abnormal
Extraoral features • Evaluate the texture, color and contuinity of the vermillon border, the commissures of the lips, the philtrum • Purpose: Lumps, dryness and cracking of the tissues are deviations from the normal that may indicate that further evaluation of the area is required
Extraoral features • Document all findings in the patient record
Cervical lymph nodes • A lymph node is an oval-shaped organ of the immune system • Lymph nodes also have clinical significance. They become inflamed or enlarged in various conditions, which may range from trivial, such as a dental or throat infection, to life-threatening such as cancers.
Cervical lymph nodes • Position yourself behind the patient so that you can easily place your fingers just belows the patient’s ears • The fingers gently follow the chain of lymph nodes • Purpose: you are looking for swelling, abnormal formation and tenderness in the area
Cervical lymph nodes • Document all findings in the patient record
Temporomandibular joint • To evaluate temporomandibular joint (TMJ) mouvement, ask the patient to open and close the mouth normally and then to move the jaw from side to side. • To further evaluate the movement of the TMJ, gently place your fingers into the external opening of the ear. Ask the patient to open and close the mouth normally
Temporomandibular joint • To determine whether there is noise in the TMJ during movement, listen and feel with your fingers as the patient opens en closes the mouth. • A stetoscope may be place on the joint
Temporomandibular joint • Dental therapist may be able to more accurately distinguish “normal” from “restricted” mouth opening. • However, it must be remembered that this is only one variable, and all aspects of possible dysfunction should be assessed comprehensively before a definitive diagnosis must be made by a stomatologist
Temporomandibular joint • Interincisal opening has been defined as “the greatest distance between the incisal edge of the maxillary central incisors to the incisal edge of the mandibular central incisors at the midline when the mouth is open as wide as possible. • Normal range of mouth opening in different population studies varies from 40-60mm
Temporomandibular joint normal opening Limited opening
Temporomandibular joint • Note in the patient record if normal or any abnormalities or patient comments regarding pain, tenderness or other problems (diminuated opening) related to opening and closing of the mouth
Indications of oral habits • Look for indications of oral habits, such as thumb sucking, tongue-thrust swallow, mouth breathing and tobacco use • Purpose: these habits can affect the patient’s oral health • Look for signs of other oral habits such as bruxism, grinding and clenching. Indications include abnormal wear on the teeth and problems in the TMJ • Document any findings in the patient record
Interior of the lips • Ask th patient to open his mouth slightly. • Examine the mucosa and the labial frenum of the upper lips by gently retracting the lip with the thumbs and the index fingers.
Interior of the lips • Examine the mucosa and the labial frenum of the lower lip by gently retracting the lip with the thumbs and the index fingers.
Interior of the lips • Palpate the tissues gently to detect lumps or abnormalities
Interior of the lips • Abnormalities:
Oral mucosa and tongue • Palpate the tissue of the buccal mucosa gently by placing the thumb outside and index inside
Oral mucosa and tongue • Examine the tissue that covers the hard palate
Oral mucosa and tongue Normal Normal Gingiva Torus AFAMS Dental Advisor Team
Oral mucosa and tongue • Visually examine the buccal mucosa and the opening of Stensen’s duct. • Purpose: the mouth mirror is warmed to prevent fogging Stensen’s duct
Oral mucosa and tongue • Visually examine the buccal mucosa and the opening of Stensen’s duct. • Purpose: the mouth mirror is warmed to prevent fogging Normal Abnormal
Oral mucosa and tongue • Ask the patient to extend the tongue and to relax it. Using sterile gauze, gently grasp the tip of the tongue and pull it forward.
Oral mucosa and tongue • Observe the dorsum (top) of the tongue for color, papillae and abnormalities.
Oral mucosa and tongue • Gently move the tongue from side to side to examine the lateral (side) and ventral (underneath) surfaces. Normal Normal
Floor of the mouth • Gently palpate the interior of the mouth by placing the index finger of one hand on the floor of the mouth and by placing the fingers of the other hand on the outer surface under the chin.
Floor of the mouth Normal (toris) Abnormal Abnormal (ranula) Abnormal (leukoplasia)
Floor of the mouth • Instruct the patient to touch the tongue to the hard palate • Purpose: the floor of the mouth, the lingual frenum and the salivary duct can be visually examined
Oral cancer screening • The most common site for oral cancers are: • Lower lip • Tongue • Floor of the mouth • Soft palate • Some oral cancers begin as a white plaque (leukoplakia), red lesion or as a mouth ulcer. • Men get oral cancer twice as often as women do, particularly men older than 40.
Cancer screening • Smoking and other tobacco use are linked to most cases of oral cancer. Heavy alcool use or long term sun exposure also increases your risk for oral cancer. • Other factors that may increase the risk for oral cancer include: • Chronic irritation (such as from rough teeth, dentures, or fillings) • Human papilloma virus (HPV) infection • Taking medications that weaken the immune system (immunosuppressants) • Poor dental and oral hygiene
Oral cancer screening • A ulceration, a red or white lesion with no apparent cause can be manage for 10-14 days. Without change after this period, the DT must refer the patient to a stomatolog.
Oral cancer screnning • Other finding must be refer to a stomatolog: • Non-tender lesion • Non-movable swelling • Non-symmetry lesion • Numbness • Lump in throat
Oral cancer screnning • White lesion appearance
Oral cancer screnning • red lesion appearance
Oral cancer screnning • Mixed red-white lesion appearance
Gingiva - Inspection • Is the gingiva healthy? • Look for: • Redness • Swelling • Recession CFHSTC Clin Perio Crse 0013
Gingiva - probe CFHSTC Clin Perio Crse 0013
PSR – periodontal screening and recording CFHSTC Clin Perio Crse 0013
PSR – periodontal screening and recording • The PSR is a good technique for getting an overall idea of the gingival health • This should be used for comprehensive treatment planning NOT emergency treatment CFHSTC Clin Perio Crse 0013