Download

1 / 38
380 likes | 560 Views
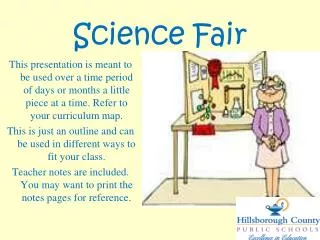
Science Fair. Class Due Date: October 30 th School Fair – November 17-19.

E N D
Science Fair Class Due Date: October 30th School Fair – November 17-19
Every student will be completing a Science Fair Project. The best projects from each class will be entered into the TMS Science Fair. If your project wins, you may be invited to move on to the Gwinnett County Competition. This packet contains all of the information that you will need to complete the science fair – if you are ever confused about anything, please don’t hesitate to ask.
Grading: The “legwork” or checkpoint assignments will count collectively as a Minor Assessment Grade and the Final Project will count as a Major Assessment grade at the end of the first semester. The last page of this packet is the rubric I will use when I am grading your project. Also, for your reference, if your project wins the class science fair, I have included the rubric that judges will use to grade your project in the school science fair.
Science Fair Due Dates • September 5th Group choice form Turn in form with parent signature. • Sept. 15th Topic form due I would recommend choosing to research something that you are genuinely interested in: doing this will make your research experience much more enjoyable. I have resources in the room to look at as well as links on my website to help you choose a topic. • Sept. 22nd Turn in Checkpoint #1 Form Science Fair: Submit your purpose, hypothesis, materials list, variables, and proposed procedure for approval. Also bring in your logbook for me to check.
Oct. 15th Checkpoint #2 (Turn in logbook and paragraph summary of experiment) • Science Fair: By this date, your experiment should be completed! Turn in your Logbook and a paragraph summary of the results of your experiment. (I will check both and return for you to make corrections/additions.) • Oct. 30th Final due Date (Science Fair Packet, logbook, and display board) • Help Sessions to be announced for each step along the way. • Toward the end, we will have a help session just for work on the display boards. • Trickum Science Fair: Week of Nov. 17th – 19th • Projects will be set up in the cafeteria for judging.
So, what do I need to do? • Go to Mrs. Gritz’s website and read over this powerpoint. • By September 5th decide whether you want to work individually or with a partner. • Begin thinking of project ideas – your topic is due by Sept. 15th.
TOPIC Step 1: Choose and Research your Topic • Once you have chosen to work individually or with a group…………. • Choose the topic: Your project can deal with any science topic you have been wondering about – What type of paper airplane flies the longest distance? Will cut flowers keep longer in soda or water? Do colors affect how we learn? Just remember these things when picking a topic: • The experiment should not harm you, other people, or any animal. • The project must be an experiment, not a demonstration or a model – such as an erupting volcano model. • If your topic involves open flame or any flammable materials, you must have signed parental permission. • Research the topic: You will need to do some background research on your topic. Look up information on your topic from several sources and record it in your logbook. You will need the background research to help you develop your hypothesis. Record the sources of all information in MLA formatin the Science Fair Packet!
Helpful websites • www.sciencebuddies.org This is a great starting point. Click on “Project Ideas” then on the Selection Wizard. It will take you through a survey that generates a list of ideas that may be interesting to you based on your answers. There are links from each of the items it lists to other sites that might be helpful in helping you pick a topic. • http://www.all-science-fair-projects.com/category0.html Browse through the subject areas here. There are great ideas based on subject area. • http://www.sciencenewsforkids.org/pages/sciencefairzone/topics.asp Another good site to look for ideas • http://www.terimore.com/science-experiments/cool-science-experiments.htm • http://www.sciencefair-projects.org/ Again here you can search by subject area. • http://school.discoveryeducation.com/sciencefaircentral/Getting-Started.html This site will walk you through the whole process. If you have looked at all of these sites and still can’t find something let me know. Please do try to find something on your own.
On Sept. 15th… Topic Form You will turn in the completed form concerning your topic.
Step 2: Begin your LOGBOOK Once your topic is approved……
Page 1 – Title Page The first page of your logbook should be a title page…… Name(s) of group members Class Period (that you have Science) Science Teacher Title of your project – Could be your question.
Page 2 – Table of COntents Table of Contents Entry #1 ……………………………..pg. 3-4 Entry #2……………………………… Entry #3……………………………… Entry #4…………………………….
Logbook Reminders • Everything must be written in BLUE or BLACK ink. • Number each page (only the right hand side) • Only write on the right hand side of the notebook. • You must have at least 10 entries. • Each entry must be signed and dated. • NO WHITE-OUT if you make a mistake, cross it out neatly then rewrite it. • Don’t lose points on the format of your logbook!!
Other info you may include in your logbook: • Your background research. Record your sources and the information in your logbook. • Your purpose, hypothesis, materials, and procedure • Your observations • The results of your experiment
Entry Examples… • Treat your logbook as a journal where you will write about your project – anytime you do anything with your project, it should be recorded in your logbook
Data should also be recorded in your logbook… Entry 7: I again measured my plants to observe growth. My plants have been growing for 3 weeks now. Here is my data that was collected today: Plant 1: 5.8 cm tall, 2 branches, 4 leaves total Plant 2: 7.9 cm tall, 4 branches, 6 leaves Plant 3: 1.6 cm tall, 1 stem, no leaves yet Plant 4: 4.1 cm tall, 2 branches, 4 leaves total Regan Gritz Nov. 17th, 2010
Step 3: Designing your experiment
Next Step: Design your experiment • After you have done your background research, you can design your experiment. Be sure and record your experimental design in your logbook! • Procedure List: Decide how you are going to do the experiment and write down each of the steps in order. Make sure to include exact details such as the exact amount of sugar used or the amount of time you shake the test tube. In planning your procedure, you need to remember the following: • Control the variables - There are many variables that can affect the outcome of your experiment. If you are testing the effect of a variable such as light on plant growth, make sure all the plants have the same amount of soil, water, fertilizer, and pot size (the controlled variables). In this way you can be sure that only the change in light (the manipulated variable) caused the change in plant growth (the responding variable).
Your results must be measurable - Your procedure must have results you can measure. For example, if you want to find out how jogging affects health, don’t just ask people if they feel healthier - record measurements of health such as blood pressure and cholesterol levels. • Write the procedure clearly and in detail – Someone else should be able to read your procedure and perform it exactly. • Identify the variables: Identify your manipulated (independent) variable, responding (dependent) variable and controlled variables. Also identify your control group, if any.
On Sept. 22nd… Checkpoint 1: You will turn in the Checkpoint 1 form (purpose, hypothesis, materials, variables, procedure) And logbook
Step 4: Perform your experiment
Step 4: Perform your experiment!!! • Once you get your variables and procedures approved……… • After your experimental design has been approved, you can do the experiment! • As you perform your experiment, record your observations or measurements in your logbook. • If you decide to change your procedure, be sure to write it down in your logbook. (Very important!) Remember, blue or black ink only and be sure to date each entry. • If you can, perform more than one trial. The more data the better. • Arrange your data in tables in your logbook to make it easier to find later.
On Oct. 15th … You will turn in Checkpoint 2: Logbook (should be MOSTLY done) 1 paragraph summary of your experiment and results
Step 5: Complete the Science Fair Packet (which includes the lab report and abstract)
Step 6: Complete the Display Board
This is the part where you should go all out! Be creative! (But make sure your board is easy to read!) You should include the following on your display board: • Title ● Materials • Purpose ● Procedure • Hypothesis ● Graph of the data • Variables ● Conclusions • Pictures and experimental apparatus don’t have to be included, but they do make the display a lot more interesting, impressive, and convincing. Do not include items that can’t be replaced if broken or lost. Display boards are available at the school store, and they can not exceed 36” x 48”. Electric outlets will not be available for displays.
Title Purpose Materials Procedure, Experiment, Graphs or Charts of Data and Observations, Pictures Hypothesis Conclusion Variables
Help Sessions – Every Tuesday 4:15 to 5:00 in Mr. Lucy’s room
Abstract • This is a summary (no more than 250 words, please) of your entire experiment, including your purpose, hypothesis, basic procedure, results, and conclusions. The abstract should be written as a narrative, 2-3 paragraphs, and in the third person (don’t say I). • Put the abstract in front of the lab report and staple them together.
Lab Report Fill in all of the boxes in your Science Fair packet.
On October 30th. . . You will turn in: Logbook, Completed Science Fair Packet, Completed Display Board