Download
1 / 37
370 likes | 488 Views
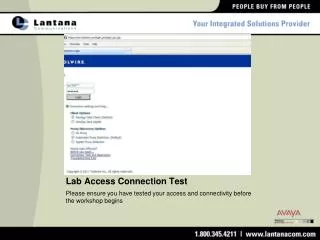
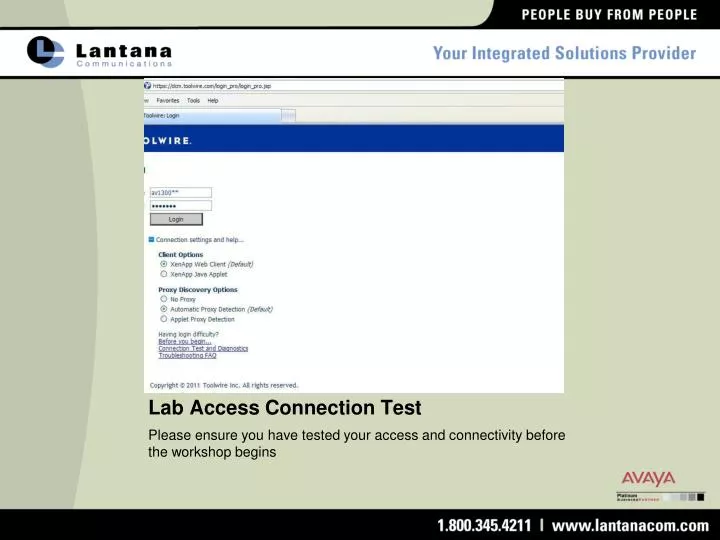
Lab Access Connection Test. Please ensure you have tested your access and connectivity before the workshop begins. Working Environment. You should see all green check marks, however; the ping test may or may not work. AES (Application Enablement Server) Workshop. Overview And PBX Link Setup.

E N D
Lab Access Connection Test Please ensure you have tested your access and connectivity before the workshop begins
Working Environment You should see all green check marks, however; the ping test may or may not work
AES (Application Enablement Server)Workshop Overview And PBX Link Setup
Workshop Agenda • AES Overview Discussion • AES Link Configuration • CM Link Configuration • Student Link Exercise • Troubleshooting Lab
AES Overview • “Avaya Aura Application Enablement Services (AE Services) is a software platform that leverages the capabilities of Avaya Aura Communication Manager. AE Services provides an enhanced set of Application Programming Interfaces (APIs), protocols, and web services that expose the functionality of Avaya Communication solutions to corporate application developers, third-party independent software vendors, and system integrators.” (Excerpt from: Avaya Aura Application Enablement Services Overview, Release 6.1 Issue 1, February 2011)
Ensure you have all necessary information AE to CM LINK Configuration
AES AccessWeb Access: https://WW.XX.YY.ZZ AE 4.2 Initial Screen AE 5.2 Initial Screen
AES LoginDefault login & password is craft & craft01 or cust & custpw 4.2 Login Screen 5.2 Login Screen
License File Check for AE 4 4.2 WebLM Access is chosen instead of AE Server administration
License File Check 5.2 and 6 WebLM Access is chosen from the Console Management screen after the initial login by clicking the licensing link to expose the WebLM Server Access link. Default login for WebLM in 4 and 5 is admin and weblmadmin. If and when you change it, please document what it has been changed to.
License File Check for AE 5 &6 After choosing WebLM access from the console management screen, log into the WebLM server and check the licensed products
License is based on MAC address 4.2 WebLM Server Properties 5.2 WebLM Server Properties
Link Admin(AE Side: Switch Connection) • 4.2 Switch Connection
Link Admin(AE Side: Switch Connection) • 5.2 Switch Connection
Link Admin(AE Side: Switch Connection) • 4.2 Switch Connection Password Must be 12 characters and match PBX IP services entry
Link Admin(AE Side: Switch Connection) • 5.2 Switch Connection Password Must be 12 characters and match PBX IP Services entry
Link Admin(AE Side: Link Registration Interfaces) 4.2 Clan or Procr 5.2 Clan or Procr
Link Admin(AE Side: TSAPI Link) • AE 5 & 6 Add TSAPI Link
Link Admin(AE Side: TSAPI Link) • AE 5 & 6 Configure TSAPI Link
Link Admin(CM Side: Node Names) • Add AES hostname and IP Address to node names
Link Admin(CM Side: CLAN or Processor Ethernet) • Ensure the CLAN board or Processor Ethernet are configured and enabled • Procr is shared so cannot be in an isolated NR (instead use ip-network-map see next slide) • CLAN boards can be placed into the isolated NR designated for the AE link • Older CM releases required data modules associated with CLAN boards
Link Admin(CM Side: Network Map) • IP Network Map entry for AE IP Address when using Procr to isolate AE • Best practice when CLANS are available • Note: Link will work without this step, but may eventually become problematic. This is considered more of a “best practice”
Link Admin(CM Side: CTI Link) • CM command is “add cti-link x” • Use and unused extension number, preferably non-did • Type is “ADJ-IP” • Leave pages 2 & 3 at default
Link Admin(CM Side: IP Services) • CM command is “Change IP-Services” • On page 1, enter “AESVCS” in service type field, select “y” under enable, and enter the node-name of the designated CLAN board or, as in the illustration, “procr”, leaving the local port number at default • On page 4, enter the node name associated with the AE server and enter the password you created in the AE on the Switch Connection entry, then select “y” to enable
Link Status(CM Side) • CM commands • “status aesvcs interface” look to see that it is enabled and listening • “status aesvcs link” verify that messages are being sent and received • “status aesvcs cti-link” ensure the link is not busied out, and the service state is established
Link Status(AE Side: Switch Connection) • In AE 4.2 from “CTI OAM Administration” screen select “Status and Control” and then “Switch Conn Summary”, look to see that the link is talking and online and messages are being sent and received • In AE 5.2 from the initial main screen select the “Status” link, then “Status and Control” and finally “Switch Conn Summary”, look to see that the link is talking and online and messages are being sent and received
Link Status(AE Side: TSAPI Link) • In AE 5 and 6, from the initial main screen select the “Status” link, then “Status and Control” and finally “TSAPI Service Summary”, look to see that the link is talking and online and messages are being sent and received. If an adjunct server is connected check to see if “associations” are being created
Troubleshooting 4.2 Diagnostics 5.2 Diagnostics
Things to keep in mind • Use dedicated CLAN board/s for the Link/s and one or more different CLAN boards for the H.323 registrations when possible (limit to ~250 per CLAN) • Optimize Network Region configurations for desired results and test for functionality • Coordinate port speed / duplex modes on Ethernet Switch ports • Keep FW and SW updates current to latest known stable load • Ensure third party CTI apps are Avaya DevConnect certified with up-to-date app notes
Break Lab will begin after the Break
Lab Objectives • Demonstrate the ability to access CM via putty (ssh) or ASA and complete all steps required to establish an AE Services Link and AE CTI Link • Demonstrate the ability to access AE via a Browser and complete all steps required to establish a CM Switch Connection and a TSAPI Services Link • Demonstrate the ability to complete any diagnostic and status steps necessary to verify functionality of services and links
Lab Resources • This slide deck • QuickLabs (Toolwire) Sandbox lab access • Server IP Addresses • Server Logins and Passwords
Sandbox LabUsername: av1300** (**=your assigned lab number)Password: welcome
Sandbox Lab • You may have to allow popups and temporary file downloads • You may also have to log into the Toolwire Login page again • Once successfully logged in you should see a virtual desktop environment as shown on the next slide
Thank You Presentation By: Jim Reinhardt with Lantana Communications