Download
1 / 75
830 likes | 1.15k Views
Framebuffer in OpenGL. MAE152 Computer Graphics for Scientists and Engineers Fall 03. Rasterization. What is Rasterization?. Is a process by which a primitive is converted to a 2D imge First, it determines which squares of an integer grid in window coordinates are occupied by the primitive

E N D
Framebuffer in OpenGL MAE152 Computer Graphics for Scientists and Engineers Fall 03
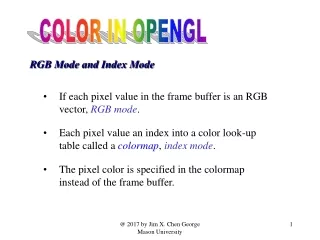
What is Rasterization? • Is a process by which a primitive is converted to a 2D imge • First, it determines which squares of an integer grid in window coordinates are occupied by the primitive • Assign a color and a depth value to each square • A grid square along with its assigned color and depth is called a fragment • The results of the process are passed to the next stage of per-fragment operations
Video Memory • Before an image can be sent to a display device, it must be first represented as a bitmap in an area of video memory called the frame buffer. The amount of video memory, therefore, dictates the maximum resolution and color depth available • In a conventional video adapter, the bitmap to be displayed is first generated by the main processor and then sent to the frame buffer. Most modern video adapters use graphics accelerators that have their own processors capable of manipulating bitmaps and graphics objects. A separate memory area is reserved for such operations
Video Memory • Graphics systems place heavy demands on video memory, therefore, video memory needs to be much faster than main memory • Most video memory is dual-ported or bi-directional, and capable of transferring data between the video memory and the video processor simultaneously while another set of data is being transferred to the display device • Therearemanydifferenttypesofvideomemory, including: • VRAM: Video RAM - dual-ported memory • WRAM: Windows RAM - dual-ported windowed memory • RDRAM: A type of memory developed by Rambus Inc. • SGRAM: Synchronous Graphic Random Access Memory, single-ported, capable of opening two memory pages at once
The Frame Buffer • The portion of memory reserved for holding the bit-mapped image that is sent to the display device is called the frame buffer • Typically the frame buffer is stored on the video adapter’s memory chips. In some cases, the video chipset is integrated into the motherboard, and the frame buffer is stored in main memory • The frame buffer is a bit-map that contains among other things the color depth or bit depth which defines the number of distinct colors in the graphics subsystem • A 24-bit video adapter, has a color depth of 2^24 (~16.7 million) colors. It follows that its color depth is 24 bits
Buffer Define a buffer by its spatial resolution (n x m) and its depth k, the number of bits/pixel pixel
The OpenGL Pipeline(The Macroscopic View) TransformationPipeline Rasterization Application Framebuffer
A Closer Look at OpenGL’s Rasterization Pipeline Point Rasterization Line Rasterization Triangle Rasterization Bitmap Rasterization Pixel Rectangle Rasterization Texture Mapping Engine Color Sum (Sep. Specular Color) Fog Engine To Fragment Tests
A Closer Look at OpenGL’s Rasterization Pipeline (cont.) Framebuffer Fragments (from previous stages) Pixel Ownership Test Scissor Test Alpha Test Stencil Test Depth Buffer Test Blending Dithering Logical Operations
OpenGL Buffers • Color buffers can be displayed • Front • Back • Auxiliary • Overlay • Depth • Accumulation • High resolution buffer • Stencil • Holds masks
Writing in Buffers • Conceptually, we can consider all of memory as a large two-dimensional array of pixels • We read and write rectangular block of pixels • Bit block transfer (bitblt) operations • The frame buffer is part of this memory memory source frame buffer (destination) writing into frame buffer
Writing Model Read destination pixel before writing source
Writing Modes • Source and destination bits are combined bitwise • 16 possible functions (one per column in table) XOR replace OR
XOR mode • We can use XOR by enabling logic operations and selecting the XOR write mode • XOR is especially useful for swapping blocks of memory such as menus that are stored off screen If S represents screen and M represents a menu the sequence S S M M S M S S M swaps the S and M
Color Buffers • Color buffers are the ones to which you draw • They contain RGBA data • Stereoscopic viewing needs left and right color buffers for the left and right stereo images • Double-buffered systems have front and back color buffers • Non-displayable auxiliary color buffers can be used • Minimum requirement is a front-left color buffer
Other Buffers • Depth buffer (z-buffer): • Stores a depth value for each pixel • Depth is usually measured in terms of distance to the eye • Used for a hidden-surface removal • Stencil buffer: • Stores the information to restrict drawing to certain portions of the screen • Accumulation buffer: • Holds RGBA color data for accumulating a series of images into a final, composite image • When accumulation is finished, the result is copied back into the color buffer for viewing • Used for Scene antialiasing, motion blur, simulating depth of field, and calculating soft shadows
Clearing Buffers • Clearing the screen (or any of the buffers) is expensive • Hardware can clear more than one buffer at once • First, specify the current clearing values for each buffer • void glClearColor(GLclampf red, GLclampf green, GLclampf blue, GLclampf alpha); • void glClearDepth(GLclampf depth); • void glClearStencil(GLuint s); • void glClearAccum(GLclampf red, GLclampf green, GLclampf blue, GLclampf alpha); • Then issue a single clear command • void glClear(GLbitfield mask); • mask is the bitwise logical OR of some combination of GL_COLOR_BUFFER_BIT, GL_DEPTH_BUFFER_BIT, GL_STECIL_BUFFER_BIT, and GL_ACCUM_BUFFER_BIT
Color Buffers for Writing and Reading • void glDrawBuffer(GLenum mode); • Selects the color buffers enabled for writing or clearing • mode can be GL_FRONT, GL_BACK, GL_LEFT, GL_RIGHT, GL_FRONT_LEFT, etc • Defualt mode is GL_FRONT for single-buffered contexts and GL_BACK for double-buffered contexts • void glReadBuffer(GLenum mode); • Selects the color buffer enabled as the source for reading pixels
Masking Buffers • Sets the masks used to control writing into the indicated buffers • void glColorMask(GLboolean red, GLboolean green, GLboolean blue, GLboolean alpha); • The red, green, blue and alpha values control whether corresponding component is written • void glDepthMask(Glboolean flag); • flag is GL_TRUE for writing • void glStencilMask(Gluint mask); • mask = 1 for writing the bit
Testing and Operating on Fragments • After fragments are generated, several processing stages occur determining how and whether a given fragment is drawn as pixel into the framebuffer • Set of tests: • Scissor test • Alpha test • Depth test • Stencil test • Blending • Dithering • Logical Operation
Scissor Test • void glScissor(Glint x, Glint y, GLsizei width, GLsizei height); • Sets the location and size of the scissor rectangle or box • By default, the rectangle matches the window • Drawing occurs only inside the rectangle: pixels lying inside the rectangle pass the scissor test • Needs enabling • glEnable(GL_SCISSOR_TEST);
Alpha Test • void glAlphaFunc(GLenum func, GLclampf ref); • Sets the reference value and comparison function for the alpha test • In RGBA mode, a fragment is accepted or rejected by the alpha test on its alpha value • By default, ref is zero, and func is GL_ALWAYS • func can be GL_ALWAYS, GL_NEVER, GL_LESS, GL_EQUAL, GL_LEQUAL, GL_GEQUAL, GL_GREATER or GL_NOTEQUAL • Needs enabling • glEnable(GL_ALPHA_TEST);
Using Alpha • The 4th component of RGBA color is “alpha”. • Alpha is specified with the glColor… and glClearColor commands, as well as various lighting and material-definition commands. • Alpha is stored in the color buffer, along with R, G, and B. • Two major applications of alpha: • Blending • Alpha can determine how a color to be drawn is blended with the color already present at that pixel. • The most common application of blending is transparent objects. • The Alpha Test • Alpha can be tested, in ways similar to the stencil buffer
Using Alpha: Blending • Blending is covered in chapter 6 of the Red Book. • You may also wish to read about anti-aliasing and depth-cueing (“fog”) in that chapter. • To do blending, enable it, and specify a blend function. • Blending is enabled withglEnable(GL_BLEND); • It is not necessary to allocate any additional buffers; alpha is stored in the color buffer. • The blending function is specified with glBlendFunc.
Using Alpha: glBlendFunc() • Blending involve mixing colors based on their respective alpha values. • A blending function blends two colors: • The source color: the color of the fragment be drawn. • The destination color: the color already present in the color buffer. • Blending functions are specified using glBlendFunc, which takes two parameters: • GLenum: blending factor for the source color. • GLenum: blending factor for the destination color.
Using Alpha: glBlendFunc() • Some possible blending factors are: • GL_ZERO: Multiply this color by zero (0,0,0,0). • GL_ONE: Multiply this color by one (1,1,1,1). • GL_SRC_ALPHA: Multiply this color by the source alpha. • GL_ONE_MINUS_SRC_ALPHA: Multiply this color by one minus the source alpha. • GL_DST_ALPHA: Multiply this color by the destination alpha. • GL_SRC_COLOR (for dest. blend factor only): Multiply this color by the source color, component by component. • For a complete list of possible blending factors, see p. 223 of the Red Book.
Using Alpha: The Alpha Test • glAlphaFunc takes two parameters: • GLenum: What test to perform. • GLclampf: Reference value • Type is like GLfloat, but required to be in [0,1], that is, “clamped”. • The possible tests all compare the alpha value of the pixel to be drawn with the reference value. • GL_LESS: Passes if alpha to be drawn is less than the ref value. • GL_EQUAL: Passes if the two are equal. • GL_ALWAYS: Always passes. • Etc… • Note: The alpha test is backwards from the stencil test. • Stencil test: REF comparison VALUE_IN_BUFFER. • Alpha test: VALUE_FOR_NEW_PIXEL comparison REF.
Stencil Buffer Per Vertex Poly. Frag FB Raster CPU DL Texture Pixel • Used to control drawing based on values in the stencil buffer • Fragments that fail the stencil test are not drawn • Example: create a mask in stencil buffer and draw only objects not in mask area
Stencil buffer (OpenGL) • Controls whether an image fragment continues toward frame buffer • Two operations involved • Image fragment is passed or not • Stencil buffer is updated by result of stencil test and depth test
Stencil buffer (continued) • Image fragment passes only if stencil test and depth test succeed • Stencil test fails (color and depth of pixel remain unchanged) • Stencil test passes, depth test fails (color and depth of pixel remain unchanged) • Both pass (color and depth for pixel are given the new values) In all cases stencil buffer is updated according to stencil operation pre-set for the condition
Stencil Buffer: Functions • The two major functions used in stenciling are glStencilFunc and glStencilOp. • glStencilFunc determines what the stencil test does. • glStencilOp determines what happens to the stencil buffer if the stencil test passes or fails. • If the stencil test passes, then you can also have different outcomes based on the depth test.
Creating a Mask • glInitDisplayMode( …|GLUT_STENCIL|… ); • glEnable( GL_STENCIL_TEST ); • glClearStencil( 0x0 ); • glStencilFunc( GL_ALWAYS, 0x1, 0x1 ); • glStencilOp( GL_REPLACE, GL_REPLACE, GL_REPLACE ); • draw mask: for example glBegin(GL_QUADS); glVertex2f (-1.0, 0.0); glVertex2f (0.0, 1.0); glVertex2f (1.0, 0.0); glVertex2f (0.0, -1.0); glEnd();
Using Stencil Mask • Draw objects where stencil = 1 • glStencilFunc( GL_EQUAL, 0x1, 0x1 ) • Draw objects where stencil != 1 • glStencilFunc( GL_NOTEQUAL, 0x1, 0x1 ); • glStencilOp( GL_KEEP, GL_KEEP, GL_KEEP );
Stencil Test • The stencil test takes place only if there is a stencil buffer • It compares a reference value with the value stored at a pixel in the buffer • Depending on the test result, the value in the stencil buffer is modified • void glStencilFunc(GLenum func, GLint ref, GLuint mask); • Sets the comparison func, reference ref and mask for the test • Comparison applies to those bits for which bits of the mask are 1 • func can be GL_ALWAYS, GL_LESS, etc. • Needs enabling: glEnable(GL_STENCIL); • glStencilOp(GLenum fail, GLenum zfail, GLenum zpass); • Specifies how the data in the stencil buffer is modified when a fragment passes or fails the stencil test • fail, zfail, zpass can be GL_KEEP, GL_ZERO, GL_REPLACE, GL_INCR, GL_DECR, GL_INVERT • fail = failed stencil test; zfail = failed z test; zpass = passed z test
Stencil Buffer: glStencilFunc • glStencilFunc takes three parameters: • A GLenum: what comparison the stencil test will do. • A GLint used as a “reference value” in the stencil test. • A GLuint used as a mask (an “and” mask). • Think: REF COMPARE (buffer pixel & mask) • Examples • Stencil test passes if bit in SB is on:glStencilFunc(GL_EQUAL, 0x1, 0x1); • Stencil test passes if bit in SB is off:glStencilFunc(GL_NOTEQUAL, 0x1, 0x1); • Test passes if 20 < low 8 bits in SB:glStencilFunc(GL_LESS, 20, 0xff);
Stencil Buffer: glStencilOp • glStencilOp takes three parameters, all GLenum’s: • Operation to perform if stencil test fails. • Op. to perform if stencil test passes and depth test fails. • Op. to perform if stencil test passes and depth test passes. • Examples • Replace the SB value with the reference value (from glStencilFunc):glStencilOp(GL_REPLACE, GL_REPLACE, GL_REPLACE); • Do not modify the SB:glStencilOp(GL_KEEP, GL_KEEP, GL_KEEP); • Replace SB value with zero, the reference value, or the bitwise inversion of the current SB value, respectively:glStencilFunc(GL_ZERO, GL_REPLACE, GL_INVERT); • Increment or decrement the SB value, as appropriate:glStencilFunc(GL_DECR, GL_INCR, GL_INCR);
Review: Stencil Buffer [1/2] • Stenciling involves the stencil buffer and the stencil test. • Remember: allocate the buffer, enable the test. • Clear the buffer the same way you clear any buffer. • The two major functions used in stenciling are glStencilFunc and glStencilOp. • glStencilFunc determines what the stencil test does. • glStencilOp determines what happens to the stencil buffer if the stencil test passes or fails. • If the stencil test passes, then you can also have different outcomes based on the depth test.
Review: Stencil Buffer [2/2] • glStencilFunc takes three parameters: • GLenum: Which comparison the stencil test will do. • GLint: “Reference value” in the stencil test. • Also used by operations specified with glStencilOp. • GLuint: Used as a mask (an “and” mask). • glStencilOp takes three parameters: • GLenum: Operation to do if stencil test fails. • GLenum: Operation if stencil passes and depth fails. • GLenum: Operation if stencil passes and depth passes.
Stenciling Examples: Ordinary Stenciling • To draw a shape in the stencil buffer: • Redo when viewport changes size! Code goes in the reshape function. glClearStencil(0); glClear(GL_STENCIL_BUFFER_BIT); glStencilFunc(GL_NEVER, 1, 1); glStencilOp(GL_REPLACE, GL_REPLACE, GL_REPLACE); // only 1st param matters Draw a shape here. glStencilOp(GL_KEEP, GL_KEEP, GL_KEEP); • To use the above shape: glStencilFunc(GL_EQUAL, 1, 1); Draw something; it will appear only inside the above shape. glStencilFunc(GL_NOTEQUAL, 1, 1); Draw something; it will appear only outside the above shape.
Stenciling Examples: Odd Things to Do • Draw each pixel at most 5 times: glClearStencil(0); glClear(GL_STENCIL_BUFFER_BIT); glStencilFunc(GL_GREATER, 5, 0xff); glStencilOp(GL_KEEP, GL_INCR, GL_INCR); • Draw each pixel successfully only on every other attempt: glClearStencil(0); glClear(GL_STENCIL_BUFFER_BIT); glStencilFunc(GL_EQUAL, 0, 1); glStencilOp(GL_INVERT, GL_INVERT, GL_INVERT);
Stenciling Examples: Capping • Here is an implementation of “capping” (see Red p. 446). • You are drawing a number of closed objects. You wish to make sure that the inside of these is never visible, even if the near clipping plane slices one of them. glClearStencil(0); glClear(GL_STENCIL_BUFFER_BIT | GL_COLOR_BUFFER_BIT | GL_DEPTH_BUFFER_BIT); glStencilFunc(GL_ALWAYS, 1, 1); glStencilOp(GL_INVERT, GL_INVERT, GL_INVERT); Draw scene. glStencilFunc(GL_EQUAL, 1, 1); Draw rectangle covering entire viewport, in “capping” color.
Depth Test • glDepthFunc(GLenum func); • Sets the comparison function for the depth test • An incoming fragment passes the depth test if its z value has specified relation to the value already stored in the depth buffer • By default, func is GL_LESS • Pixels with larger depth-buffer values are overwritten by pixels with smaller values • func can be GL_ALWAYS, GL_EQUAL, GL_GREATER, etc. • Needs enabling • glEnable(GL_DEPTH_TEST);
Use of Depth Buffer • Use of depth buffer (z-buffer) to achieve hidden surface removal • Graphical calculations convert each surface (before drawing) to a set of corresponding pixels on the window and also compute depth value for each pixel • A comparison is done with the depth value already stored at that pixel to accept the pixel only if it has a smaller depth • Color and depth information of the incoming pixel with greater depth is discarded