Download
1 / 29
310 likes | 804 Views
Managing Risk with the IPDE Process. Chapter 5 Drive Right. Risk. All activities involve some degree of risk. The risk when driving is the possibility of conflict. Risk Factors: Driver Vehicle Roadway and environment. Driver-contributed Risk Factors. From all drivers on the road.

E N D
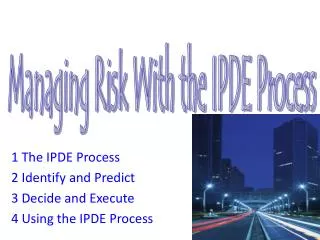
Managing Risk with theIPDE Process Chapter 5 Drive Right
Risk • All activities involve some degree of risk. • The risk when driving is the possibility of conflict. • Risk Factors: • Driver • Vehicle • Roadway and environment
Driver-contributed Risk Factors • From all drivers on the road. • Adjusting the radio • Being angry • Having blurred vision • Combing hair / fixing make-up • Drinking while driving • Using a cell phone
Vehicle-contributed Risk Factors • Most are the responsibility of the owner. • Bald tires • Poorly adjusted brakes • Dirty windshield • Broken headlight • Worn wiper blades
Roadway & EnvironmentRisk Factors • Bright sun • Construction • Dark shadows • Snow, ice, and rain • Sharp curves
Low-risk Driving • Good drivers make every effort to manage risk in order to lower the probability of conflict. • Good seeing habits and your ability to manage space in the roadway are basic tools for low risk driving. • Use IPDE along with the Smith and Zone Control systems.
The Smith System • Method to help develop good seeing habits by using five keys: • Aim high in steering • Get the big picture • Keep your eyes moving • Leave yourself an “out” • Make sure they see you.
Zone Control System • Managing the 6 zones of space surrounding your vehicle. (Overhead 9) • 3 steps: • See a zone change. • Check other zones • Create time and space by getting the best speed control, lane position, and communication.
Zone • Zone Control System • Sets the standard of what to identify and what to do when you find it. • One of six areas of space around a vehicle that is the width of a lane and extends as far as a driver can see. • Left-front Front Right-front • Left-rear Rear Right-rear
Open Zone • A space where you can drive without a restriction to your line of sight or to your intended path of travel. • Line of sight – the distance you can see ahead in the direction you are looking. • Intended path of travel – the space your vehicle will occupy.
Closed Zone • A space not open to you because of a restriction in your line of sight or intended path of travel. • The sooner you identify a closed zone, the more time you have to respond.
You will use both the Smith and Zone Control Systems within the IPDE Process.
I.P.D.E. Visual information sent to the brain is combined with stored information. As a result, you can: • Identify hazards • Predict conflicts • Decide to maintain or adjust your speed and position • Execute your decisions
Safe Driving Habits Video California DMV Sharing the Road Video Safe Driving Habits http://apps.dmv.ca.gov/video/lets_drive/sharing/safe_driving_habits/safe_driving.htm#topVideo (1:46) • Click on web address to access video clips • *Suggest full screen viewing
Identify • More that just seeing • You have to give meaning to what you see. • Knowing: • When to look • Where to look • How to look • What to look for
Field of Vision Field of vision is the entire area that you can see while looking straight ahead. • Central Vision targeting • Fringe Vision depth and position • Peripheral Vision color and motion
Central Vision Fringe Vision Peripheral Vision 3 Visual Fields Central Vision Visual Acuity, Targeting, Signs, Signals Fringe Referencing, Path of Travel Peripheral Vision Motion and Color Changes
Central Vision • Used for: • Targeting skills • Establishing visual lead • Reading signs and interpreting signals Straight-ahead vision
Peripheral Vision Approximately 90 to each side Used to see: • Moving objects • Color changes
Fringe Vision Fringe vision allows drivers to see the roadway without looking down. Upper Fringe Vision Targeting Lower Fringe Vision
Scanning the Road Video See Rules of the Road video #7-Scanning http://apps.dmv.ca.gov/video/lets_drive/rules/scanning/scanning.htm#topVideo (1:44) • Click on web address to access video clips • *Suggest full screen viewing
Final Thoughts Did You Know It takes only one-tenth of a second for a collision to occur. That’s half the time it takes just to blink your eyes.
Searching Range • A certain distance ahead of the vehicle where the intended path of travel is systematically evaluated. • To keep alert to the conditions of your zones, there are 3 searching ranges that need to be evaluated. • Target Area Range, 12-15 Second Range, and 4-6 Second Range.
Target Area Range • The space from your vehicle to the target area. • Search to detect early any conditions that might affect your intended path of travel.
12-15 Second Range • The space you will travel in the next 12-15 seconds. • Identify changes in your line of sight or path of travel. • Identify possible closed zones
4-6 Second Rage • The space you will travel during the next 4-6 seconds. • Get the final update on how you are controlling your intended path of travel.
Orderly Visual Search Pattern (OVSP) • A process of searching critical areas in a regular sequence. • Look for clues in and around your intended path of travel.
Keep Your Eyes Moving • Looking near and far, side to side, and in the mirrors will help you see a zone change before it becomes critical. • Do not stare, look only for an instant. • Scanning – glancing continually and quickly with very brief fixations through your orderly visual search pattern.
Look for Roadway Features and Conditions • Intersections, hills, and curves. • Change from multi-lane to single lane • Change in width of lane • Condition of roadway surface • Roadside hazards.