Download
1 / 27
270 likes | 275 Views
Learn how to use PowerPoint to create and run presentations, enhance with fonts, formatting, and graphics, and print handouts.

E N D
Introduction toMicrosoft PowerPoint2007 Elmhurst Public Library
Class Objectives By the end of this session you will know how to use PowerPoint to: • Run a presentation • Create a presentation • Use fonts, formatting and graphics to enhance your presentation, and • Print handouts for your presentation
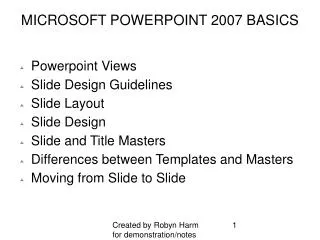
We Will Be Discussing… • Viewing a Presentation • Other Ways of Viewing Slides • Changing Fonts and Formatting • Adding a New Textbox • Adding a New Slide • Slide Transitions • Printing Handouts for Your Presentation • Making Your Own Presentation • Designing Slides
What is PowerPoint? PowerPoint is an application that is part of the Microsoft Office Suite of productivity software (i.e. software that helps you produce and present information). It is used for creating and displaying slides for telling a story, presentations and meetings.
Other Ways of Viewing Slides(bottom right corner above the task bar or View tab) • Normal View • Slide Sorter view • Slide Show view Choose your view from the View tab OR by using:
Normal View Go to Normal View (you’re probably already in it) Now move from slide to slide. Then come back to this slide.
Slide Sorter Go to Slide Sorter View • Can move slides around and reorder them • Can copy and paste slides in this view • Can delete a slide you don’t want • Can’t make any changes to the slide
Changing Fonts and Formatting(Review tab) As you can seeee, I have made a typooo on thise page. Please fix it and then move to the nexte slide. Right clickiing can be used for checkking your spellling.
Fonts (Typefaces)(Home tab) Change the fonts of the words below to different fonts. Elmhurst Library ElmhurstLibrary Elmhurst Library
Type Size(Home tab) Now change the size of the words below. Elmhurst Library Elmhurst Library Elmhurst Library
Styles(Home tab) Now try to apply some styles. Elmhurst Library (bold) Elmhurst Library (italics) Elmhurst Library (Underlined) Now try applying more than one style!
Buttons and Numbering(Home tab) Can interchange between buttons and numbering Justification and columns
Saving Your Work(Office button) Of course, you’ve made a lot of changes, so you will need to save your work. Use “Save As” or “Save” from the Office button
A Splash of Color(Home tab) Now change the colors of the words. Elmhurst Library Elmhurst Library ElmhurstLibrary
Alignment(Home tab) You can align every line of text differently. Change the alignments of the words below. Elmhurst Library Elmhurst Library Elmhurst Library
Adding a New Textbox(Insert tab) Add a new textbox below here and type your name into it.
Moving and Resizing a Textbox Move this textbox to the bottom of the screen and then change it to make it taller and narrower.
Rotating an object Rotate me!!
Deleting a Textbox Delete me!
Inserting a New Slide(Home tab) Use “New Slide” from the HOME tab to insert a new slide after this one.
Slide Transitions(Animations tab) Slides can change from one slide to another without any special effects, or you can jazz it up a little bit. Use “Transition to this Slide.” Make sure you apply the transition to all slides.
Inserting Pictures – Clip Art(Insert tab) A picture should be added to this slide. Go ahead and insert a picture from clip art and move it into place.
Inserting Pictures – From File (Insert tab) A picture should be added to this slide. Go ahead and insert a picture from a file and move it into place and resize it.
Adding a Background Color (Design tab) Can choose a theme (many to choose from) Background styles-- gives many choices Slide orientation---portrait or landscape
Viewing your Slide Show (Slide Show tab) Setting up show to run continuously Timing length of viewing each slide
Printing Handouts(Office Button : Print) PowerPoint has the ability to print handouts with small images of the slides • Choose “Handouts” in the “Print What:” menu • Choose how many slides per page. • Make sure to use “Preview” to check how your document will print.
Make Your Own(Office Button : New) Now it’s time to make your own small presentation. Use “New…” from the Office button to start your new presentation.