Download

1 / 14
750 likes | 1.39k Views
Windows movie maker. “creativity”. Start Tutorial. Making Your Project, Come To Life An E-Learning Course To Get You Started Created By, Noe Granado. Instructional goal:.

E N D
Windows movie maker “creativity” • Start Tutorial Making Your Project, Come To Life An E-Learning Course To Get You Started Created By, NoeGranado
Instructional goal: • After completing this instructional unit, teachers will be able to use Interactive Multimedia using Windows Movie Maker 2.6 in which they will be able to create a project and also add Pictures. Intended audience: K-12 Teachers Learning environment: Teachers will learn how to use Windows Movie Maker 2.6 through an E-Learning Environment. The skills will be carried out in the classroom in order for students to be able to create a story board from a project report. Windows Movie Maker 2.6 will bring their paper project to life.
Hi! My name is Noe. In this instructional unit you will be creating a Windows Movie Maker project. Follow the instructions and you will be on your way to making your projects come to life! Remember that I will be with you throughout the process of completing this course. I’ll provide you with as much information as I possibly can in order to assure that you succeed. Make sure you read my introduction through the Blabberize and complete the Anticipation Guidebefore continuing this course. | Blabberize Anticipation Guide
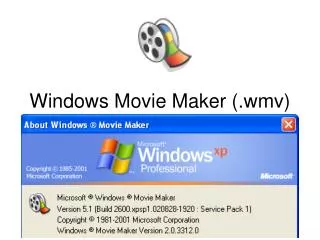
Keep in mind that Windows Movie Maker is already pre-installed in your computer if you are using Windows Operating System. If for any reason your computer does not have the program, then you can download it for free, from microsoft.com. Otherwise, click on the arrow and follow the steps to begin Windows MovieMaker 2.6 unit.
Step One: Open Windows Movie Maker 2.6 Select “Windows Movie Maker 2.6” Click on “Start”
Good Job! This is the view you should see. Now let’s save the project and give it a name: “MyFirstMovie”. Go to the next slide. “Collections Folder” “Story Board View”
Step Two: Create/Save the project • Click on “File” • Select “Save Project” • Go to “File name: MyFirstMovie” • Click on “Save” • “File” You will then see the “Save Project As” dialog box. Give the File name: “MyFirstMovie”
Wow! You’re doing great…Your view will now have the title name: “MyFirstMovie” “Collections Folder” If you are interested in making this instructional unit personal, then have ready some personal pictures of your family/students. Keep in mind that Windows Movie Maker has two of views: Storyboard View & Timeline View. For the purpose of this section you will use “StoryBoard View”. All imported images clips, go into a “Collections Folder”. “TimeLine” “Story Board View”
Ok! Let’s make sure you are comprehending. Answer the question below and Good Luck! • As you are familiarizing yourself with Windows Movie Maker, When you import pictures they go straight to the…. • Collections folder • Storyboard • Timeline • Movie
Step Three: Importing Pictures Now that you’ve created a project; let’s add pictures.
GREAT JOB! You have completed this instructional tutorial! Remember to switch to “TimeLine View” if you are interested in Editing the Pictures/Videos Don’t forget to click on “Save” to assure that you don’t lose your progress, in case of a power outage! “Collections Folder” “TimeLine View”
Ok! Let’s make sure you are comprehending. Answer the question below. Good Luck! • When you drag graphics to the storyboard in which mode can you edit them? • Timeline mode • Storyboard mode • Movie Maker mode • Edit movie mode
Congratulations! You have created you own movie using Windows Movie Maker 2.6. Use the Rubric to Score your knowledge and you did great throughout this Instructional Unit! Don’t forget to take the Anticipations Guide Performance | Rubric Anticipation Guide
Congratulations!You are done This instructional unit was intended for you, to encourage integration of technology in the classroom and lead students to use their creativity during instruction. You can know teach your students to create a Windows Movie Maker project and add pictures. Students can view a previous research paper or activity and use Windows Movie Maker 2.6 to create an animated storyboard. This will allow the students to be creative and relate to real life experience.