Download

1 / 41
420 likes | 633 Views
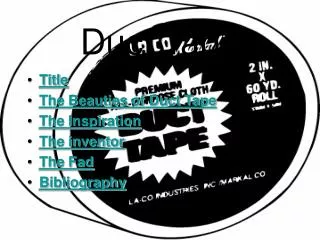
TDJ3M Tech Design Designing and Making Useful Objects from Duct Tape:. The Wallet / Purse. The Common “Duct” Tape…. A million and one uses!. Millions of Uses. Here are some of them…. After. Before. Fixing a Shoe. Taping your Vice-principal to the wall for charity. Fixing a broken CV Boot.

E N D
TDJ3M Tech DesignDesigning and MakingUseful Objects from Duct Tape: The Wallet / Purse
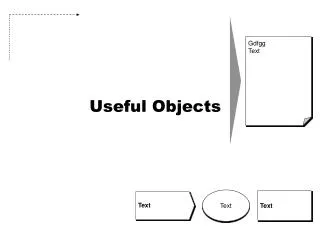
The Common “Duct” Tape…. A million and one uses!
Millions of Uses. Here are some of them…. After Before
Fixing a Shoe Taping your Vice-principal to the wall for charity. Fixing a broken CV Boot
Can’t afford that new suit? At last, the infamous wallet! "Spare the ducttape, spoil the job." - Red Green(In other words, don't spare the duct tape, just get more!)
Dozen Red Roses, the gift that keeps on sticking! HAAAAA Cheque Book
Belt and Buckle "Uh-huh, I'm all taped up." Can be seen on the set of the Red Green movie. Hat Guitar Strap
MacGyver Tip and duct tape in the news…. Reader Aaron writes in: “When I was younger (early teens), I had a wart on one of my toes that wouldn't go away for years. I saw a podiatrist and a dermatologist, each of which took several turns dousing it with acid, freezing it, scraping it, injecting who-knows-what into it, and sprinkling it with Holy water to no effect -- I'd even tried every single over-the-counter wart remedy they made; this sucker would not die. One day my dad came home from the pharmacist with some peculiar advice: duct tape. My first thought was that he meant to affix duct tape to it, then rip it off like a leg waxing; "ouch". No, he meant to put duct tape on the thing and leave it there. So, I started wrapping duct tape around the toe and leaving it there. Every week I'd snip it off, soak the foot in soapy water, then add another strip of duct tape. In a month, the monster was half its usual size. In two months, it was completely gone. Imagine that. Fourteen flavors of acid accomplished nothing, and duct tape solves it. “
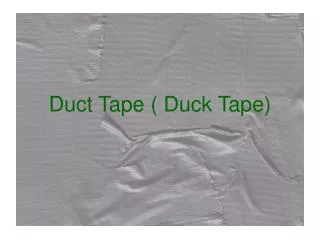
First things, first. It is called “Duct” tape, not “Duck” Tape! • Originally designed for use to tape air ducts in houses where the duct work joins together.
Quality • There are so many brands on the market it is hard to know what to get. The general rule of thumb is: You get what you pay for. Generally, the higher the price the better the duct tape. The higher priced stuff tends to be thicker, stronger, and more consistent. Consistency is very important if you want your projects to come out looking professional. • This means stay away from the utility/home & shop grade of duct tape. It is ok for wrapping parcels, but this stuff is cheap and nasty. Your project will come out flimsy. • When you are first starting to use duct tape, stay away from the very high end stuff. The thicker stuff is much harder to work with.
Thickness • You will see duct tape thickness measured in either mil (1/1000") or milimeters (mm). Here is a handy conversion table. Very roughly 1 mil = 0.025 mm. The original duct tape was 13 mil. • mil 8 9 10 11 12 13 mm 0.20 0.23 0.25 0.28 0.31 0.33 I would roughly categorize the duct tape as follows. • 8-9 mil is nasty utility grade • 10-11 mil is contractor/industrial grade • 12-13 mil is military grade
Medium End Grades • For prototyping, you cannot beat Nashua 300 tape. This tape is available at Home Depot as their "Contractor" grade. It is much thicker than utility tape but still very easy to work with. It also is a full 2" wide. The price is right too. I paid about $14 CDN for two 60 yard rolls. The problem with this tape is that the glue is close to the sides and the final product really picks up dirt. • If you need coloured tape, I have had very good luck with the Duck Tape brand coloured tape. This is the most readily available of the coloured tapes. Just be careful, the white edge of the tape shows up in the finished project.
High End Grade • For high end tapes, I like the Duck Tape brand Professional series. This is much thicker than the medium grades and has a very shiny, smooth finish. However, you tend to get bubbles in the finished project. This is about $7 CDN for 45 yards. Gorilla Tape is really strong, though a bit more expensive ($14 / roll) • For the ultimate high end duct tape, go to Lee Valley. They have the original duct tape, although in 1 7/8" width only. It is much thicker than regular duct tape with a smooth finish that crinkles. This is about $12 CDN for 60 yards.
Tools You Might Need • Olfa Knife • X-acto Knife • Metal Ruler • Scissors • Tape Measure • Cutting Board • Duct Tape • Pen or Sharpie
Making the Wallet 1 • Step 1The first step is to create a large sheet of duct tape 8.5 inches by 7 inches. This is the key to any duct tape project, with a sheet of tape you can make anything! Rip a strip of tape at least 8.5 inches in length and place sticky side up on your working surface. rip a second piece of equal length and place sticky side down half way over the first strip. Fold the rest of the strip facing up over the second strip. Flip over the two strips and place a third strip sticky side down covering the remaining sticky part of the second strip. Flip the sheet again and continue extending the size of the sheet until the needed size is satisfied.
Making the Wallet 2 • Step 2Trim the edges, fold the wallet in half and tape the sides to create a large pocket to hold bills.
Making the Wallet 3 • Step 3To create credit/business card pockets create another sheet 4 by 3.5 inches.
Making the Wallet 4 • Step 4Fold 1.5 inches over. To create two more pockets, repeat the step above and then tape the two pieces together, taping the second pocket a little lower on top of the first piece.
Making the Wallet 5 • Step 5Tape the edges of the pockets and then tape the whole piece to the large pocket. To create another pocket, leave the inside part untaped.
Making the Wallet 6 • Step 6Make a sheet of tape (as in the first step) larger than your ID card. Cut the sheet so the outside part of the frame is slightly larger than the height and width of the ID. Cut the inside .5 centimeters, (big enough you can see you picture and info, but small enough the ID can't fall through the opening. Now trim the outside so it is slightly larger in all directions than your ID. Tape three sides of this window to the inside of your wallet, or on top of the credit card holder. It'll take a some trial an error to get it right, but it will be a great addition to the wallet. When your done, the ID should be able to slide into the untaped side of the holder, and once in, not fall through the open window.
Making the Wallet 7 • Step 7Tape the completed pocket to the large pocket and again you can create an extra pocket if you wish by leaving the inside part un-taped.
Making the Wallet 8 • Step 8This is the completed wallet. There are an infinite ways to personalize this design. Some ideas I've embeded in mine are coin pockets within the large bill pocket and placing flaps on the credit card holders so business cards don't fall out when the wallet gets dropped.
Add Personal Touches • Gromets for chain-drive wallets • More sticky vinyl for initials • Various Fruit stickers • Use different colours • Add velcro for deluxe wallets • Weave duct tape for textured look Cammo Wallet
Design Brief • You are tasked to design and make a usable duct tape wallet, purse or small accessory bag to keep money, valuables and other personal belongings. The object must only be made of duct tape. You may use different types of duct tape but no other materials.
Example of Good Ideation Process. It includes thought process and lists ideas.
Where to Start?Links to Cool Duct Tape Stuff • http://www.ducttapenation.net/ • http://www.thinkgeek.com/homeoffice/gear/5f21/ • http://www.rpi-polymath.com/ducttape/index.php • http://www.3m.com/CA/english/centres/home_leisure/duct_tape/index.html • http://beckybot.com/ • http://204.255.212.10/~jthorsse/duct.html • http://www.ducttapefashion.com/
Have fun and good luck. "Duct tape is like the force: It has a dark side and a light side and it holds the universe together."- Carl Zwanzig