Download
1 / 29
310 likes | 441 Views
Dry Heat Cooking. Goal 1: Basic Hot Food Production. Definition. Uses oil, fat, the radiation of hot air or metal to transfer heat No moisture is used Moisture from food evaporates (liquid escapes from a pan as vapor). 1. Sauteing.

E N D
Dry Heat Cooking Goal 1: Basic Hot Food Production
Definition • Uses oil, fat, the radiation of hot air or metal to transfer heat • No moisture is used • Moisture from food evaporates (liquid escapes from a pan as vapor)
1. Sauteing • Quick, dry cooking technique that uses a small amount of fat or oil in a shallow pan to cook foods • Used for delicate or fragile foods that cook relatively quickly • Examples: fish fillets, scallops, tender cuts of meat, vegetables, fruits • Often served with sauce
Sauteing Equipment • Wok • Saute pan • Range • Griddle
Sauteing Method • Preheat pan on high heat. • Add a small amount of fat or oil. • Add food only after the fat or oil is heated (hot). DO NOT OVERCROWD THE PAN! This will lower the temperature of the food and it will not seal properly. 4. Allow food to seal. (allow surface of food to brown) • Lower the temperature so the food cooks evenly throughout. • Turn food in the pan. (not frequently)
2. Stir-Frying • similar to sauteing • require less cooking time than sauteed foods • uses a higher temperature • vegetables and tender, boneless meats
Stir Frying Equipment • wok
Stir-Frying Methods • Place a wok over high heat. • Add a small amount of fat. • Add small pieces of food. (food should be uniform in size so that it will cook evenly) • Constantly stir the food as it cooks.
3. Frying • food is cooked in larger amounts of hot fat or oil • outside of the food becomes sealed when it comes in contact with the hot oil • The natural moisture that is in the food turns to steam, which bubbles up to the surface • Since the outside of the food is sealed, fried foods are moist and juicy on the inside. • Fried foods are coated to add flavor and texture.
Types of Frying • Pan frying- cover about ½ to ¾ of food in fat or oil/oil temperature 350-375 F/food must be turned/chicken, potatoes, fish, pork chops • Deep fat frying- submerge food in to fat or oil/oil temperature 350-375 F/potatoes, onions, fish, poultry
Coatings for Fried Foods • Dredging- coat heavily with flour or finely ground crumbs • Breading- coating made from eggs and crumbs • Batter- semi-liquid mixture that contains flour, milk, eggs, seasonings/food is dipped immediately before frying
Frying Equipment • Deep fat fryer • Saucepan • Cast iron skillet • Commercial deep fat fryer- less recovery time (time it takes for fat to heat back up)
Frying Methods 1. Heat oil to 350-375. • Dredge, bread, or batter food. • Fry food until it reaches the proper internal temperature. Usually the recipe will give a frying time. Check the temperature after the time is up.
Tips to Follow after Frying • After foods have been fried, remove them from the oil and drain well on an absorbent surface. • Add seasoning. • Serve immediately or place under a heat lamp (uses infrared spectrum) to keep food warm during holding so it will not become soggy. • Change oil frequently. Oil will last longer if correct temperature is used. (smoking point- the temperature at which an oil will smoke. This will give the product a funny taste and color)
Frying Safety and Sanitation • Never put water on a grease fire. Use a Class B (grease, oil, chemicals) or Class K (fire in cooking appliance that contains fat or oils) fire extinguisher. • Frozen foods causes oil to pop. • Always check the internal temperature of fried foods. • Separate frying oil used for foods that contain common food allergies.
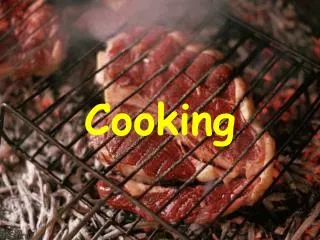
4. Grilling • Used for tender foods that cook relatively quickly
Grilling Equipment • Gas, electric, charcoal, wood fire grill • griddle
Grilling Methods • Preheat the grill. • Brush the food lightly with oil. (most food) • Place food on the grill. • Leave the food on the grill until grill marks appear. • Turn food to create crisscross grill marks. (10 and 2) • Flip food and create crisscross grill marks on the other side. • Check the internal temperature of meat to make sure it is done.
Griddle Use • Flat, solid plate of metal with a gas or electric heat source • grilled cheese, breakfast items • Temperature 350 F • Grooved Griddle- create grill marks but not smoky taste
5. Broiling • Cook food directly under a primary heat source • Thicker food should be placed farther from the heat source so that the inside and outside of the food cooks at the same rate. • Tender foods- vegetables, meats, poultry
Broiling Equipment • Range or oven • Broiling pan • Broiling rack
Broiling Methods • Turn oven to the broil setting. • Place seasoned food on broiling pan. This will create grill marks on the food. (do not salt food, this draws out the liquid and makes it dry) • Place the food at the appropriate distance from the heat source. (thin close/thick further away) • Watch food closely. • Check internal temperature to make sure food is done.
6. Roasting • Food is usually uncovered on a rack inside a roasting pan. • Usually involves longer cooking time than baking • Some food needs to be constantly basted. (spoon melted fats, pan drippings, or other liquids during cooking) • Large food continues to cook 5-15 minutes after is removed from the oven. (carry over cooking/outside of the food is hotter than the inside/the temperature stabilizes/adds 5 to 15 degrees to the final temperature of the product
Roasting Equipment • Hotel pan • Sheet pan • Convection oven • Deck oven • Loaf pan • Tube pan • Roasting pan
Roasting Methods • Searing- to quickly brown the outside of food at the start of the cooking process/enhances flavors and adds colors/creates juices for sauces 1. Heat the pan with a small amount of oil on the rangetop. • Brown the meat on one side. • Turn the meat and brown on the other side. • Place the pan in a hot oven to finish cooking.
or • Place the food on a pan into a 450 F-475 F oven. • Cook the meat for 15-20 minutes until golden brown. • Reduce the heat to 325 F-350 F to finish the cooking process.
Open-Spit Roasting • Place food on a metal rod or long skewer. • Slowly turn it over the heat source. Commercial roaster will automatically turn food. • Place a drip pan under the food source. • Check the internal temperature of food. Food will continue to cook 5-15 minutes after you remove it.
7. Baking • No fat or liquid is added to the cooking process • Bread, chicken, fish, vegetables, fruits, pastries • Food is uncovered- moisture comes from food and is turned into steam and evaporates into the air • Large food continues to cook 5-15 minutes after it is removed from the oven. (carry over cooking/outside of the food is hotter than the inside/the temperature stabilizes/adds 5 to 15 degrees to the final temperature of the product
Baking Equipment • Hotel pan • Sheet pan • Convection oven • Deck oven • Conventional oven • Tube pan • Loaf pan