Download
1 / 71
710 likes | 815 Views
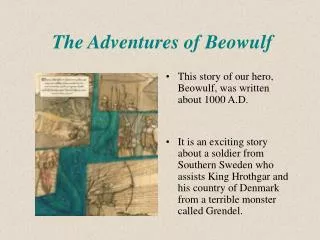
Beowulf Battles Scene Dinah Poteat Duke University, Adventures in Alice, July 2013. Part 1: Set Your Scene. Begin by opening a new world and choosing a template; we will choose the dirt template. Part 2: Add Objects.

E N D
Beowulf Battles SceneDinah PoteatDuke University, Adventures in Alice, July 2013
Part 1: Set Your Scene Begin by opening a new world and choosing a template; we will choose the dirt template.
Part 2: Add Objects First, let’s resize our world screen by holding a left click on the blue border line to the right and moving it outward. Do the same to the bottom blue border, moving it down. Now click the green “Add Objects” button in the lower right corner of your world.
Part 2: Add Objects (continued) Your screen should now look like this: Notice the object Local Gallery across the bottom of the screen.
Part 2: Add Objects (continued) In the Local Gallery, choose the Buildings section and scroll across until you find Class Shack.
Part 2: Add Objects (continued) Click on the Class Shack. The program will ask if you want to “Add instance to world.” Click that line to add the building to your world.
Part 2: Add Objects (continued) Your world view will shift as the Shack is added. Then it will settle in the center of the screen:
Part 2: Add Objects (continued) Return to your Local Gallery and scroll over to the People file. Choose the second box, titled “Walking People.” From the Walking People file, scroll over and choose the “Class MeadSeafeather.” Add him to your world.
Part 2: Add Objects (continued) He should appear in front of your building. Do not worry if he appears somewhere else. We will move our objects around after we get all of our objects into our scene.
Part 2: Add Objects (continued) While still in your Walking People folder, scroll over until you find Class Zeus. He’s at the end of the line. Add him to your world.
Part 2: Add Objects (continued) Here is where Zeus appeared in my world. It may appear somewhere different in your world, but that’s OK. We are almost ready to rearrange our objects in our world.
The Object Tree In the top left corner of your window, you will see your Object Tree. All of your chosen objects have now been added to the Object Tree. We can manipulate our objects by clicking on their title in the object tree. First we are going to rename a few of our objects.
Part 3: Renaming Objects Click on the object that you want to manipulate. Right click on the chosen object and choose the command “rename.” Rename the shack object to meadhall. Rename the meadSeafeather object to monster. Finally, rename the Zeus object to Beowulf.
Part 3: Rearranging Objects In the top right of your screen, you will see your object navigators. The first arrow is the most important tool. The first arrow moves our objects sideways, as well as forwards and backwards. However, we will use several of the tools to rearrange our objects.
Part 3: Rearranging Objects (continued) Using the arrow button, move your meadhall to the center of your screen and back a bit. Please see the example to the right.
Part 3: Rearranging Objects (continued) On your Move Objects Freely bar, use the third button to rotate the monster to face right, then adjust him further right to we’re seeing some of his back along with his profile. Then go back to your arrow key and place the monster to the left side of the world. Also move him back a bit so we can see more ground.
Part 3: Rearranging Objects (continued) So now we need to place Beowulf. I am going to write the directions here, and the next three slides will show your how it looks. On the Object Tree, choose beowulf and right click. Choose “methods,” choose “beowulf move to,” then choose “ground.” As long a Beowulf is on the ground, it doesn’t matter where he is in the picture. Again, on the Object Tree, choose beowulf and right click. Choose “methods,” choose “beowulf turn to face,” then choose “camera.” Finally, on the Object Tree, choose beowulf and right click. Choose “methods,” choose “beowulf move to,” choose “meadhall,” then finally, choose “doorstep.”
Part 3: Rearranging Objects (continued) Finally, use your Arrow button to gently push Beowulf through the door until he disappears (barely place him to the inside of the door).
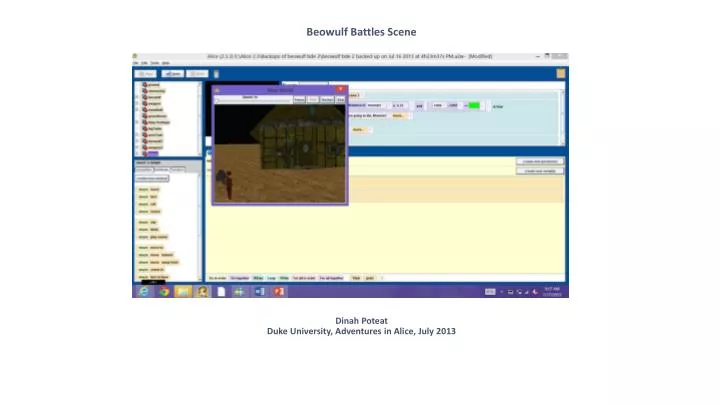
Part 3: Rearranging Objects (continued) Finally, find the Done button in the bottom right corner (above the Local Gallery), and click it. Now we can begin writing our code. See resulting scene below.
Part 4: Creating a New Method, Part 1 Before we begin writing our code, we have to create two special methods. We’ll create our first special method by clicking on the “world” in the Object Tree. Move down into the “world’s details” column and click on “create new method.” When you “create new method,” a dialogue box will pop up in the center of the page. Name the method “beowulf chase monster.”
Part 4: Creating a New Method, Part 1 (continuing) Beside the “world’s detail” column, a new tab will open above our coding section, titled “world.beowulf chase monster.” Beneath this area’s No variables section, a slot will appear where we will place our commands for this method. Since this method concerns Beowulf, we will return to the Object Tree and click on his name. We will work within his details “methods” column.
Part 4: Creating a New Method , Part 1 (continuing) Search the column for the “beowulf turn to face” command. Drag the command to the Do Nothing slot, and drop it when it turns green around the edges. As you drop the phrase into the space, a drop-down menu will ask you to choose. Choose “monster” and “the entire monster.”
Part 4: Creating a New Method , Part 1 (continuing) Once we’ve placed the command, we need to click on “more” and choose a “duration.” In this case, we want Beowulf to move quickly, so we’ll designate 0.25 seconds. We want to give Beowulf more directions about how to move, so click on “more” again. This time, choose “style,” then choose “abruptly.” The monster will surely be caught off guard!
Part 4: Creating a New Method , Part 1 (continuing) We will add two more commands to this method. The first one is one of Beowulf’s pre-set commands. Scan the “beowulf’s details” column to find the “walk how far” command. Drag it over to beneath our “turn” command, and when you drop it, assign him to walk 0.25 meters. Next find the “beowulf move to” (not just the “Beowulf move”) command. Tell Beowulf to “move to” the “entire monster,” and again make him move in “0.25 durations,” and “abruptly.”
Part 4: Creating a New Method , Part 2 We need to create one more World New Method. Since we’ve done this once, it should be easier this time. Like before, we will begin by clicking on “world” in the Object Tree. Again, make sure the “methods” tab is showing in the “world’s details” column. Like before, click on the “create new method” box. When the dialogue box comes up, name the method “monster circle.”
Part 4: Creating a New Method , Part 2 (continuing) Click on “monster” in the Object Tree. Find the “monster turn” command and drag it over to the “Do Nothing” command box. We want our monster to turn “left” for “1/4” revolutions. We also want him to complete these actions in “0.25” seconds. Next, grab another “monster turn” and again have the monster turn left. This time we want him to spin around a complete revolution. Finally, choose “more,” but this time, choose “as SeenBy,” then choose “the entire beowulf.”
Part 4: Creating a New Method , Part 2 (continuing) Finally, we want the monster to speak while he’s circling, so we’ll pull in a “monster say” and have him say “NO!” Next we’ll work on making events; we’ll use our methods in these events to make Beowulf and the monster keep moving without us having to direct their every movement.
Part 5: Creating a New Event, Part 1 Before we begin writing our code, we need to set up two events. The first event will cause Beowulf, once he emerges from the house, to chase down Beowulf. Begin by finding the “Events” bar at the top right of the page. Click on the “Create new event” tab and choose “While something is true.”
Part 5: Creating a New Event, Part 1 (continuing) You will now see the event, along with three additional commands: Begin, During, and End. We will fill in the blanks of the presented event formula. While creating this event may seem challenging, it will, in the long run, save us many steps in coding and make magic happen on the screen.
Part 5: Creating a New Event, Part 1 (continuing) sign Choose the First we will click on “world” on the Object Tree. Beneath the Object Tree, in the “world’s details” column, click on the “functions” tab. and drag it into the “none” box in the line “While ‘none’ is true.” Let’s choose 2 and 2 for our variables.
Part 5: Creating a New Event, Part 1 (continuing) Now we have to click on “beowulf” in Object Tree. Also in the “beowulf’sdetails” column, find and choose “Beowulf distance to”; drag the phrase over and drop it into the box around the first variable 2. Choose “monster,” then “the entire monster.”
Part 5: Creating a New Event, Part 1 (continuing) Our box now looks like this: At this point, our event will occur when Beowulf is greater than 2 meters from the monster. We need to shorten that distance. To do that, click on the white arrow directly to the right of the “2” and a pull-down menu will appear. Choose .25 to get Beowulf closer to the monster.
Part 5: Creating a New Event, Part 1 (continuing) Now we will fill in our “Begin: Nothing” box by clicking on the “methods” tabs in the “beowulf’sdetails” column. Drag “Beowulf say” over to the “Nothing” box after “Begin.” Choose for him to say “other” and in the dialogue box, type “You are going to die, Monster!” To complete the middle “During: Nothing,” we will need to click on the “world” in the Object Tree. We are about to use the new method we created earlier. Find the “beowulf chase monster” method and drag it over to the “Nothing” box beside “During.”
Part 5: Creating a New Event, Part 1 (continuing) Finally, we will end this event by again choosing “beowulf” in the Object Tree and dragging a “beowulf say” command over to the “Nothing” after the “End” in the event. Have Beowulf say “Die!” This event will keep Beowulf moving toward the monster. Next we need to use our “monster circle” method to keep the monster moving away from Beowulf.
Part 5: Creating a New Event, Part 1 (continuing) First we are going to add another object to our world. Find the green “ADD OBJECTS” box again and click it. In the “Local Gallery,” slide over to “Shapes.” Choose the “Class Cube,” but this time, just drag it up and place it to the right of your meadhall.
Part 5: Creating a New Event, Part 1 (continuing) Click “Done” because we now have to do something with our cube. Your cube is now listed on your Object Tree. Click on it, and then, below, in the “cube’s details” column, choose the “properties” tab. Find the word “color.” The cube is now white, but we want to change it to red. Click on the white part and choose from the available colors.
Part 5: Creating a New Event, Part 1 (continuing) In your picture, the cube has now turned red. Now return to “world” in your Object Tree. In the “world’s details” column, choose the “functions” tab and find the function . Drag the function over to the last event we created and place it in the “While Beowulf distance to monster” box. As you drop the function, you will have to choose “true.”
Part 5: Creating a New Event, Part 1 (continuing) Now your code will look like this: Return to your “cube’s details” and the “properties” column. Find the color command that you just used to make the cube red. Left click on the color and drag it over to the first “true” in our event. As you drop it, choose the first “cube color” and choose “green”:
Part 5: Creating a New Event, Part 1 (continuing) We have finally finished this event and it should look like this: But remember, we still have a red cube in our scene. To make it so we cannot see the red cube, return to your “cube’s details” column. Beneath the “properties” tab, find “isShowing.” The command is now “true”; change it to “false.” The red will disappear from your picture; if the outline remains, do not worry. Now we will begin our next event.
Part 5: Creating a New Event, Part 2 Again, go to the top right of the page and click on the “create new event” box. Like before, choose “while something is true”; however, when the event appears, move out into the blue to the right, and right click with your mouse. A box will pop up with other options. Choose “when something becomes true.” Now your event will look like the example below:
Part 5: Creating a New Event, Part 2 (continuing) Now we need to return to our “world” Object Tree to get a “function” to place in our event. Again, choose the greater than sign: As you drop your function, you’ll also have to choose numbers. Choose 1 and 1. Your event should now look like this: Now return to the Object Tree and click on “beowulf.” Also choose his “function" tab, and find “beowulf distance to.” Drop this function into the second “1” in this event. Choose “the entire monster” when prompted.
Part 5: Creating a New Event, Part 2 (continuing) Now your event should look like this: To finish this event, we need to return to our “world” in the Object Tree. In the “world’s details” column, make sure we are choosing from beneath the “methods” tab. Find our method “monster circle.” Drag it over to the red “Nothing” box and drop it in.
Part 6: Writing the Code, Part 1 Now we are ready to begin writing our codes. First, click on the “World” at the top of your Object Tree. Also click on the “world.my first method” tab. This is where we’ll place the rest of our code. Now go to the bottom of the screen and find the “Do together” command. Click on the button and drag it into the “Do Nothing” area. Again drop it in when the command is outlined in green.
Part 6: Writing the Code, Part 1 (continued) Click on “monster” in the Object Tree. Look under the “methods” tab in “monster’s details” to find the preset “FlapWlings duration amount” command. Drag “flapWings duration amount” over to the “Do Nothing” box within our “Do together” command. As you drop it, choose “2,” then choose “other.” A calculator will pop up, so type “5” and click OK.
Part 6: Writing the Code, Part 1 (continued) Scroll down in your monster details column and find “monster move.” Drag it over and place it beneath the “monster.flapWings” command, still inside the “Do together” box. Choose “up,” then choose “1/2 meters.” This will get the monster into the air so he will appear to fly briefly.
Part 6: Writing the Code, Part 1 (continued) Next, we’ll drag over a “walk how far” command and drop it beneath the “monster move up . . .” command. Tell the monster to walk 1 meter. Then scroll down and find “monster turn” in the monster details column. Drag the command over and have the monster turn “forward.” When the command asks for a number representing “how far,” choose “other.” When the calculator pops up, type .05 into the box and click OK.
Part 6: Writing the Code, Part 2 Drag another “Do together” from the bottom of the screen, and place it just below the previous “Do together” code (make sure not to place it into the previous “Do together” command). In the Object Tree, choose “beowulf.” As Beowulf comes from the meadhall, we want him to grow taller, so under the “beowulf details” “methods” tab, find the Beowulf resize” command. Drag it into our new “Do together” box. Calculate Beowulf to resize to 1.5 and choose OK.