Download

1 / 16
160 likes | 255 Views
Taking a soil sample. Jill Montle, District Technician Athens SWCD. Taking a soil sample. Why should we sample? Soil sampling or testing shows our soils potential productivity. Why should we care?

E N D
Taking a soil sample Jill Montle, District Technician Athens SWCD
Taking a soil sample • Why should we sample? Soil sampling or testing shows our soils potential productivity. • Why should we care? Knowing the nutrient content of soils, allows us to CORRECTLY make appropriate amendments to maximize yields – whether it be crops, pasture, lawn, etc.
Taking a Soil sample Typically we sample for the following: • Phosphorus (P) • Potassium (K) • Calcium (Ca) • Magnesium (Mg) • pH • Cation exchange capacity • Organic matter %
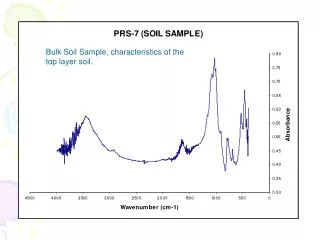
Taking a soil sample Example of a soil sample result.
Taking a soil sample • When should we test? Spring or Fall. Don’t try to sample soils that are extremely wet or dry. • What would be an advantage to fall testing? Fall sampling allows time for any potentially needed lime application to be applied as it can take as long as 6 months for a lime application adjust soil pH. • How often? Generally every 3-4 years.
TAKING A SOIL SAMPLE Tools of the trade Clean instruments! Clean collection containers – plastic works great. Use stainless steel or chrome-plated instruments and/or collection containers. Soil sampling probes are available for use for a REFUNDABLE deposit of $50. Avoid brass, bronze or galvanized tools or collection containers.
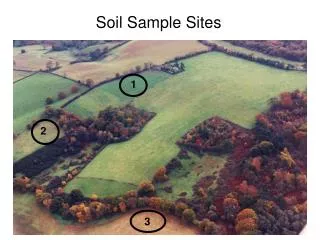
TAKING A SOIL SAMPLE Simple steps! Take soil cores or slices from at least 15 different places, using a zigzag pattern to obtain the best representation of the area.
TAKING A SOIL SAMPLE • Sample a row crop field or garden between rows to avoid fertilizer bands. • Take separate samples from fields that have received different fertility programs or that have different land uses. • Take separate samples from soils that are distinguishable by color, drainage, unique land form features, or other factorsi.e. in a draw, on a hill, etc. • Test results are only going to be as good as the sample taken, therefore it is very important to take a representative sample.
TAKING A SOIL SAMPLE Simple steps! Remove the top debris, residue, rocks, etc.
TAKING A SOIL SAMPLE Simple steps! Sample gardens, trees, shrubs, flower beds and orchards 6-8 inches deep. Sample lawns 3-4 inches deep.
TAKING A SOIL SAMPLE Simple steps! Mix all samples in your clean container. Let sample AIR dry. Remove any stones, roots, or other debris. Crush any clumps. Take sample to business of choice for analysis. About one cup of soil is appropriate.
TAKING A SOIL SAMPLE Sample of form you will need to fill out when sending off your soil.
TAKING A SOIL SAMPLE Nutrient availability by pH in mineral soils. http://www.avocadosource.com/tools/fertcalc_files/ph.htm