Download
1 / 17
170 likes | 265 Views
Living in the tide pools . With supplemental tour of horticulture. Outline of the day. Turn in your lab reports at the front More than 10 minutes late = bad Any questions on last week’s lab? Quiz Introduction to the lab Lab! Check out Get a stamp Make sure I mark you down for attendance.

E N D
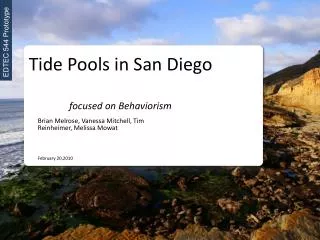
Living in the tide pools With supplemental tour of horticulture
Outline of the day • Turn in your lab reports at the front • More than 10 minutes late = bad • Any questions on last week’s lab? • Quiz • Introduction to the lab • Lab! • Check out • Get a stamp • Make sure I mark you down for attendance
Quiz • Ends 8 minutes after it’s started • Ends at: ____
Lab this week! • Preparing for our tidepool trip • Where we’re going • What we’re going to do while there • Applying what we learned last week to real plants • A tour of horticulture! • Today’s worksheet is based on this part
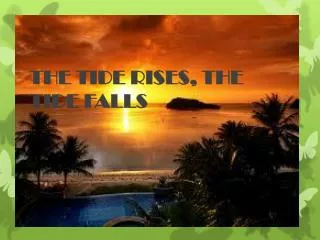
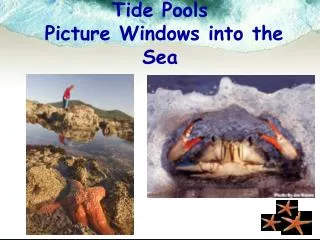
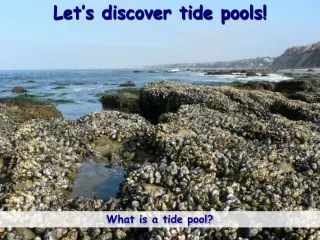
The intertidal zone • Area where land meets sea • Can be rocky or sandy • Rocky is typically more diverse
What causes the tides? • The relative position of the sun and moon • Moon affects tides on a daily basis • Pulls on ocean water as it moves around the earth • Sun has less of an influence; seen more seasonally • When moon and sun line up, tides are larger than normal (spring tides) • When moon and sun counter each other, tides are lower than normal (neap tides)
Variation in tides seasonally • Neap tides • Tides are larger than average • Sun and moon counter each other • Spring tides • Tides are larger than average • Sun and moon lined up PD images from: http://en.wikipedia.org/wiki/Image:Spingtide.jpg & http://en.wikipedia.org/wiki/Image:Neaptide.jpg
There are many “zones” on the shore • Subtidal – Never exposed to air due to tides. • Low littoral (Low intertidal) – Infrequently exposed to air at low tides • Mid littoral (Mid intertidal) – Exposed to water and air relatively frequently • Upper littoral (High intertidal) – Infrequently covered by the tides • Spray zone – Never covered by the tides
Meeting site information • Tide pools at Dana Point, near the Ocean Institute • Saturday May 5 8:30 am – 11:30 • Sunday May 6 9:00 am – 12:00 noon • You need to be there for ~1.5 hours in that time • See the handout for more information • Wear appropriate field clothing • Shoes/boots/sandals w/heel straps (e..g Tevas) • Highs ~65F; may be cloudy and/or windy • Bring supplies • Water, sunscreen, snacks, etc. • While there • BE CAREFUL • Watch the waves • Watch your footing
What you’re going to do • Before you go • Choose 5 organisms to look at • See the photo guide for help with this • Do a bit of research into what they look like, what they do, etc. • When you’re there • Spend 15 minutes observing each of your five organisms • Pick one area to look at and note how many are there, summarize the behavior of the organism, describe the environmental surroundings, and its adaptations to the environment • After you’re there • Write up a formal report • Turn this in next week • Follow the instructions in the manual
Participation form • Before attending the trip you need to sign a waiver • Let’s do that now!
Plant diversity! • Last week we looked at a few plant specimens in lab • But we didn’t really see all that much … • So today we’re going to go outside and look at real plants • Complete the worksheet as we tour the campus
Before you leave • Clean up your work area • Show me your lab report so I can stamp it • Need to have all data fields filled in • Complete at home and then turn in at the beginning of next lab • Remember that we’ll have a quiz at the beginning of the next class • 6-7 questions on today’s lab • 3-4 questions on the lab we’ll do next week
Notes for the instructor: • I distributed a handout of photographs of common intertidal organisms, and let the students keep these for the trip. Contact me if you’re interested in this handout (it consists solely of pictures I’ve taken at Crystal Cove, so it’s completely distributable). • As my students seemed to have great difficulty understanding the plant reproductive biology introduced in the reproduction lab, I replaced part of this lab with a tour of horticulture. I created my own handout for this, which focused on comparing the anatomy and reproductive physiology of the four major types of plants (non-vascular, vascular non-seed-producing, etc.). Contact me if you’re interested in seeing this handout. • Add any relevant cleanup instructions to the final slide (that slide is a generic one I’m adding to each presentation). • Change the meeting site information as appropriate.
License information • This work is licensed under the Creative Commons Attribution-NonCommercial-ShareAlike 3.0 License. To view a copy of this license, visit http://creativecommons.org/licenses/by-nc-sa/3.0/us/ or send a letter to Creative Commons, 171 Second Street, Suite 300, San Francisco, California, 94105, USA. • The slides in this presentation were originally created by Marc C. Perkins (http://faculty.orangecoastcollege.edu/mperkins). • You are free to use, modify, and distribute these slides according to the terms of the Creative Commons license (e.g., you must attribute the slides, no commercial uses are allowed, and future distributions must be licensed under a similar license). • Attribution should be given to Marc C. Perkins (and any later editors), including a link back to Marc’s current website. This applies both while distributing the slides and during use of the slides; attribution during use can be satisfied by, for instance, placing small text on at least one of the slides that has been shown (see below for an example). Slides in this presentation based on those created by Marc C. Perkins. http://faculty.orangecoastcollege.edu/mperkins
History • August 2007: Marc Perkins released first version. http://faculty.orangecoastcollege.edu/mperkins (If you modify these slides and redistribute them, add your information to the list)