1 / 0

Basic Video Camera Use

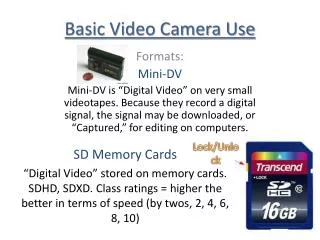
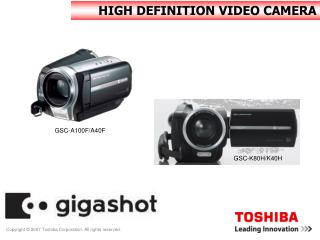
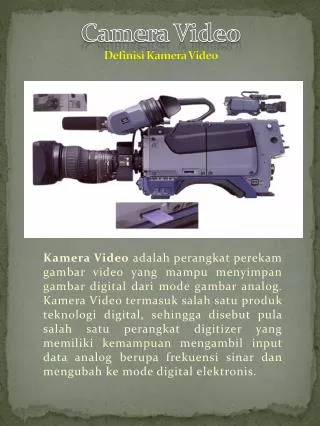
Basic Video Camera Use. Format: Mini-DV Mini-DV is “Digital Video” on very small videotapes. Because they record a digital signal, the signal may be downloaded, or “Captured” for editing on computers. DV Cameras can also output analog signals via “S-Video” or “RCA” connectors and cables.

najwa
Download Presentation

Basic Video Camera Use

An Image/Link below is provided (as is) to download presentation Download Policy: Content on the Website is provided to you AS IS for your information and personal use and may not be sold / licensed / shared on other websites without getting consent from its author. Content is provided to you AS IS for your information and personal use only. Download presentation by click this link. While downloading, if for some reason you are not able to download a presentation, the publisher may have deleted the file from their server. During download, if you can't get a presentation, the file might be deleted by the publisher.

E N D

Presentation Transcript


  1. Basic Video Camera Use

    Format: Mini-DV Mini-DV is “Digital Video” on very small videotapes. Because they record a digital signal, the signal may be downloaded, or “Captured” for editing on computers. DV Cameras can also output analog signals via “S-Video” or “RCA” connectors and cables.
  2. Connectors and Signal Cable Types (best to worst) Digital HDMI (High Definition Multimedia Interface) IEEE 1394 Digital Cable Firewire (Apple) - I.Link (Sony) - DV (Panasonic) Analog S-Video (Separate Video – 2 signals in one cable) RCA (Composite Video - One video cable) Yellow: Video, White: L Stereo, Red: R Stereo Coaxial (Video and Sound in one cable – cable TV)

    Basic Video Camera Use

  3. Basic Video Camera Use

    Video Capturing Connect IEEE 1394 Digital Cable from Camera or Tape Deck to Computer
  4. Basic Video Camera Use

    Video Capturing If using a camera, power on camera to VCR mode
  5. Video Capturing For our purposes, with Final Cut, follow these steps: Using your source (deck or camera), cue tape to the footage you want and press stop Start Final Cut (we have 10 desktops and 2 laptops with the program) Go to “New > Project” and Save Project (MAKE A NEW FOLDER WITH YOUR NAME ON THE PORTABLE HARD DRIVE AND SAVE YOUR PROJECT, ALSO NAMED, IN THAT FOLDER) Go to “File > Log and Capture” If you can see your footage in the capture window, click “log,” give the clip you are going to capture a name, then click “Now.” When the footage you want is done, press the “Escape” key to finish.

    Basic Video Camera Use

  6. Video Capturing *Notes: Don’t try to capture too much footage into one file or it will get too big to deal with. Keep each captured clip to less than 2ish minutes. Make sure you log your captured video (write down exactly what you captured, when you captured it, what computer it is on, and what folder it is in Make backup copies of your clips on *flash drives *Flash Drives are required for all students

    Basic Video Camera Use

  7. Basic Video Camera Use

    Video Recording Camera Support To fully minimize camera shake, always use a Tripod when filming reports Cameras may be handheld when gathering “B” Roll When handholding a camera, keep your elbows in against your body, support the camera with both hands, and keep your hands close against your chest for stabilization. Camera Shake is the most common mistake made that can ruin your footage
  8. Basic Video Camera Use

    Video Recording News Filming Basics Leader (Head and Tail) Anytime you film ANYTHING, include at least 5 full seconds of static footage at the beginning and end of your recording. This allows room for editing later, ensuring that needed words or footage aren’t cut off
  9. Video Recording News Filming Basics “B” Roll “B” Roll is video footage pertinent to your story that runs while the reporter’s voice is heard. Always film more “B” Roll than you think you’ll need to be sure you have a good variety to choose from when editing. Also, film the same “B” Roll scene from several different angles.

    Basic Video Camera Use

  10. Video Recording Composing the Shot Rule of Thirds The most interesting part (center of interest or subject and in this case, the eyes) of the shot should be off centered by dividing the frame into thirds

    Basic Video Camera Use

  11. Video Recording Composing the Shot Filling The Frame Head Room: Make sure your subject fills the viewfinder, with one finger width between the border and the top of the head

    Basic Video Camera Use

  12. Basic Video Camera Use

    Video Recording Composing the Shot Filling The Frame Over Scan: What you see in the viewfinder of your camera will be slightly cut off all around when it is converted to a television screen
  13. Video Recording Composing the Shot Filling The Frame Long Shot: Full Body shot, Feet to Top of Head. Do not cut feet or tops of heads off in a long shot

    Basic Video Camera Use

    Amputation Rule: Never cut people off at the joints – it looks strange, as if they are amputated
  14. Video Recording Composing the Shot Filling The Frame Medium Shot: Waist or Lower Chest to Top of Head (most common shot for reports)

    Basic Video Camera Use

  15. Video Recording Composing the Shot Filling The Frame Close-up: Shoulders to Top of Head. *Note: Never film a “floating head” shot where you see a person’s entire head, but not their neck and shoulders

    Basic Video Camera Use

  16. Video Recording Composing the Shot Filling The Frame Extreme Close-up: Close-in on just a body part.

    Basic Video Camera Use

    Use Rarely to Never: Extreme close-ups are ok for some “B” Roll but generally not to be used on people.
  17. Video Recording Composing the Shot Filling The Frame Nose Room or “Rule of Motion”: Leaving more space in the direction the subject is looking or moving

    Basic Video Camera Use

  18. Video Recording Composing the Shot Backlighting/Background: Never film with bright light behind the subject. Particularly, the sun outdoors or a window indoors. Also do not film against a solid white wall.

    Basic Video Camera Use

  19. Video Recording Composing the Shot Interviewing: For our purposes, do not film interviews with the reporter in the shot. Ask interview questions off, or behind camera, and film the interviewee talking with a Medium Shot. Interviews are used for adding personal detail to information already presented by the reporter – not a series of questions and answers.

    Basic Video Camera Use

  20. Video Recording News Filming Basics Camera Operation Power: Battery Pack or Direct Power

    Basic Video Camera Use

  21. Video Recording News Filming Basics Camera Operation

    Basic Video Camera Use

    Tape Loading: The protective, outer door is separate from the tape loading slot. After inserting tape into loading slot, “push” on the slot and the slot will close and load the tape. Then, close the outer cover.
  22. Video Recording News Filming Basics Camera Operation Tape Loading: *Note: The camera must be removed from the Tripod “Shoe” to load/unload a video tape.

    Basic Video Camera Use

  23. Video Recording News Filming Basics Camera Operation Mode: Camera or VCR Switch from Camera mode to VCR to watch footage in-camera

    Basic Video Camera Use

  24. Video Recording News Filming Basics Camera Operation Zoom: Use zoom SPARINGLY or not at all. Lens zoom is unnatural and more often than not is a distraction from the message of your video

    Basic Video Camera Use

  25. So: Avoid playing back in-camera and wait until you capture to see footage you intend to use Note: Tapes have a life of about 9 scans. This includes playback, rewind, f-forward, etc. Video Recording News Filming Basics Camera Operation Playback: Switch mode from “Camera” to “VCR” and use the controls on the top of the camera to view recorded footage.

    Basic Video Camera Use

  26. Video Recording News Filming Basics Camera Operation Microphones: Connect microphones properly and be careful that cables are not pulled while connected

    Basic Video Camera Use

  27. Video Recording News Filming Basics Camera Operation- Microphones: Lapel Mics should be placed as close to the throat as possible. Handheld Mics should be held at the bottom with your thumb against your sternum

    Basic Video Camera Use

  28. Video Recording News Filming Basics Camera Operation Headphones: Always monitor sound in-camera while recording if the camera accepts headphones

    Basic Video Camera Use

  29. Video Recording News Filming Basics Camera Operation Headphones: Note: Our small gray cameras do not allow simultaneous headphone/microphone use, hence the need to pre-record a sound test prior to recording

    Basic Video Camera Use

  30. Video Recording News Filming Basics Camera Operation Playback: With the small, gray, Canon cameras, always record a brief (5-10 seconds) sound test before recording a piece. After recording with the sound equipment hooked up, replay your test, in-camera, to ensure that the sound worked properly. Make sure that you NEVER record over anything that is already on a tape

    Basic Video Camera Use

  31. Video Recording News Filming Basics Camera Operation Equipment Care/Archiving: NEVER let students NOT IN THIS CLASS handle equipment. Students will be held financially accountable for damaged/lost equipment Return all equipment when finished and plug batteries in for recharging LOG all video footage on Master Log Sheet

    Basic Video Camera Use

  32. Basic Video Camera Use

  33. Basic Video Camera Use

  34. Basic Video Camera Use

  35. Basic Video Camera Use

  36. Basic Video Camera Use

  37. Basic Video Camera Use

  38. Basic Video Camera Use

More Related