Download
1 / 43
430 likes | 582 Views
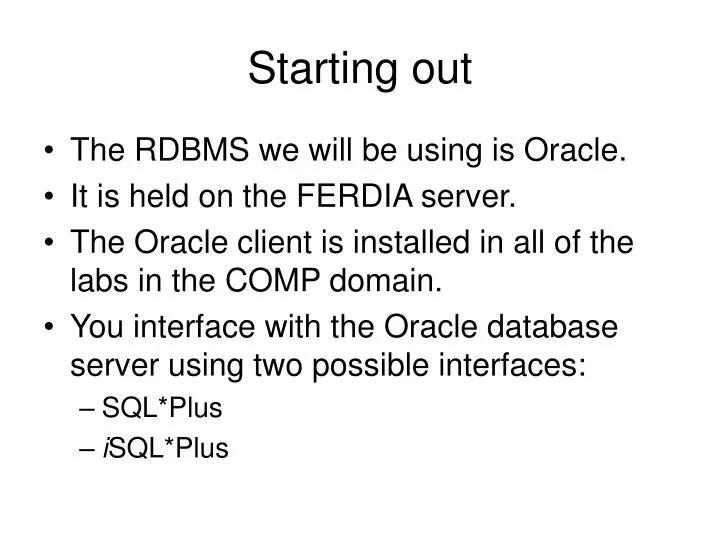
Starting out. The RDBMS we will be using is Oracle. It is held on the FERDIA server. The Oracle client is installed in all of the labs in the COMP domain. You interface with the Oracle database server using two possible interfaces: SQL*Plus i SQL*Plus. Your schema.

E N D
Starting out • The RDBMS we will be using is Oracle. • It is held on the FERDIA server. • The Oracle client is installed in all of the labs in the COMP domain. • You interface with the Oracle database server using two possible interfaces: • SQL*Plus • iSQL*Plus
Your schema • Your schema will have your username on the COMP domain. • You will be given a password. • The Host string you will need is OracleDB. • This is the connection string that allows you to connect to the correct database. • When you connect successfully, you are in the SQL*Plus environment.
The SQL*Plus query tool • This provides you with an environment in which you can: • Make ad hoc queries • Edit (in a very basic way) some commands • Load and run scripts or PL/SQL blocks, or run stored procedures. • Manipulate the buffer. • Define host or bind variables for use during the session. • The buffer: • Is your current working buffer. It instantiates with the session when you connect to your schema. You can manipulate it using the SET command. E.g. SET SERVEROUTPUT ON shows output on the screen. • The default command prompt is SQL>_ • NOTE: If you want to save your work, you need to commit it before exiting from SQL*PLUS. • The exit function does this automatically.
SQL*Plus commands • The SQL*PLUS commands are quite limited. In essence, it is used as a development tool or an expert’s tool, so is not a GUI. • Apart from the menu commands and the editor commands (see next few slides), there are some commands that manipulate the session: • SHOW • EXECUTE • VARIABLE • SET • DESCRIBE • @ • START
MENU COMMANDS • File • Allows you to open, save or run .SQL files • Allows you to open a spool file, that will save the query results as in the window. • Edit • Allows you to invoke another editor and to define one (e.g. NOTEPAD.EXE) • Search • Allows you to search for a string in the window. • Options • This allows you to set defaults.
Examples SQL> SELECT * FROB dept; This has a syntax error. To correct: SQL>C\OB\OM\\ SQL>\ SQL> SELECT * FROM dept; …result… SQL> SELECT * FROM dept SQL> A\ WHERE country=‘France’; SQL>\ SQL>SELECT * FROM dept WHERE country=‘France’; …result…
SQL*Plus commands v SQL • When you type in an SQL command in Oracle, you must end it with a semi-colon’;’ • SQL*Plus commands do not end in a semi-colon • When editing a command in SQL*Plus, to run the command, use a backslash’/’.
Your rights • Your connection gives you all the rights / privileges that you as a user have been granted. • In your case, this means that you have owner privileges to your own schema. • If you want access to someone else’s schema, then you must ask them to grant it to you. • If you want anyone else (who doesn’t have system privileges) to access your schema, you must grant that access to them.
Today in the lab… • Connect to SQL Plus – your schema. • Conduct simple select statements to return rows from the builder2 schema.
Find your feet… • Oracle SQL Plus • Are you in the correct lab? • Introduce yourselves to Oracle • Each person has an individual schema (R,W,U,D) • In your INDIVIDUAL schema, use the Data Definition Language commands to create, populate, update and alter 2 joined tables.
Find the application • Through the Start menu, find • Programs • Oracle client • Application Development • SQL Plus (icon opposite)
This is an example • Don’t forget to get a username and password for your SCHEMA. • The Host string defines the DATABASE. This one won’t work for you!
About the interface… • Each line is transacted immediately. • It takes a bit of getting used to! • Use Notepad to develop your queries and save them (as type .sql, not as .txt). • When you exit the session, unless you have saved your queries, you lose them. • To exit the application, type in EXIT • Note that the full path name needs to be entered, so keep path names SHORT!!.
SQL • SQL or Structured Query Language is used widely to access databases. • There is an ANSI SQL 2003 that specifies standard SQL. • Oracle deviates from the standard in some respects. • Implemented SQL (Oracle, MS SQL Server, Access) varies a little from the standard, but is reasonably standard
Elements of SQL • It consists of a data definition language - DDL (Create, Alter, Drop) • And a Data Manipulation Language - DML (Select, Union, Update, Delete, Insert Into, Select Into, Transform, Parameter) • A Data Control Language – DCL (GRANT, REVOKE) and • Transaction control statements • COMMIT, ROLLBACK
Simple SELECTs • Today, as you have not set up anything in your own schema, we will use the builder2 schema. • The details of this schema are available on your web page.
Using a table from a different schema • Any student who has been granted access to the table stock in the schema builder2: • Select * FROM builder2.stock; • The builder2. prefix tells the DBMS that you are looking outside your own schema.
Simple selects • The full syntax of the SELECT statement is complex, but the main clauses can be summarized as: • SELECT select_list[INTO new_table_name]FROM table_list[WHERE search_conditions][GROUP BY group_by_list][HAVING search_conditions][ORDER BY order_list [ASC | DESC] ] • In this lesson, we will address only those clauses in black.
Select list • Describes the columns of the result set. It is a comma-separated list of expressions. • Each expression defines both • the format (data type and size) and • the source of the data for the result set column. • Each select list expression is usually a reference to a column in the source table or view the data is coming from, but can be any other expression, such as a constant or a Transact-SQL function. • Using the * expression in a select list specifies that all columns in the source table are returned.
FROM table_list • Contains a list of the tables from which the result set data is retrieved. These sources can be: • Base tables or views in your own schema. • Base tables or views in schemae to which you have select access.
Simplest SELECT • SELECT * FROM <table-name> • E.g. SELECT * FROM builder2.corderline; • or
SQL> SELECT * FROM cat; TABLE_NAME TABLE_TYPE------------------------------ -----------BIN$diXeGjXrQFi1kU/+ypNLsQ==$0 TABLEBIN$6btY4yriRdic8z2ONHRQrg==$0 TABLEBIN$Suh8BiYvRGuAAEdTnfho0w==$0 TABLEBIN$4DwYo9kfTciwcX3xGgcz3A==$0 TABLECUSTOMER TABLECORDER TABLESUPPLIER TABLESTOCK TABLEsorderline TABLEstaff TABLESORDER TABLETABLE_NAME TABLE_TYPE------------------------------ -----------corderline TABLEBIN$CW8kb+b3Q+WljFuHIBZosQ==$0 TABLEBIN$Jb8z6PBiTL6Hy8yXBB8W3g==$0 TABLEBIN$5AZXhMuMS4mosvy8TqkfqQ==$0 TABLEBIN$hkvkMrD9RrqOMe4W2key9g==$0 TABLEBIN$pFcvgvUlSDmjAyQPR5Gz7A==$0 TABLEBIN$Pk3/ceHkRvOH06D3q/6WeA==$0 TABLEBIN$kZs92llMTwKdMcBRyIwlbg==$0 TABLEBIN$L4P807SFTNm63jXRmPA7XA==$0 TABLEBIN$oV13pVZNQr+ow/hMlzjzww==$0 TABLEBIN$K4j8mchgSh6CseBlwvlJxw==$0 TABLE TABLE_NAME TABLE_TYPE------------------------------ -----------BIN$w54kQhBiQciAp90csiFiWw==$0 TABLEBIN$E+DmYcaIQxiLOa0euxpTaA==$0 TABLEBIN$WtulD5u9T2CdH/eYXdC6PQ==$0 TABLEBIN$sUogRgsJT221fbL/tFGcCw==$0 TABLEBIN$gCyduUbEQrOk1DVLgPpr2Q==$0 TABLEBIN$/uY2loJiTGu3UFW+NjUBxQ==$0 TABLEBIN$lv9wTq5gRmGK2th8kl4hnw==$0 TABLE29 rows selected. This is unclear and unhelpful. We don’t want to see the dropped tables. Later on we will learn how to improve this. Catalog
Miscellaneous • To denote a string, use single quotes. Double quotes are not recognised. • If you want to embed a single quote (i.e. an apostrophe!) in a string, precede it with another single quote (see slide 3 for example) . • Note: If you copy single quotes from word, they don’t work, but they work from Notepad. • You do not need to use quotes for numeric fields: • SELECT * FROM Product where UnitPrice <5
Date functions • Commonly used date functions are: • SYSDATE • NEXT_DAY • ADD_MONTHS • LAST_DAY • MONTHS_BETWEEN • least • greatest • round • trunc
Date functions • Current date and time: SQL> SELECT SYSDATE FROM dual; SYSDATE --------- 30-SEP-05
Sample date functions SQL> SELECT 2 order_date AS "Date", 3 TO_CHAR(order_date,'DAY'), 4 NEXT_DAY(order_date,'MONDAY') AS "Monday following", 5 LAST_DAY(order_date) as "Last day of month", 6 ADD_MONTHS (order_date,3) AS "3 months later" 7 FROM corder;
Produces… Date TO_CHAR(O Monday fo Last day 3 months --------- --------- --------- --------- --------- 02-FEB-02 SATURDAY 04-FEB-02 28-FEB-02 02-MAY-02 04-FEB-05 FRIDAY 07-FEB-05 28-FEB-05 04-MAY-05 04-FEB-05 FRIDAY 07-FEB-05 28-FEB-05 04-MAY-05 06-FEB-05 SUNDAY 07-FEB-05 28-FEB-05 06-MAY-05 06-FEB-05 SUNDAY 07-FEB-05 28-FEB-05 06-MAY-05 10-FEB-05 THURSDAY 14-FEB-05 28-FEB-05 10-MAY-05 12-FEB-05 SATURDAY 14-FEB-05 28-FEB-05 12-MAY-05 18-FEB-05 FRIDAY 21-FEB-05 28-FEB-05 18-MAY-05 22-FEB-05 TUESDAY 28-FEB-05 28-FEB-05 22-MAY-05 12-FEB-05 SATURDAY 14-FEB-05 28-FEB-05 12-MAY-05 10 rows selected.
Meaning… • TO_CHAR(date,format) • Converts the date to the specified format • NEXT_DAY(date,dayofweek) • Gives the date of the next ‘dayofweek’ after the date given. • LAST_DAY(date) • Gives the last day of the month in the date specified. • ADD_MONTHS (date,int) • Adds int months to the given date.
Date functions • SYSDATE gives current date • NEXT_DAY(d,day) where d is a date and day is a string representing a day of the week. • E.g. NEXT_DAY(’14-dec-2005’,’Monday’) will return ’19-dec-2005’ • ADD_MONTHS(d,count) adds n months to d. • LAST_DAY(d) returns the date corresponding to the last day of the month in which d belongs. • MONTHS_BETWEEN(d1,d2) • LEAST(d1,d2,…,dn) • GREATEST(d1,…,dn) • TRUNC(d) returns the date (d) with the time at midnight.
Functions in SQL • There are many types of functions provided. • The ones that are used most are: • Date and Time functions • Mathematical functions • String functions • There follows a list of all functions in these categories. • We will practice only the most popularly used.
All about dates • Dates are relative – i.e. the date and time are the same function. • The current date and time depends on where you are in the world. • The date format '12-dec-2005' will work, but NOT ’12-dec-2005’. Microsoft Word / PowerPoint will automatically change FROM ' to ‘.
Formatting the date • TO_CHAR(d,format) returns the date in the format specified: • Mm returns month number • Mon returns the month in 3-character format • D returns the day number in the week • DD returns the day number in the month • DDD returns the day number in the year • DY gives the weekday in 3-character format • DAY gives the weekday name • Y returns the last digit of the year • Yy returns the last 2 digits of the year • Yyyy returns the 4-digit year • Hh12 returns the hours of the day(1 -12) • Hh24 returns the hours of the day (1 – 24) • Mi returns the minutes of the hour • Ss returns the seconds of the minute • AM returns AM or PM
resources • These sites are helpful: • http://www.techonthenet.com/oracle/index.php • http://www.ss64.com/orasyntax/
Use the ‘AS’ clause to give a name to a column. Unitprice AS Price or UnitPrice AS “Unit Price” Note double quotes. This can be used on any column, but is especially useful in a derived column. New columns can be derived from existing fields: E.g. the value of an item in stock is the number in stock by the unit price. Surround the alias with double quotes: SQL> SELECT stock_description AS "Name" FROM stock; Name -------------------- Brick - red, 30x100 Cavity blocks(100) 2"x4" lengths 6" Nails(50) 6" Nails(100) Workbench cordless Drill Cavity blocks(500) Cavity blocks(200) 9 rows selected. SQL> To put a name on a column
Naming sample SQL> SELECT 2 stock_description AS "Name", 3 QuantityRequired AS "Quantity", 4 Unit_Price AS "at Price", 5 Unit_Price * QuantityRequired AS "SubTotal" 6 FROM Stock join Corderline on 7 stock.stock_code = corderline.stock_code; Name Quantity at Price SubTotal ---------------- ---------- ---------- ---------- Brick - red, 30x100 200 2.5 500
String functions - Concatenation • Concatenation: SQL> SELECT supplier_name||','||supplier_address FROM supplier; SUPPLIER_NAME||','||SUPPLIER_ADDRESS -------------------------------------------------------------------------------- Buckleys,Quarry town, Quarrysville, D44. Brendan Moore,44 Kevin St., D8 James McGovern,33 Synge St. Liam Keenan,33 Mount Vernon Ave Mary O'Brien,Appian Way, D2 Oliver Moore,Georges St., D2 June Browne,33 Liberty Lane Paul Sloan,44 Liberty Lane Kevin Kelly,33 Bride St, D8 Robert O'Mahony,Fitzwilliam Sq Patricia O'Brien,21 Liberty Lane, D8 11 rows selected.
String manipulation • Concatenation: use || instead of , • Pad out a string (from the left) to a specified length: • Lpad(string,length,’padding char’) • Rpad does the same, but pads from the right. • Trim strings of characters uses • LTRIM(string,’trim char’) • RTRIM trims from the right.
Example of lpad SQL> SELECT lpad(stock_code,12,'x') AS "stock code", stock_description FROM stock; stock code STOCK_DESCRIPTION ------------ -------------------- xxxxxxxxA111 Red bricks(100) xxxxxxxBRK11 Brick - red, 30x100 xxxxxxxxA101 Cavity blocks(100) xxxxxxxxB101 2"x4" lengths xxxxxxxxB111 Window Frames 2'x4' xxxxxxxxC101 6" Nails(50) xxxxxxxxC121 6" Nails(100) xxxxxxxxD101 Workbench xxxxxxxxD131 cordless Drill xxxxxxxxE101 Cavity blocks(500) xxxxxxxxE141 Cavity blocks(200) 11 rows selected.
Trim from the right SQL> SELECT stock_code, RTRIM(stock_code,'1') FROM stock; STOCK RTRIM ----- ----- A101 A10 A111 A B101 B10 B111 B BRK11 BRK C101 C10 C121 C12 D101 D10 D131 D13 E101 E10 E141 E14 11 rows selected.
Look up… • LOWER(string) • UPPER(string) • LENGTH(string) • SUBSTR(string,start,[n]) • INSTR(string,’chars’[,start [,n]])