Download
1 / 4
40 likes | 169 Views
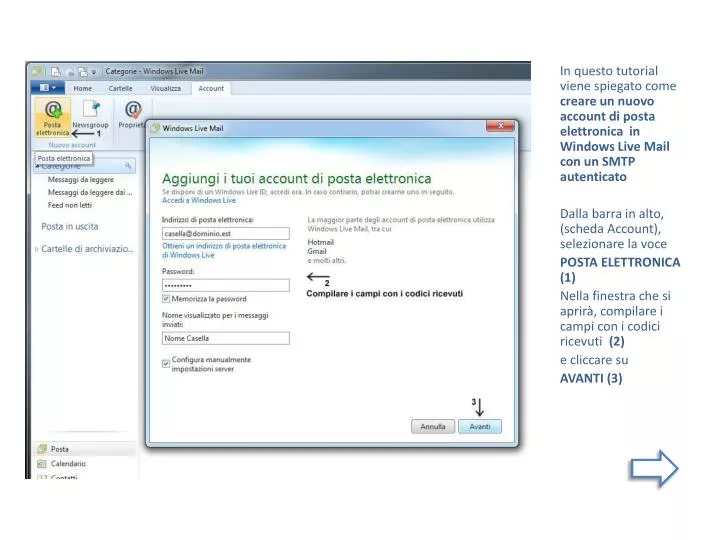
In questo tutorial viene spiegato come creare un nuovo account di posta elettronica in Windows Live Mail con un SMTP autenticato Dalla barra in alto, (scheda Account), selezionare la voce POSTA ELETTRONICA (1) Nella finestra che si aprirà, compilare i campi con i codici ricevuti (2)

E N D
In questo tutorial viene spiegato come creare un nuovo account di posta elettronica in Windows Live Mail con un SMTP autenticato Dalla barra in alto, (scheda Account), selezionare la voce POSTA ELETTRONICA (1) Nella finestra che si aprirà, compilare i campi con i codici ricevuti (2) e cliccare su AVANTI (3)
Aggiungere le altre informazioni richieste (1): il POP3 e l’SMTP ricevuti, facendo attenzione a selezionare anche la casella per l’autenticazione del server della posta in uscita (2). A questo punto è possibile cliccare su AVANTI (3)
Dopo aver completato la creazione dell’account è necessario cliccare sull’icona delle PROPRIETA’ (1) per sistemare il Nome (2) che si vuole far comparire alla ricezione dei messaggi inviati. E’ utile anche inserire l’email nel campo Indirizzo per risposte (3). Prima di completare la procedura scegliere la scheda IMPOSTAZIONI AVANZATE (4)
In questa scheda è opportuno impostare l’opzione che rimuove i messaggi dal server (1) dopo alcuni giorni (ad es. dopo 5 giorni) per non sovraccaricarlo troppo. Fatto ciò, cliccare su OK (2) La procedura di creazione del nuovo account è stata completata.