Download

1 / 34
340 likes | 451 Views
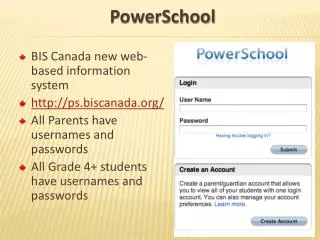
Missouri PowerSchool Users Group ( MoPSUG ) 2010 Annual Meeting. Scheduling Students in the Elementary School. Agenda. Welcome and Introductions Course Objectives Overview of Elementary Scheduling Scheduling Student(s). Objectives. After completing this course, you will be able to:

E N D
Agenda • Welcome and Introductions • Course Objectives • Overview of Elementary Scheduling • Scheduling Student(s)
Objectives After completing this course, you will be able to: • Set up Sections • Mass Enroll/Schedule Students using Dependent Sections • Enroll/Schedule New Students and /or Individual Students • Verify Enrollment/Scheduling • View a Master Schedule
Terminology Notes: Think of: • Courses as subjects on a report card • Periods as simply how a student’s school day is broken up by those subjects – it is NOT a specific time • Days as a different type of day when the normal sequence of events is significantly different, ex. Art, Music, etc. or A, B, C, D • Term as the months students are in class – in elementary it is usually year long
What’s in a Name?Course • Think of courses as the list of subjects on a student’s report card: • Math • Communication Arts • Science • Social Studies • Music
What’s in a Name?Period • Think of a period as simply how a student’s school day is broken up – it is NOT a specific time. - Attendance - Math - Social Studies - Art
What’s in a Name?Day • Think of different types of days when the normal sequence of events is significantly different, such as… - Specialty Subject Rotations: - Art - Music - PE - Or, A, B, C, and D days
What’s in a Name?Term • Think of a term as the months that a student is in a class working on a specific subject… Year long Classes: - Communication Arts - Math - Art, Music, PE
Start page 2. Choose School from the menu 3. On the SchoolSetup page, under Scheduling, click Years and Terms. This page will appear.
In the Change to selection, select the current or next school year to change the term. The screen below will display. NOTE: Always verify that you are working in the correct/current term when scheduling students, or in the next year term if pre-enrolling students.
Scheduling Students in the Elementary School • School Setup > Sections • Click Homeroom/Attendance on the course menu • Click on New • Enter Course Number • Enter Term • Expression - Select rotation days, ex. A, B, C, D • Select Teacher Name from the drop down box • Enter Room • Enter Section Number/Name (never use a “P” in PS) • Enter Grade Level • Enter Maximum Enrollment • Dependent Sections - see the following page specific to this topic • Submit
Creating a New Section Click on New to add additional sections.
Enter the Course Number • Enter the Term • Enter the Expression – click on • the rotation days, ex. A,B,C,D • Select the Teacher’s name from • the drop down box.
Edit Section - continued Select Teacher name from the drop down box. Enter Room. Enter SectionNumber/Name (Never use a “P” in PS. Enter Grade Level. Enter MaximumEnrollment.
Dependent Sections • This optional step allows you to enroll students in one section, and the • system will enroll them in the remaining dependent sections. • Attach the Dependent Sections to the Homeroom/Attendance period. • Go to the Edit Section page. • In the Dependent Sections field, enter all the other sections that the • selected students must also be enrolled in. • Separate the section numbers with a comma. Do not use a space between • commas. For example: 1000.51,90429.1, etc. • By enrolling students in one section, the system will also enroll them in ALL • the sections entered in the Dependent Sections field.
Manually Mass Enroll/Schedule Students • Start page • Select a Grade Level by clicking on a number • Inthe select a Function field, click on Select Students by Hand • Click Select Students by Hand (Press and hold the CTRL key (Windows) or the Command key (Mac) and click the selected students from the list) • Click Functions • Click Mass Enroll from the Group Functions list • Click the teacher’s name from the “Select a teacher…” menu • Enter the date in the Enrollment Date field (Note: this date must be the SAME date as the school enrollment date on the transfer page) • Submit (be sure all information is correct before clicking Submit)
Manually Enroll Students • On the Start page, click on the number of the • Grade Level you want to work with. • The Student Selection appears. A list of student names appear here.
Functions/Group Functions 123456 (1) Mouse , Minnie 234321 (4) Potter, Harry 741768 (K) Wonderland, Ally Select Functions.
Functions/Group Functions - continued Click Mass Enroll in Class.
Mass Enroll The Mass Enroll page appears: • Do one of the following: • Select the Teacher and the Period in which you want to Mass Enroll the • students. • Or, enter information in the course.section text box. • Enter the Enrollment Date. (NOTE: The Enrollment Date/Schedule • must be the SAME date as the School Enrollment date on the Transfer • page.) • Click Submit.
Enrolling/Scheduling Individual Students • Start page • Select student (if a new student enrollment, you may need to use a slash (/) to retrieve the student • Select Scheduling > Modify Schedule • Effective Enrollment Date (use the date of the student’s 1st day in attendance; this date must be the SAME date as the school enrollment date on the Transfer page) • Search either by: • Course or Period • Click on Find • When you locate the Crs.Sec and teacher, click on the “Blue” course name • Continue clicking on the “Blue” link until all the courses have been scheduled • Or, Quick Enroll (uses Dependent Sections) • Type in thecourse.sectionnumber for the Homeroom/Attendance period • Click Enroll • Verify the student’s enrollment by viewing his/her List View and Matrix View
Modify Schedule • Select Scheduling > Modify Schedule • Effective Enrollment Date. NOTE: this date MUST be the SAME date • as the school enrollment date on the Transfer page. • Search either by: • Course, Period, Find • Quick Enroll, Enroll
Modify Schedule - continued • When using the Course, Period, Find option: • Locate the Crs.Sec and teacher name and click on the “Blue” course name • Continue clicking on the “Blue” link until all the courses have been scheduled • Submit • When using the Quick Enroll option: • This option uses Dependent Sections • Type in the course.section number for the Homeroom/Attendance period • Click Enroll • Submit
View a Master Schedule Sample Master Schedule – Matrix View
Master Schedule - continued Sample Master Schedule – List View
Verifying Enrollment/Scheduling Select a student. Click on List View. Verify that the courses and teachers are correct.
Verifying Enrollment - continued Select a student. Click on Matrix View. Verify that the courses and teachers are correct.
Verifying Enrollment - continued • School • School Setup • Sections • Click Homeroom/ Attendance • Click on the number in the Size column for the teacher whose class list • you want to verify. • The Class Roster will appear
Verify Enrollment - continued Applewood, Chris Bratton, Karla Cook, Matt Crisp, Sherry Edmonds, Leah Forrest, Cole Garrett, Niles Harris, Brenna Jackson, Renner Johnson, Cooper Lee, Sarah Moore, Tom Smith, Jaxson Webber, Eric West, Kenny Zelder, Leo From this Class Roster, click the name of a random student.
Verify Enrollment - continued • After selecting the random student, from the Menu • under scheduling, click Modify Schedule • View all the classes to verify proper enrollment in the • dependent sections • Submit
Helpful Web Sites MOSIS Code Sets http://dese.mo.gov/MOSIS/CodeSets.html Missouri Student Information System 09-10 Reference Manual http://dese.mo.gov/MOSIS/documents/MO_2009_09_22_MOSIS_Reference_Manual_v27_AC_SENTTOPRINT_09252009.pdf Missouri School Directory http://www.dese.mo.gov/directory PowerSchool Support Site https://powersource.pearsonschoolsystems.com Yahoo Groups – search for MOPSUG www.Groups.yahoo.com W3 Schools – Free online training for various computer languages including html (for use with the bulletin) www.w3schools.com PowerData Solutions – supplies free customizations to PowerSchool users. www.powerdatasolutions.org
Questions after you leave? Feel free to contact us at: Elizabeth Daniels danielse@parkhill.k12.mo.us Southeast Elementary 816-359-5772 Nanette Ebbertt ebberttn@parkhill.k12.mo.us Graden Elementary 816-359-6084 THANK YOU FOR ATTENDING!