Download

1 / 20
210 likes | 372 Views
Upgrading your RAM. What, Why, and How. Presented by Jamie Leben IT-Works Computer Services 970-405-4399. What is R.A.M. ?. R. andom A. ccess M. emory Small circuit boards holding ICs that plug into the main board of your computer

E N D
Upgrading your RAM What, Why, and How Presented by Jamie Leben IT-Works Computer Services 970-405-4399
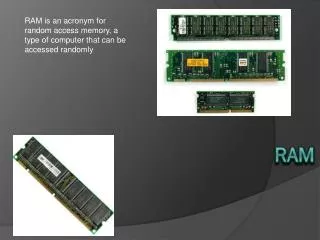
What is R.A.M. ? • R. andom • A. ccess • M. emory • Small circuit boards holding ICs that plug into the main board of your computer • Where your computer stores and works with information for active programs
Why upgrade your RAM? • It’s an easy, economical way to improve your PC’s performance. • For $50-$100, your PC will be noticeably snappier. • It’s a do-it-yourself project!
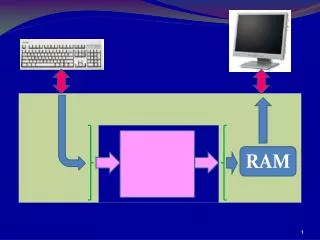
Why does RAM help? • Think of RAM like a desk in an office. The larger the desk, the more space you have to work without having to return projects to the filing cabinet (the hard drive)
How much RAM do I need? • The more the better… up to a point • Windows 98/ME- 512MB is optimal • Windows XP/2000- 1GB is optimal* • *Audio, Video, and Photo editing “power users” can benefit from 2GB or more
How much RAM do I have? • Right click once on “My Computer” • Left click “Properties” • Select the “General” tab • “xxx MB RAM” appears near the bottom
Looking under the hood • Check for open RAM slots and RAM type • Shut down your PC • Unplug the PC’s power cord • Open up the case • Notebooks: bottom cover • Locate installed RAM • Approx. 5” long • Installed vertically • Held by clips on the ends
Looking under the hood • Remove a RAM stick • Ground yourself to the chassis • Use a wrist strap or keep one hand on the metal case of the power supply • Push outward on retaining clips • Ram will pop up
What type of RAM is it?PC: • DDR 184 pins • Single center slot • Buy in pairs for “dual channel” • DDR2 240 pins • Single center slot • Always has heat spreader
What type of RAM is it?PC: • SDRAM 168 pin • Two widely spaced slots • 512mb max?? • RDRAM 184 pin • Two closely spaced slots • Very expensive, bought in pairs
What type of RAM is it?Notebook: • SDRAM SODIMM • 144 pins • Single center slot • DDR/2 SODIMM • 200 pins • Single offset slot
Looking under the hood • Reinsert the RAM and close the case • Plug the machine back in and start it.
Go shopping! • Local stores stock RAM • Online sites with RAM selection wizards: • www.crucial.com • www.kingston.com • Not the most aggressive pricing though • IT-Works has good RAM prices ;0)
Installing the new RAM • Create a bootable RAM test disk before installing the new RAM • Google search for “memory test” • Memtest86 makes bootable floppies or CDs • Microsoft windows memory diagnostic makes either bootable CDs or floppies • Insert the bootable CD/floppy before shutting the PC down
Installing the new RAM • Shut down your PC • Unplug the PC’s power cord • Open up the case • Notebooks: bottom cover • Ground yourself to the chassis • Use a wrist strap or keep one hand on the metal case of the power supply
Installing the new RAM • Align the key notch on the RAM with the key tab in the RAM socket • Press the RAM stick into place • Listen for click of retaining tabs • Up to 20 lbs of force may be needed • Close up the machine • Plug it in • Start the computer
Installing the new RAM • Most machines will display a “RAM changed” message • Usually push F1 to continue • Sometimes F2 is required to take you into “setup”, the machine’s BIOS • Find the “save changes and exit” • Boot to the RAM test program • Sometimes you need to press F10 or F12 at boot up • Let the memory test run for at least 5 minutes
Installing the new RAM • Remove the RAM test boot disk • Reboot the machine • When Windows boots, check to see if the new RAM was identified • Right click once on “My Computer” • Left click “Properties” • Select the “General” tab • “xxx MB RAM” appears near the bottom • Success!!!