Download
1 / 10
110 likes | 143 Views
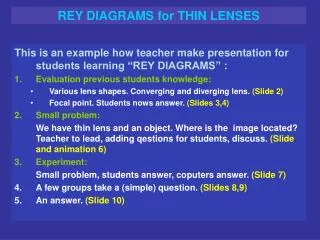
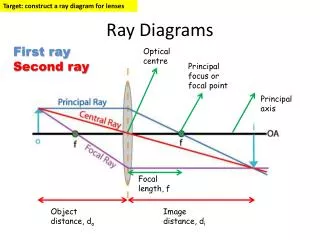
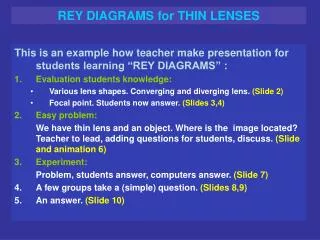
RAY DIAGRAMS FOR LENSES. CONVEX (CONVERGING) LENS. All ray diagrams start with a center line and the lens. Note: the lens can be simplified into a straight vertical line. C. F. F. Next, put in the focal points (F) -- Note: for lenses there are 2 focal points.

E N D
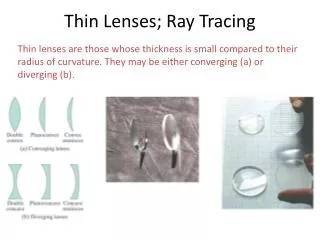
CONVEX (CONVERGING) LENS All ray diagrams start with a center line and the lens Note: the lens can be simplified into a straight vertical line
C F F Next, put in the focal points (F) -- Note: for lenses there are 2 focal points. The center is located where the lens intersects the center line Next, put in the object as described in the problem.
F F You can get 3 types of images from a convex (converging) lens. The type of image is determined by the object distance. do > 2 f IMAGE = real, inverted, smaller F F 2 f > do > f IMAGE = real, inverted, bigger do < f IMAGE = virtual, upright, bigger F F
F F RAY DIAGRAM: do > 2 f - draw a ray parallel to the center line to the lens THEN through oppositeF - draw a ray through nearF to the lens THEN parallel to the center line - draw a ray through C The point where the refracted rays intersect is where the image will be formed
F F RAY DIAGRAM: 2f > do > f - draw a ray parallel to the center line to the lens THEN through oppositeF - draw a ray through nearF to the lens THEN parallel to the center line - draw a ray through C
F F RAY DIAGRAM: do < f - draw a ray parallel to the center line to the lens THEN through oppositeF - draw a ray in line with nearF to the lens THEN parallel to the center line - draw a ray through C Refracted rays do not meet in “real” space. Draw dotted lines back from refracted rays so that they intersect behind the lens
CONCAVE (DIVERGING) LENS All ray diagrams start with a center line and the lens Note: the lens can be simplified into a straight vertical line
C F F Next, put in the focal points (F) -- Note: for lenses there are 2 focal points. The center is located where the lens intersects the center line Next, put in the object as described in the problem.
F F You can only get 1 type of image from a concave (diverging) lens: virtual, upright, smaller - draw a ray parallel to the center line to the lens THEN in line with near F - draw a ray in line with oppositeF to the lens THEN parallel to the center line - draw a ray through C Refracted rays do not meet in “real” space. Draw dotted lines back from refracted rays so that they intersect behind the lens.